
I'm pretty late to the choker game since it's been back in style for awhile now. Also, I may have actually Googled "are chokers still in style?" before starting this DIY. Guess my age is showing! I hadn't worn a choker since the last time they were really popular back in the 90s. Even then I didn't like to wear them. I thought they were uncomfortable and that my neck was too short to wear them. Yes, you read that right. I think I read in a teen magazine that you shouldn't wear chokers if your neck is short because they were unflattering. The self-esteem of young girls is so fragile and convoluted that I stayed away from chokers because of some silly "fashion rule". So now that I'm a full grown adult I decided to try them out again and short neck be damned. Confidence is the most flattering thing you can wear anyway.
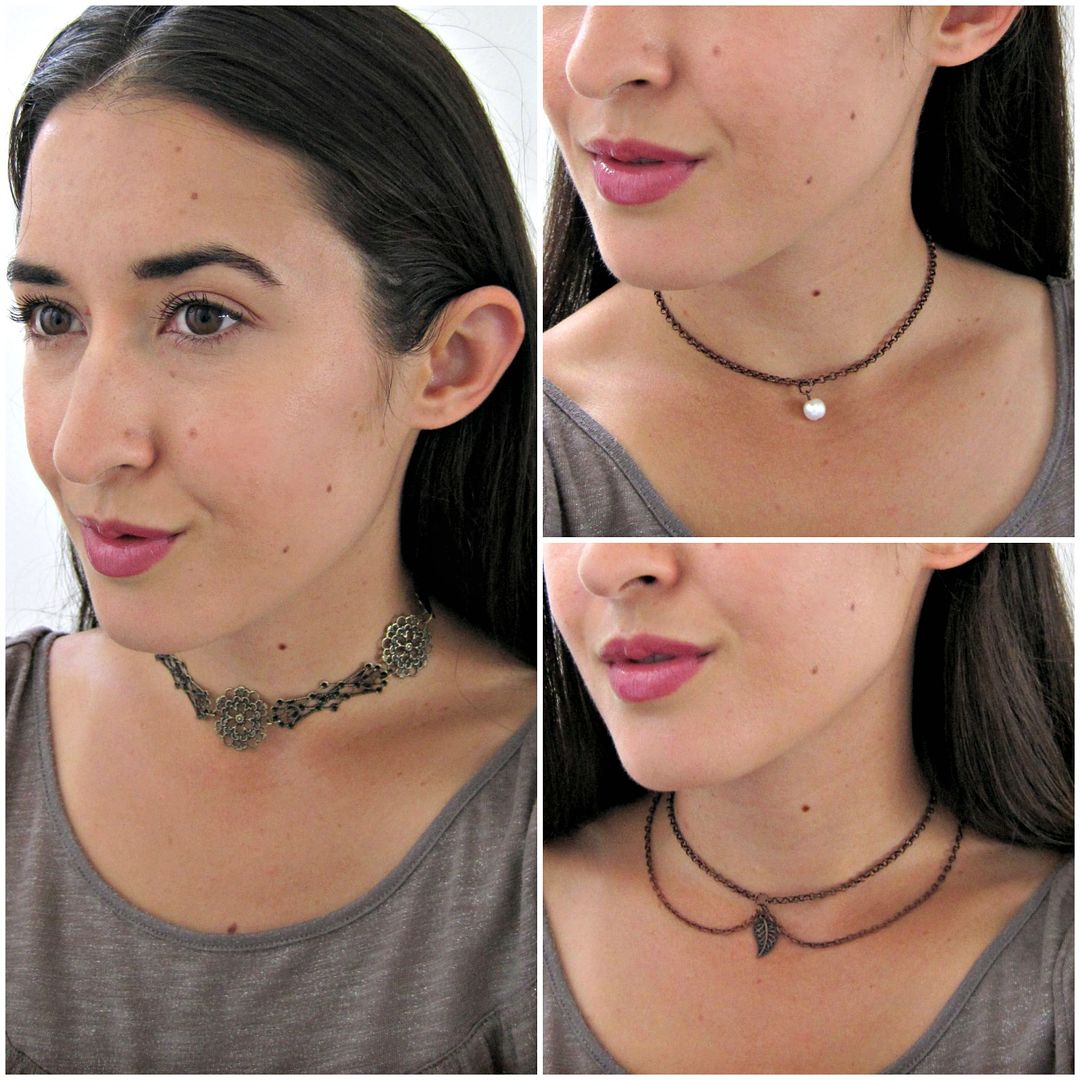
The first choker I made was super simple. I wondered if it was even worth a tutorial, but I loved it so much I wanted to share it anyway. Yeah, it is a bit uncomfortable, but in that I'm constantly remember I'm wearing it kind of way. Plus, I feel really cool in it. (Is it still cool to say cool?) Of course, I didn't stop there. I decided to make another, slightly more complicated choker. Then leftover from that I had the perfect amount of chain left to make a third simple choker. Now I have three chokers to pick from depending on my mood. Ready to get started? Pick your favorite or make all 3!
If you're new to jewelry-making, be sure to read my Beginner's Guide to Basic Jewelry Making.


Choker #1
Materials
Steps
- Cut the decorative chain to fit your neck. I removed one of the rectangle links. If your necklace is too short, add the extra chain to one end to lengthen it.
- Add a clasp to one end of the necklace.
- Add a jump ring to the other end.
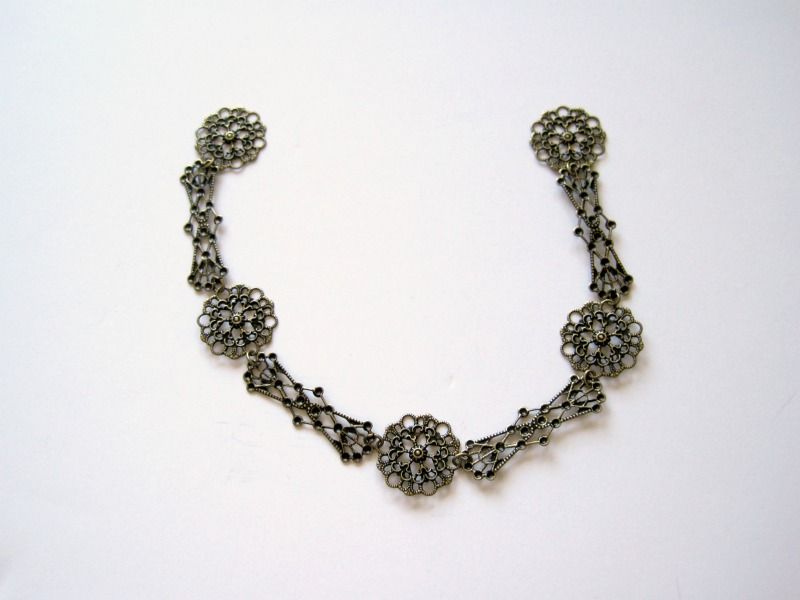
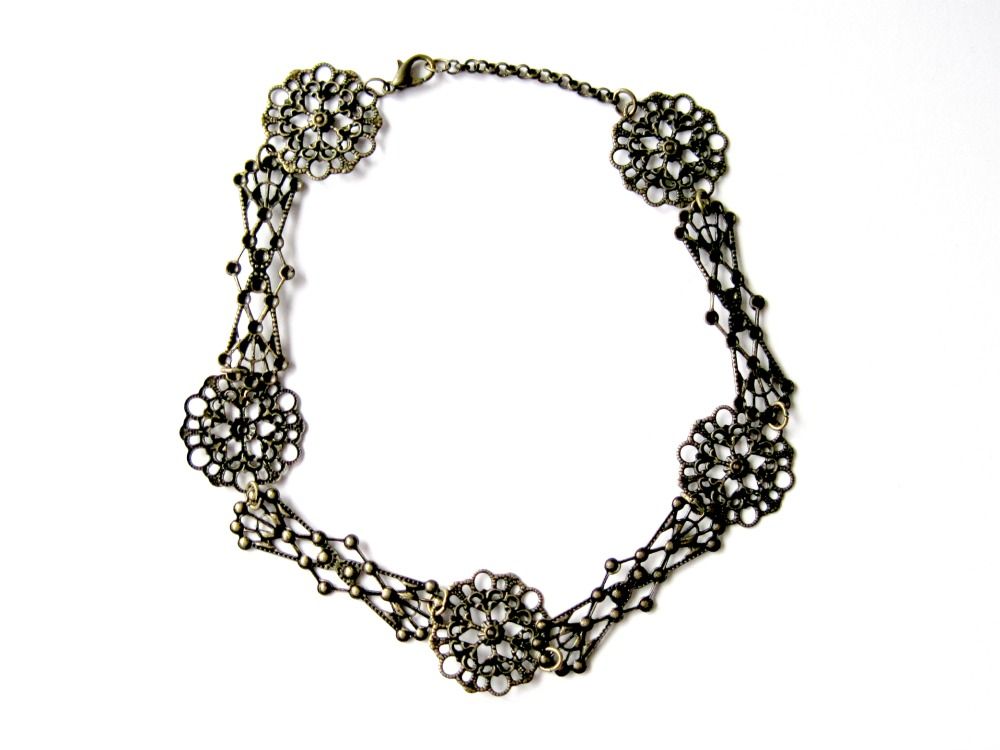
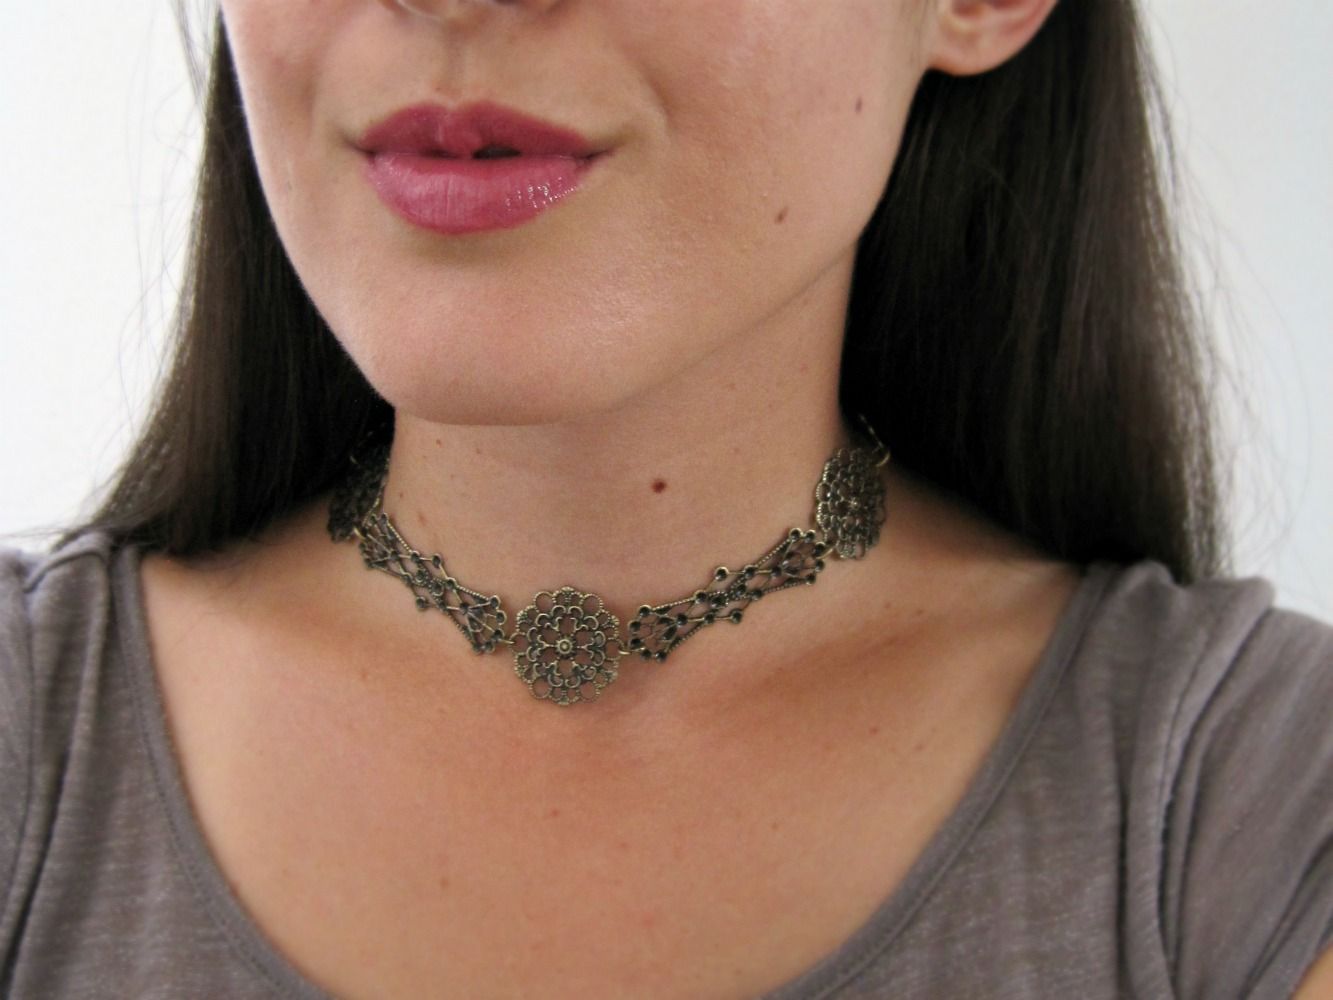
That's it! Obviously this necklace relies on the decorative chain to give it its character. I found the one I used at Michaels.
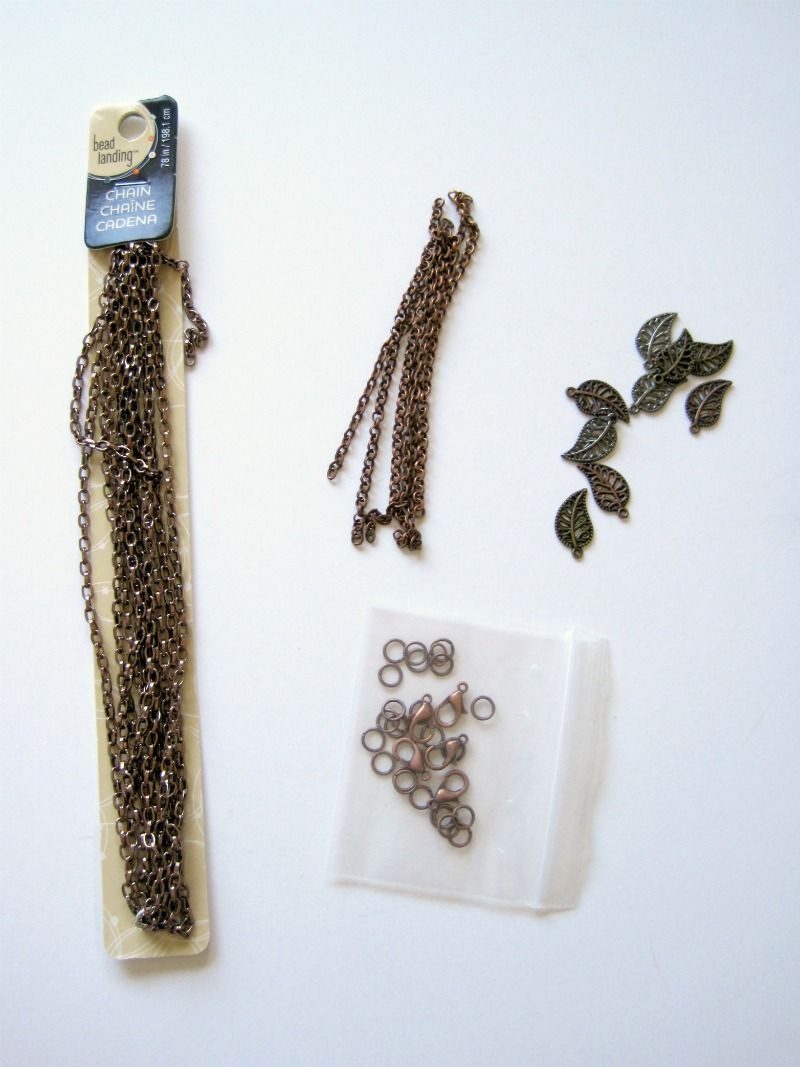
Choker #2
Materials
Steps
- Cut the heavier/thicker weight chain to fit around your neck comfortably. Now cut that piece in half.
- Cut two lengths of the lighter/thinner chain about 1.5" longer than the heavier chain pieces.
- Open a jump ring and add the chains and charm in this order: thin chain, thick chain, thick chain, thin chain, charm/pendant.
- To one end of the necklace, add a jump ring to connect the thick and thin chain lengths and add a clasp.
- To the other end of the necklace, add a jump ring to connect the thick and thin chains. You can also add an extender chain to lengthen the necklace if it is too short or to make it adjustable.

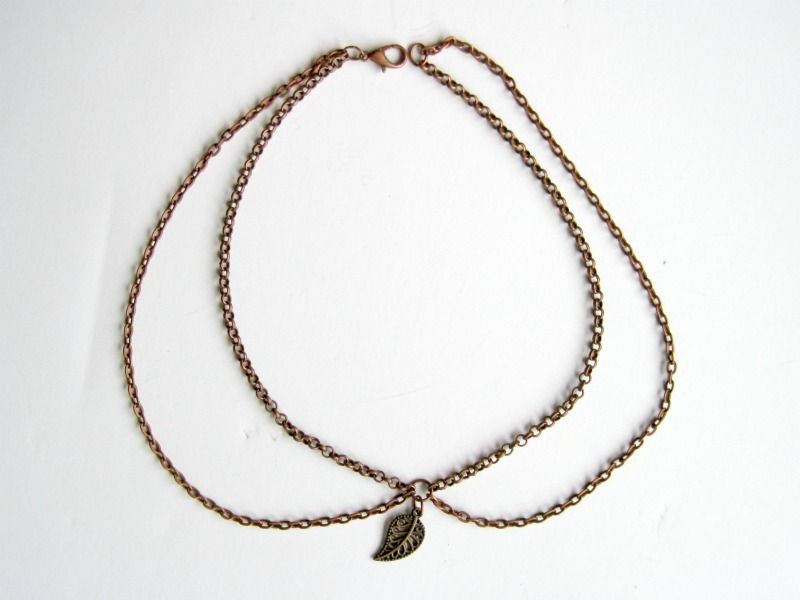
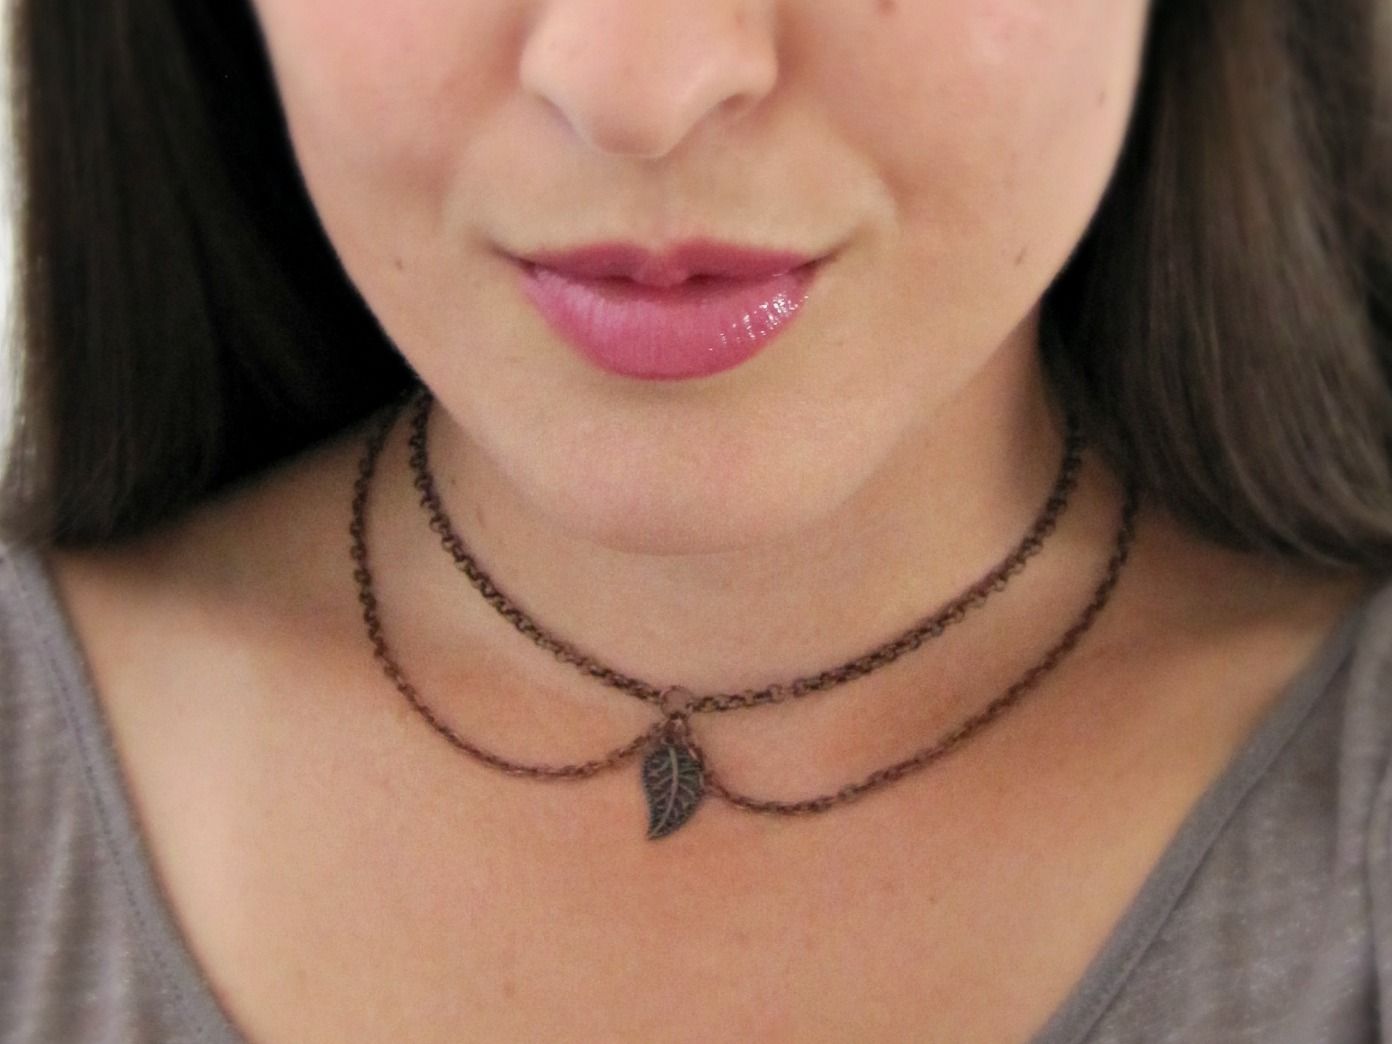
A warning about this necklace, I tested it out the first day with my hair in a low side ponytail. The necklace kept rubbing against my hair and becoming tangled and twisted. This necklace would probably work best with your hair up and without collars to catch on it. I still love it though, so it was worth the constant mirror checks to make sure it was still in place.
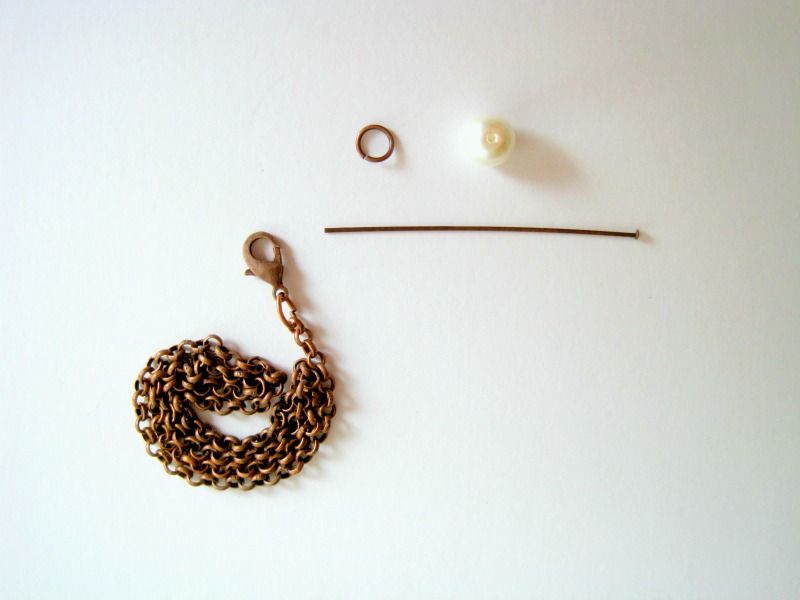
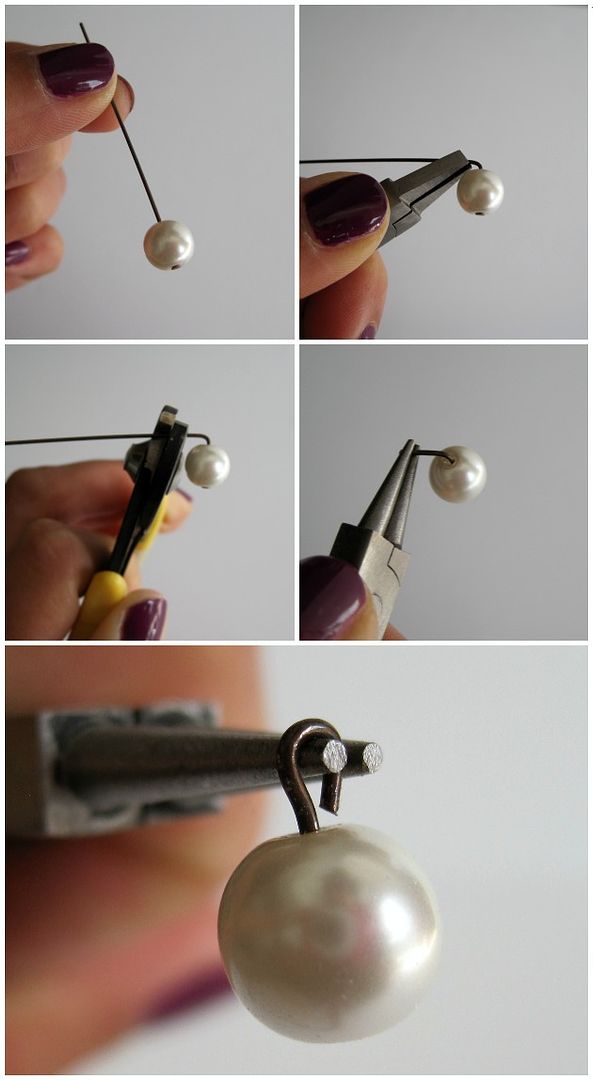
Choker #3
Materials
Steps
- Cut the chain to fit around your neck comfortably.
- Add the bead to the head pin. Bend the wire to 90 degrees at the top of the bead and cut the wire to approx. 3/8" or 1 cm. Use needle nose pliers to bend the end into a loop. Add a jump ring to the loop and thread it into your chain.
- To one end of the necklace, add a clasp.
- To the other end of the necklace, add a jump ring to connect to the clasp. You can also add a length on an extender chain to lengthen the necklace or make it adjustable.
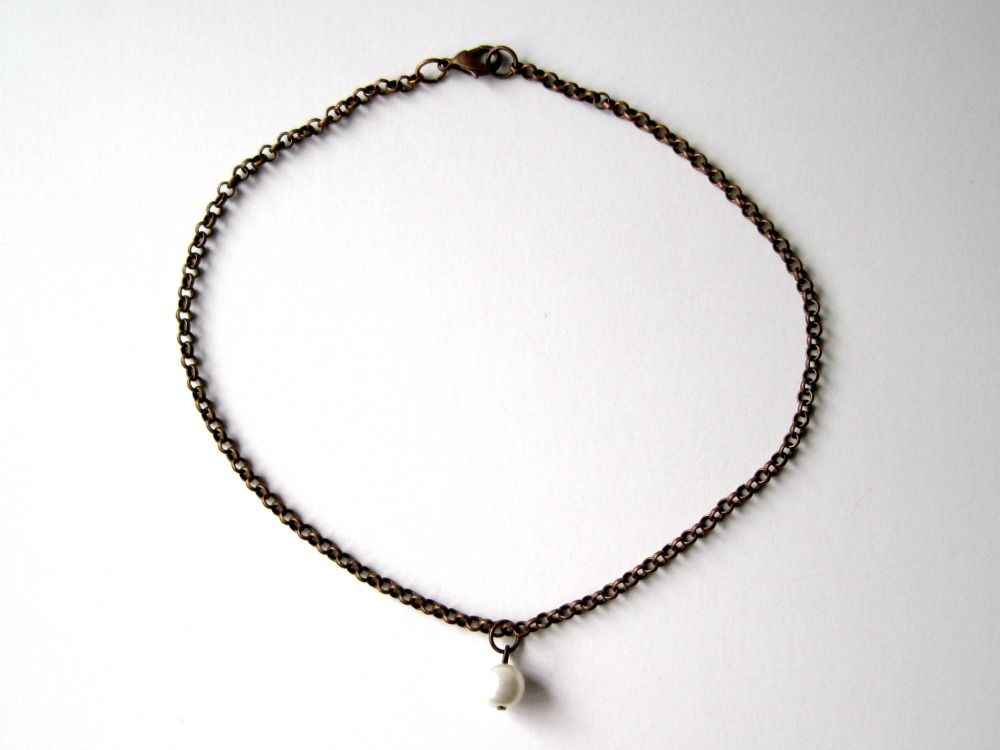
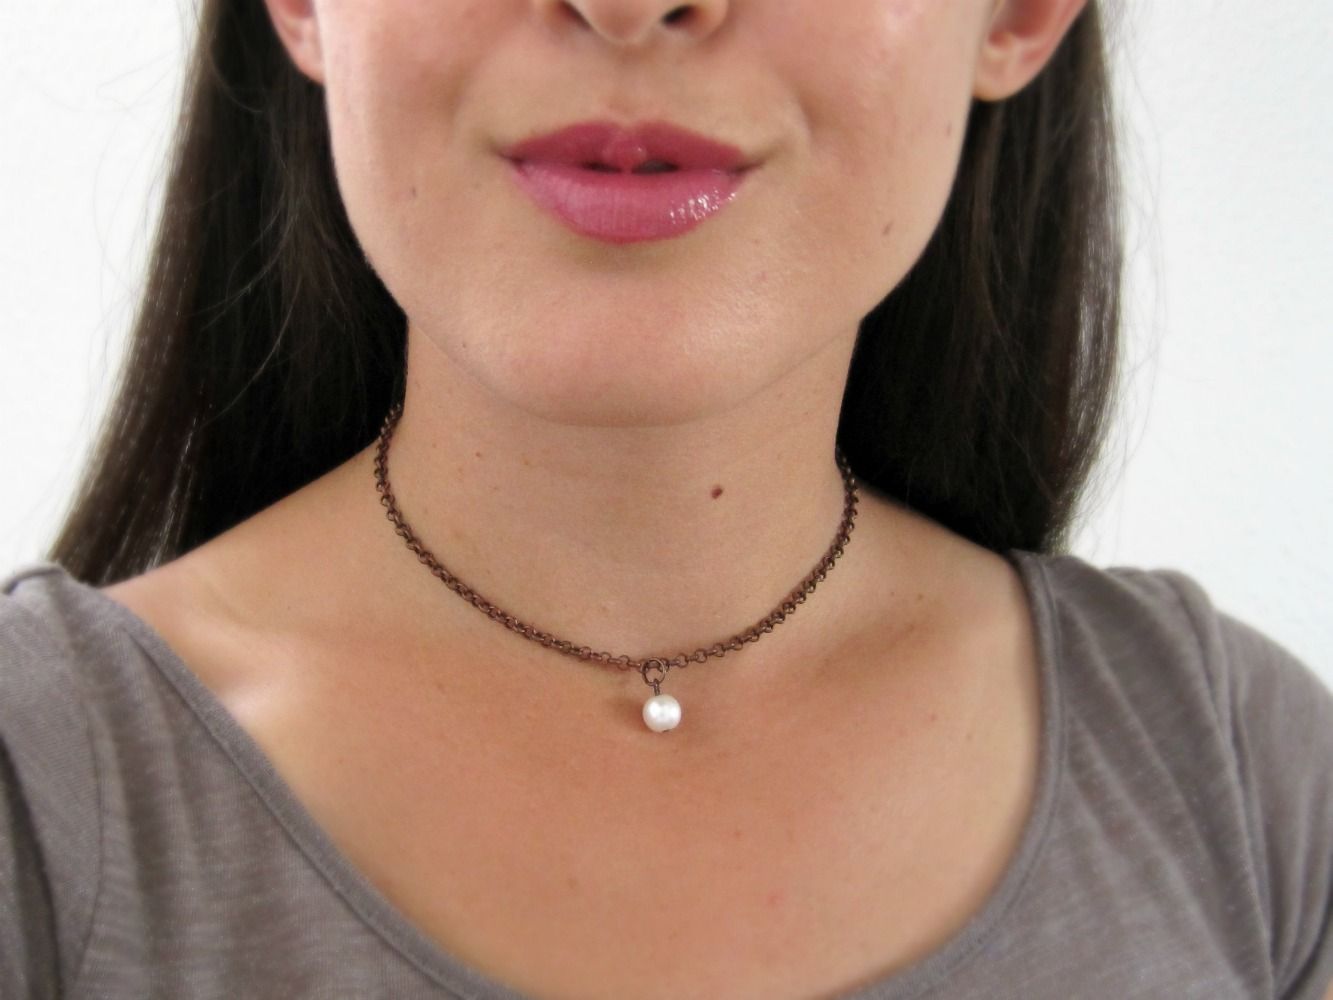
And that's it! Which one of these necklaces is your favorite? If you make one (or all 3!), be sure to tag me on social media (links in sidebar) so I can see your beautiful creations!
Happy DIY-ing!

No comments:
Post a Comment