
I started experimenting with making my own jewelry a few years ago. I've always had a bit of a jewelry addiction and bought way more than I actually wear. That's probably why I was drawn to buying inexpensive jewelry to be able to afford such an addiction. Then I decided to actually try making making some of my own "cheaper" versions of more expensive jewelry I loved but didn't want to or couldn't afford to spend much on. Sometimes the process involves trying to replicate an inspiration piece, but other times I just take out my jewelry making supplies and see what inspires me.
This will be a very basic beginner guide. I wrote it mainly as a companion to my other jewelry making tutorials to explain in further detail some of the steps. It will cover the supplies you will need as well as the basic skills needed to do any of my jewelry tutorials. As a disclaimer, I am no expert. My skills are still in the advanced beginner to intermediate level and I'm completely self-taught. I just want to share some basic knowledge if you want to start making jewelry but don't know where to start. Let's begin with basic supplies. You can get most of these inexpensively from craft stores or purchase online. You can even repurpose old or broken jewelry you already have for chain, clasps, or pendants.
This post contains affiliate links. If you click on and purchase a product through one of these links, I will receive a very small commission and you will receive my gratitude in helping to keep this blog up and running. Most of these products I do own, so I feel comfortable recommending them to you.
Tools
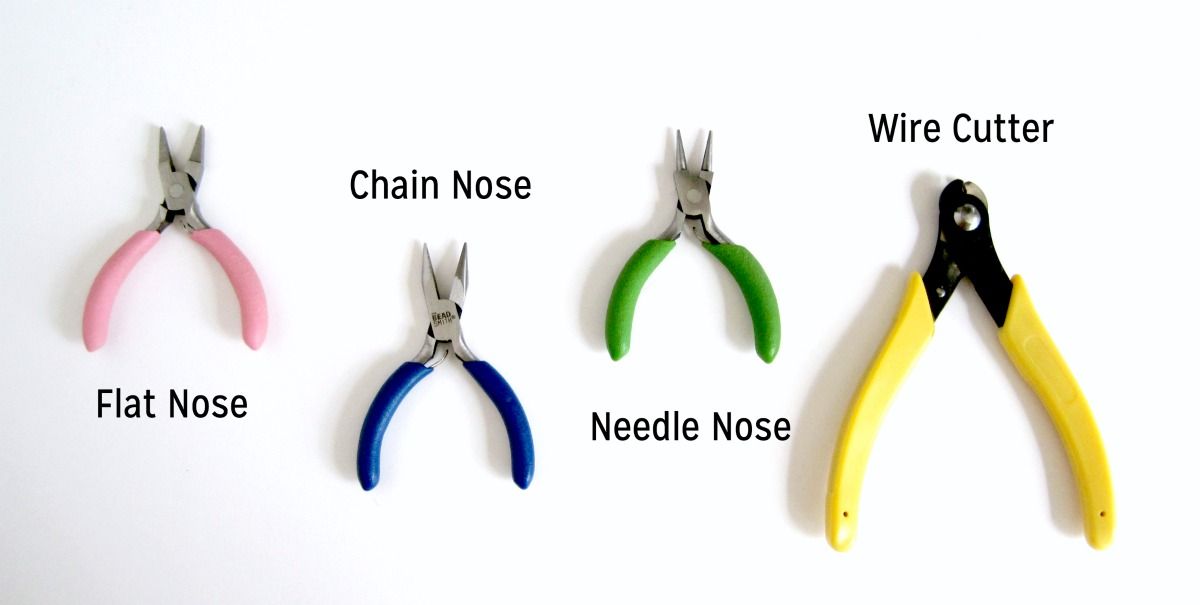
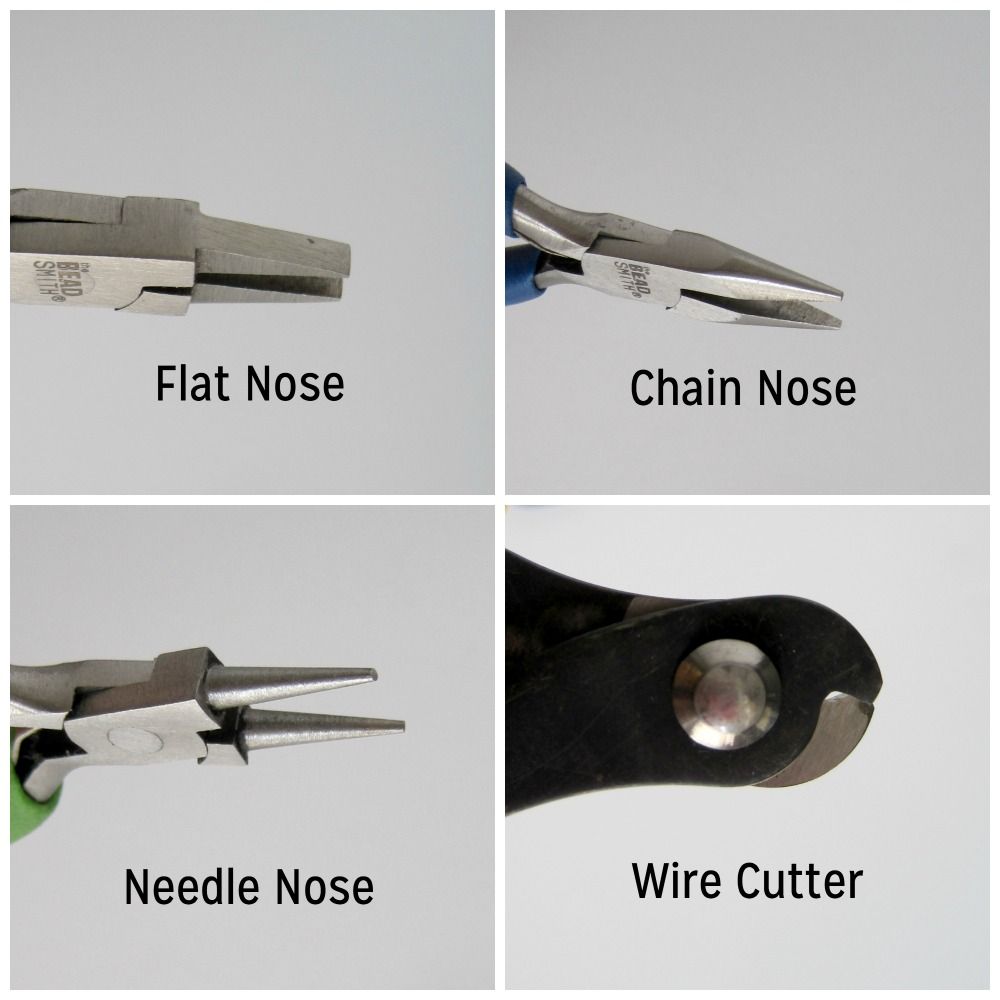
To start out, you will need to obtain/buy some jewelry making tools. I get by with using a mini tool set that has most of what I need in it. I bought the mini set because it was cheaper and I have tiny hands so I can make it work. However, if you have normal sized hands or want to do a lot jewelry making, I'd definitely recommend a full size set for comfort and ease of use. At a minimum, you will need the following:
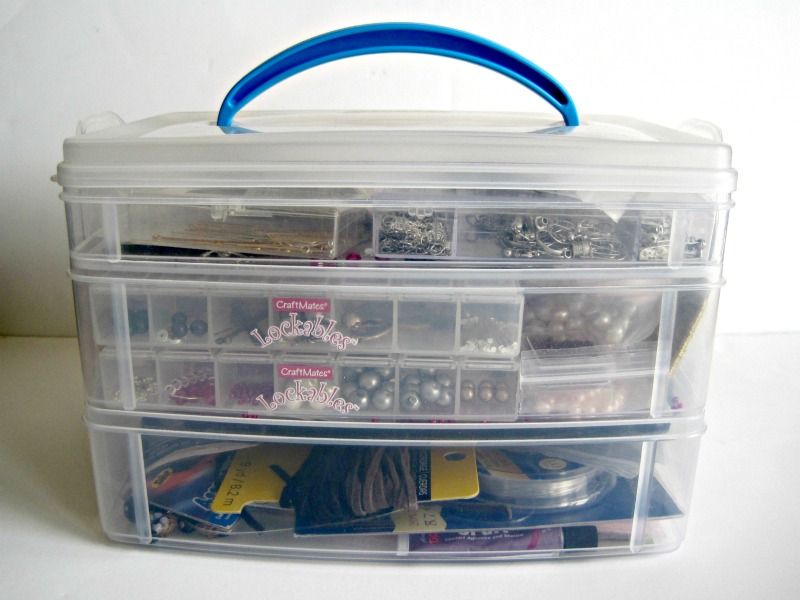
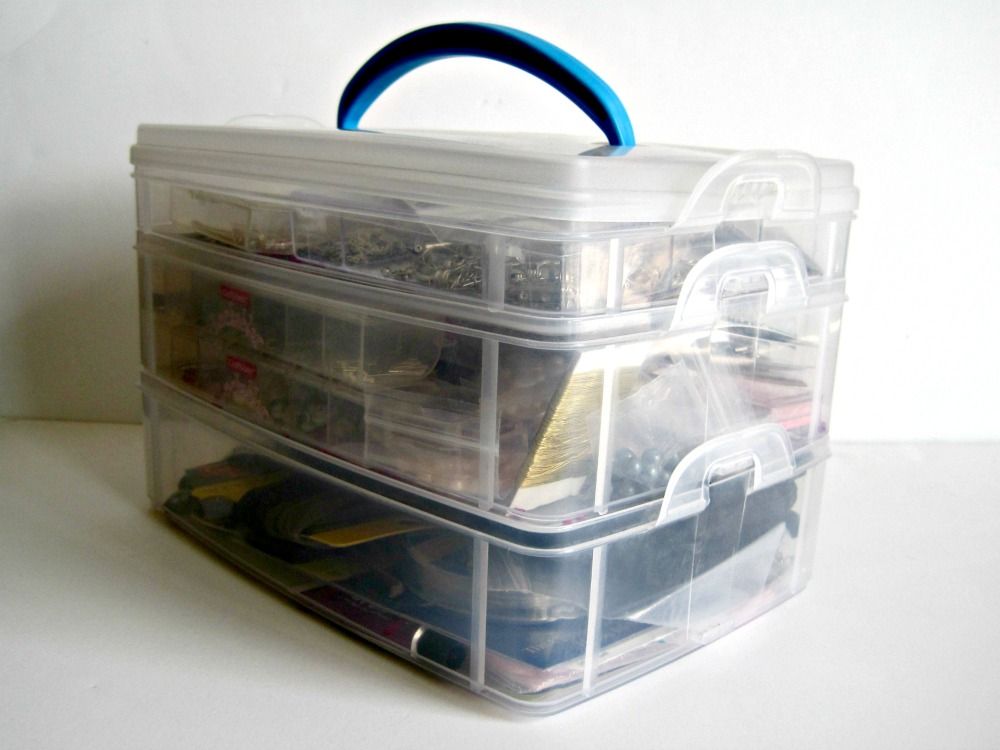
I keep all of my jewelry making supplies organized in a stacking storage container.
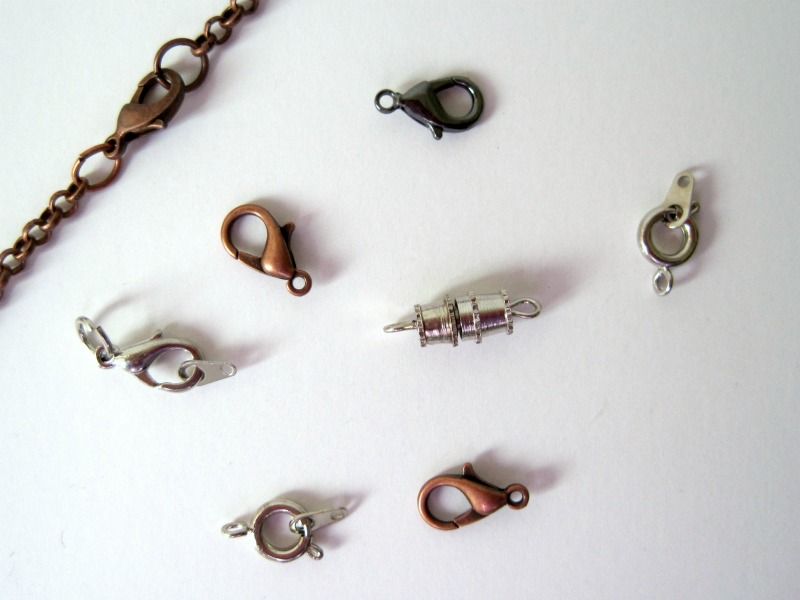
Jewelry Findings (a.k.a. supplies)
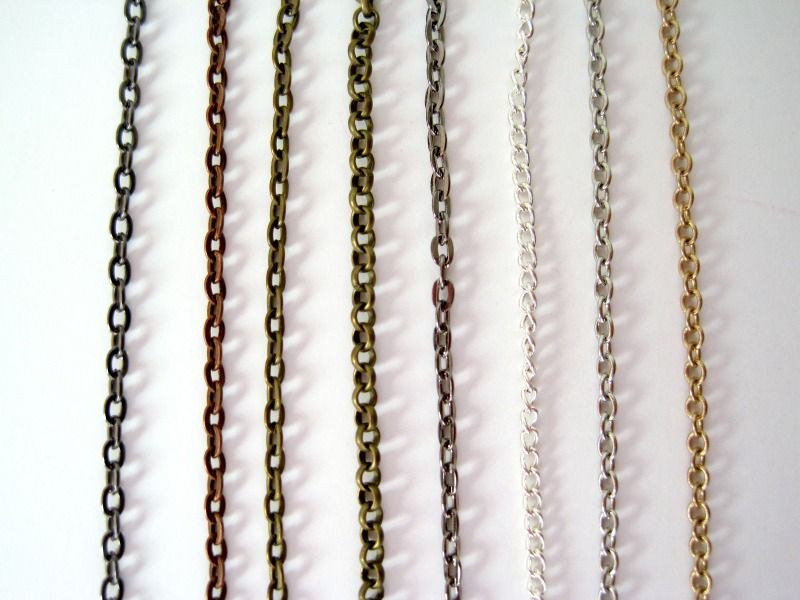
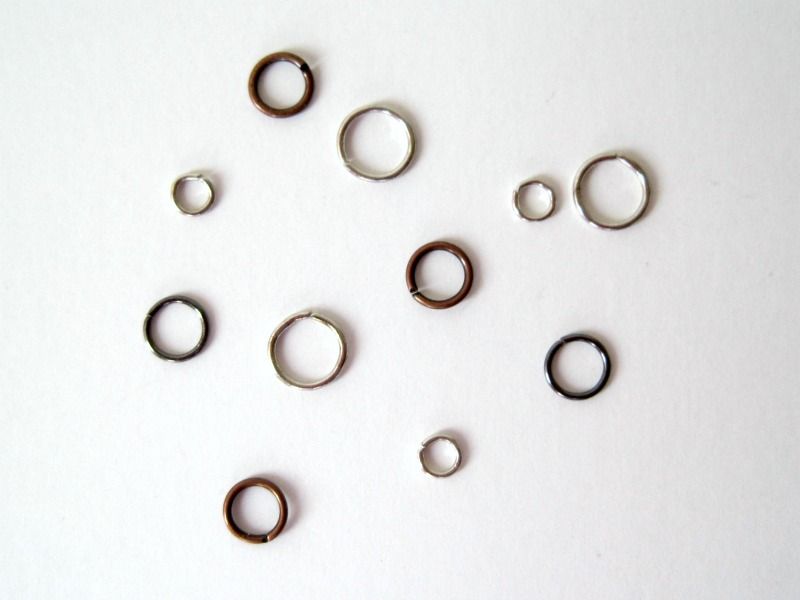
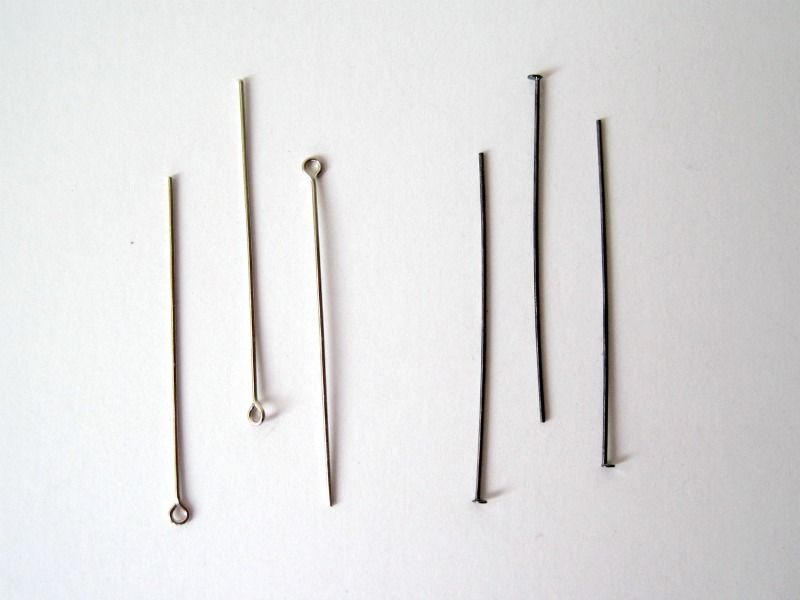
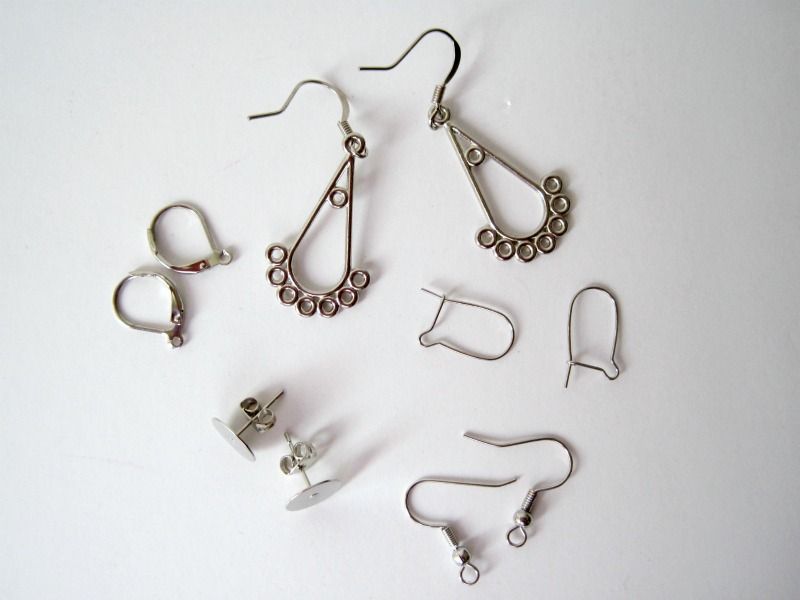
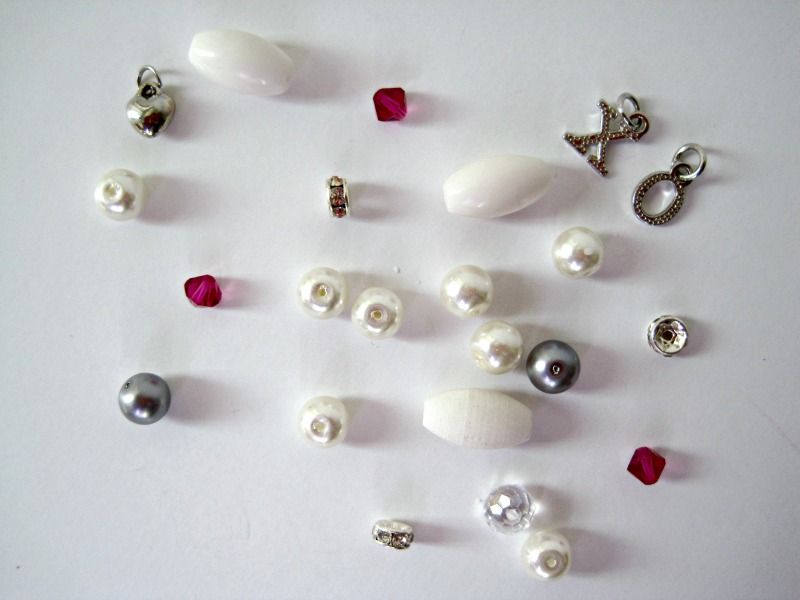
To make most of the tutorials on my blog as well as most basic jewelry, you will need chain, jump rings, head and eye pins, and clasps. You will also need earring finding if you want to make earrings. Beads and charms are great ways to add personality to your designs as well. If you're starting out and want to build your supply, I suggest buying a kit with most of these items in it. It will save you money, and as a bonus you can reuse the container it comes in as you restock your supplies.
Basic Skills
These next two skills will allow you to make most basic jewelry. First, you will need to know how to open and close jump rings. This is one of the most basic (and easy) skills to learn and will be necessary for nearly every jewelry project. The next is how to use head pins and eye pins. This is a bit more advanced and might require some practice to get the hang of it.
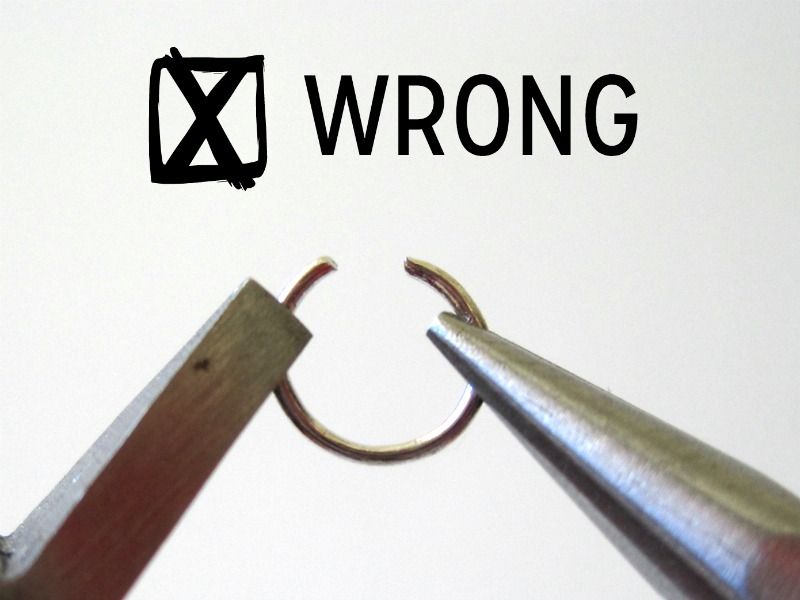
Using a jump ring
Jump rings come in an assortment of sizes to fit every project. They can be used to connect chain to clasps, add pendants to necklaces, or even as a decorative element. I find the easiest way to use them is by holding the jump ring with one set of pliers, and opening it with the other. The most important thing to remember is to NOT pull it apart to open. This weakens the jump rings and can cause it to break. To open, hold one end and pull the other outwards. Then you can slip on the chain, clasp, etc. and then simply move it back into place.

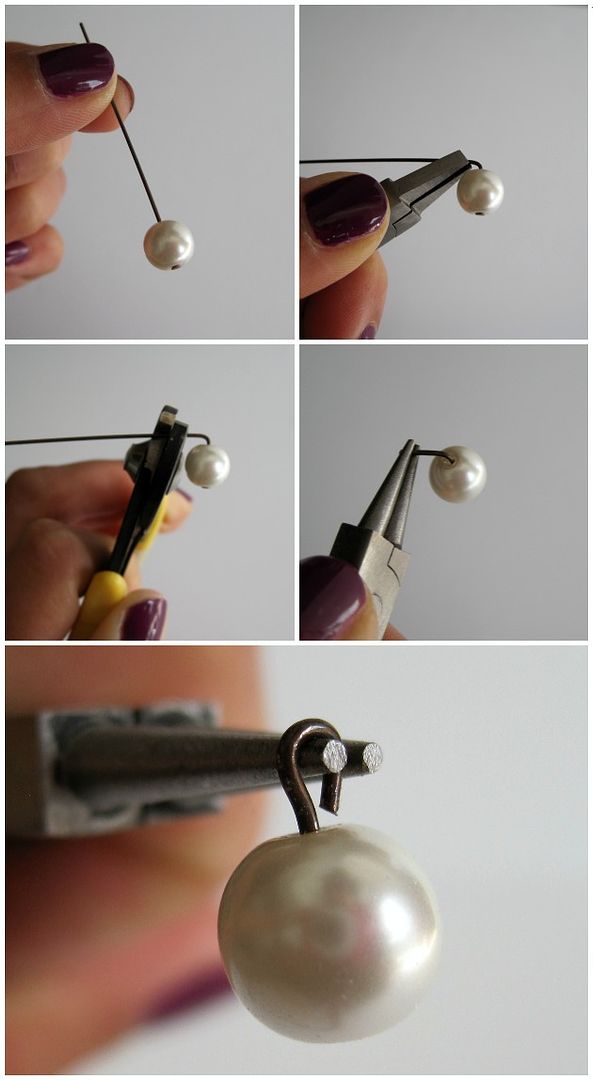
Using head pins and eye pins
Eye pins have one open end and the other is in the shape of an "eye" or circle. They are used to connect pieces or elements together. Head pins have one open end and one end with a flat pinhead. They are use to hang beads such as a pearl on a chain necklace or dangle beads on earrings. Both can fit large hole beads and pearls.
To use them, add the bead(s) to the open end. Once finished, bend the wire at a 90 degree angle to the side of the bead. Use wire cutters to cut the excess metal, leaving approximately 3/8" or 1 cm. Using round nose pliers, bend the wire into a loop using a turning action. Use flat nose plier to straighten the loop if necessary. The loop can be opened and closed to the side much like jump rings.
I recommend practicing using cheap eye or head pins since it might take a few tries to get it right. Also, try to use "softer" metal the first time. This is usually the cheap metal that comes with variety starter kits. It is much more pliable and easier to work with.
Ready to test out your new knowledge and skills? Try one of these easy tutorials:
This is really great! thank you for the step by step guide. It makes me happy!
ReplyDelete~Dana@Haus
Glad you like it Dana!
Delete