
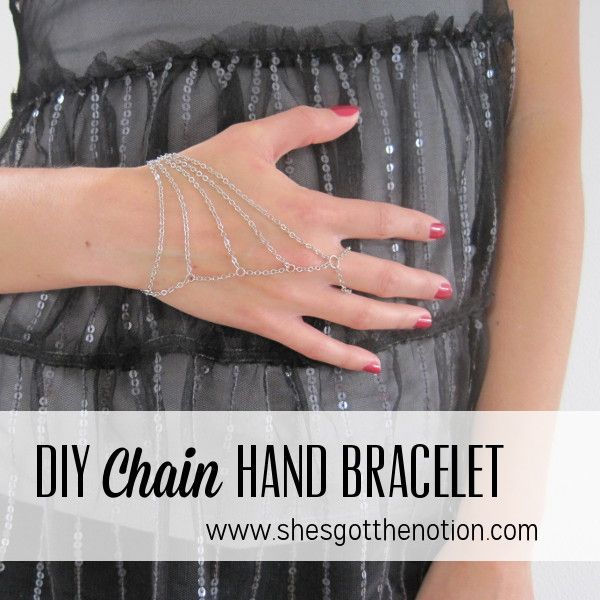
I'm very excited to bring you my first jewelry tutorial! I had been debating what to make this week for 6 Weeks of Gifting. I wanted to do something that would make a nice gift, but also would be appropriate to make for yourself for the holidays. The holidays mean going to several parties, which means several excuses to dress up. A shiny piece of jewelry fits right into that.
If you're new to jewelry-making, be sure to read my Beginner's Guide to Basic Jewelry Making.
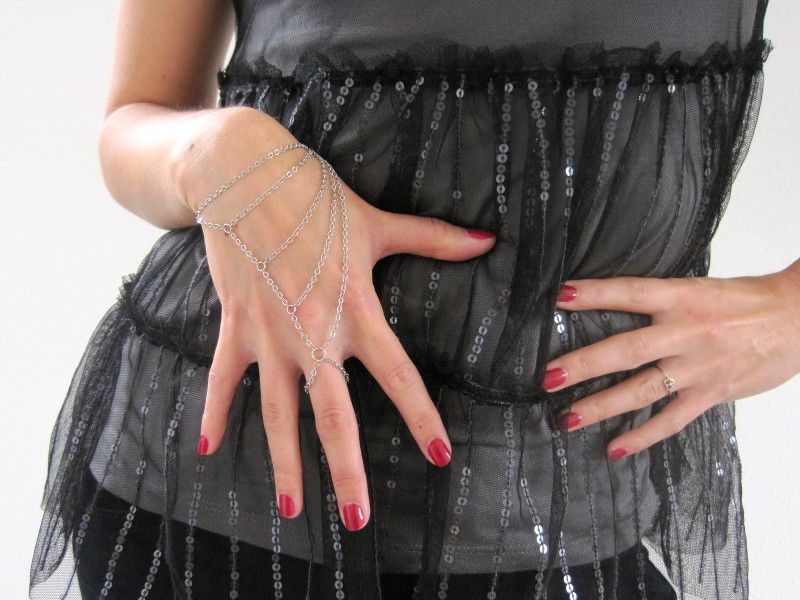

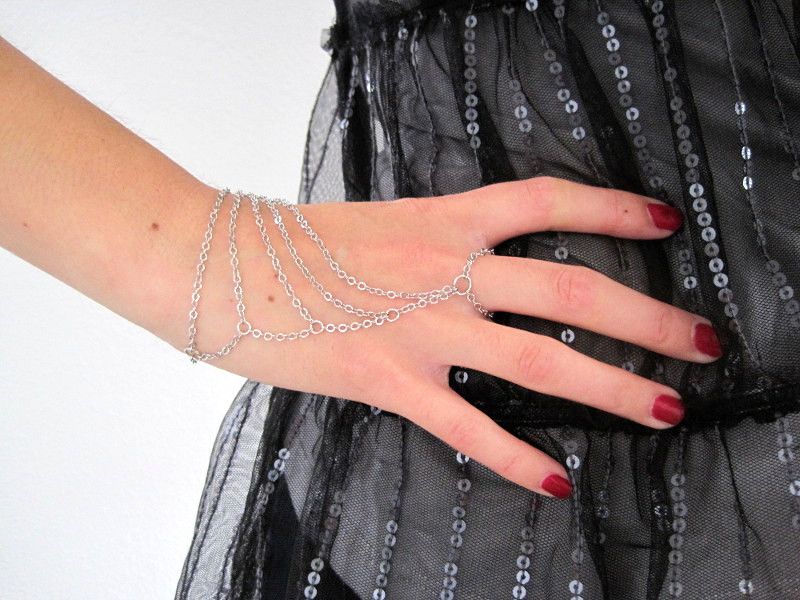
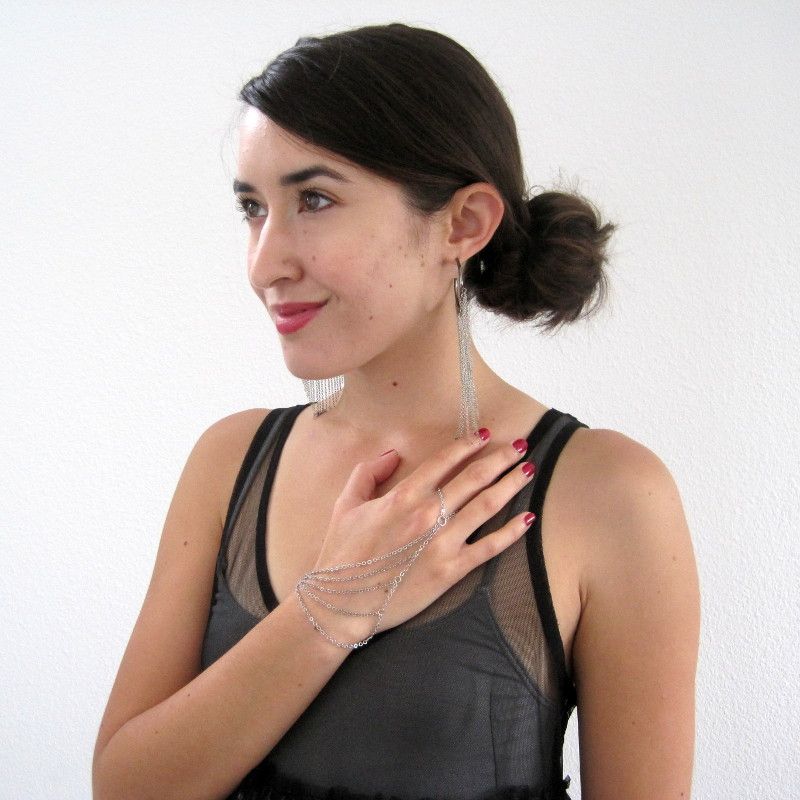
I've been seeing a lot of hand pieces/hand bracelets/hand adornments/rosary bracelets (I'm still not sure what the 'official' term is) in stores lately. I decided to jump onto the trend with my own version. It is an easy jewelry project even if you're a beginner. I had every intention of going to Michael's buying something new that inspired me, but it's been raining pretty heavily here in California and not weather I felt like driving in. Luckily I had everything I needed to be inspired in my own jewelry making supplies. This makes this a perfect rainy day project. I wore tested it around for a couple days too and it's actually quite comfortable and even forgot I was wearing it. I love how the bracelet moves and drapes while wearing it.

This the jewelry tool set I purchased when I first started making jewelry and still use it. The tools are mini sized, but I have small hands so it works just fine.
(associate link)
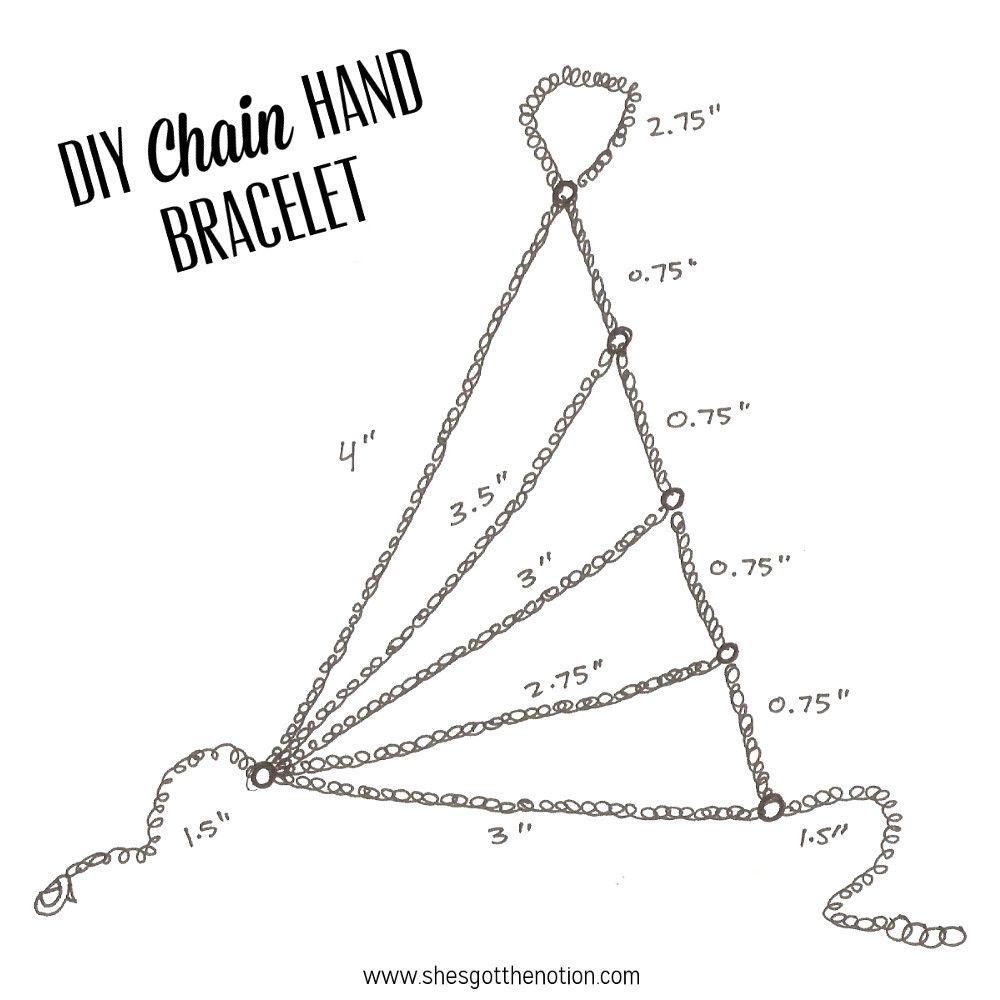
After I got an idea of what I wanted in my head, I drew it out to try and estimate the chain lengths.
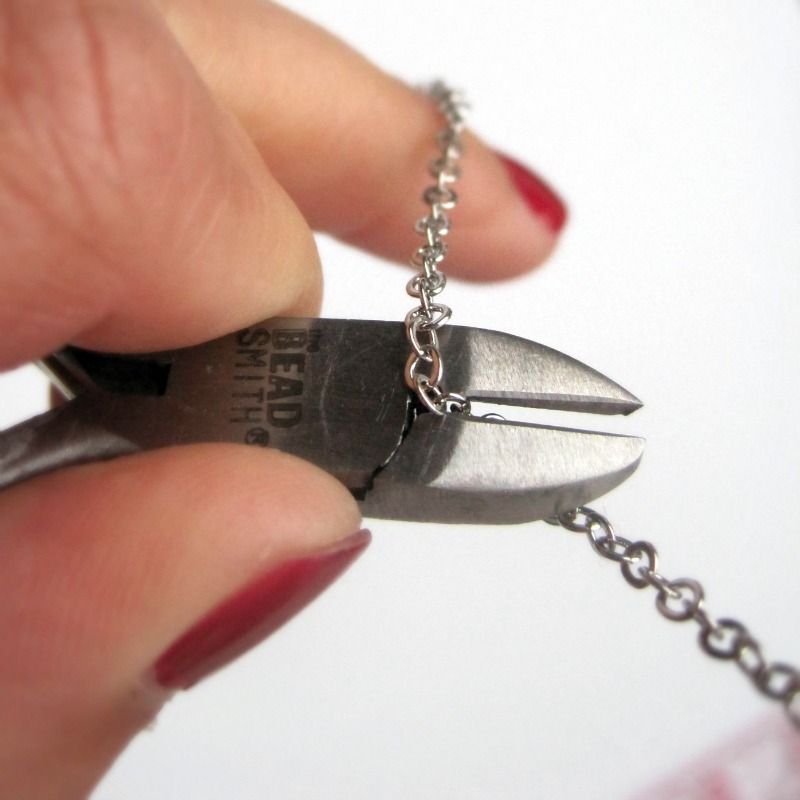
Let's get to work. All you need for this project is some chain and jump rings. I used small metal chain, but you could you use thicker chain for a different look.
MATERIALS
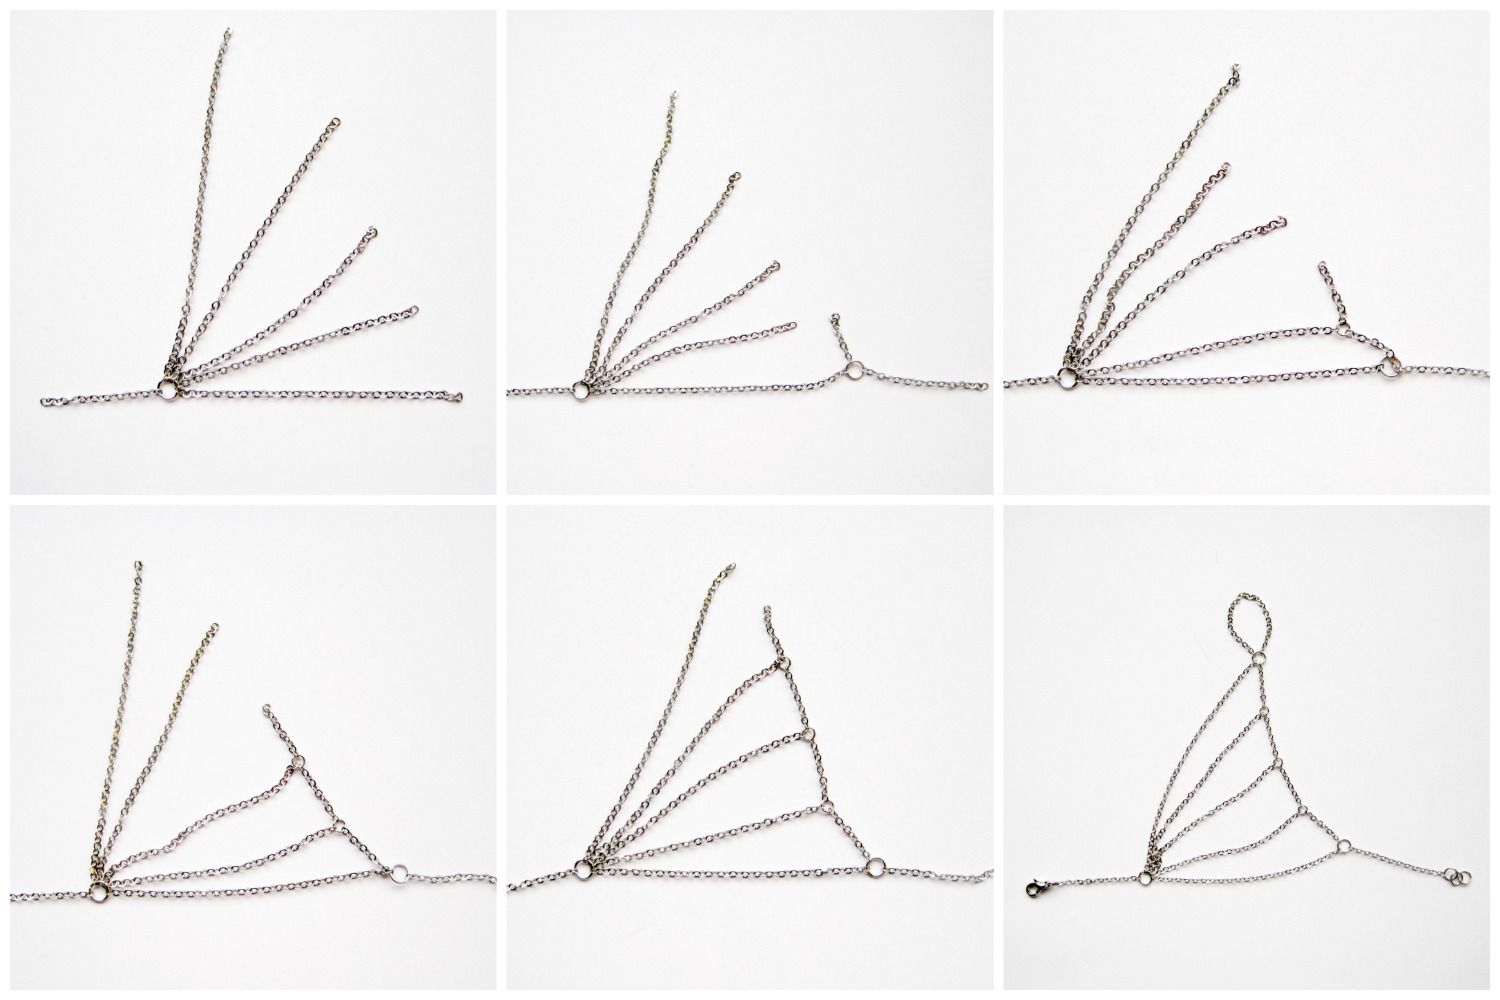
NOTE: It helps when doing this project if you lay out the piece as shown in the picture above and the photo steps below while working on it.
INSTRUCTIONS
The instructions start on the jump ring in the lower left hand corner, and moves counter-clockwise to the top.
- Open a large jump ring (#1). Cut & add to your jump ring chain in the following lengths: 1.5", 4", 3.5", 3", 2.75", 3". Close the jump ring.
- Open another larger jump ring (#2). Attach it to the end of the 3" chain you added last in the previous step. Cut & add to the jump ring chain measuring 0.75" and 1.5". Close the jump ring.
- Open a small jump ring (#3). Attach it to the end of the 2.75" chain you added in the 1st step and the 0.75" chain you added in the previous step. Cut & add to the jump ring chain measuring 0.75". Close the jump ring.
- Open a small jump ring (#4). Attach it to the end of the middle 3" chain you added in the 1st step and the 0.75" chain you added in the previous step. Cut & add to the jump ring chain measuring 0.75". Close the jump ring.
- Open a small jump ring (#5). Attach it to the end of the 3.5" chain you added in the 1st step and the 0.75" chain you added in the previous step. Cut & add to the jump ring chain measuring 0.75". Close the jump ring.
- Open a large jump ring (#6). Attach it to the end of the 4" chain you added in the 1st step. Cut a length of chain measuring 2.75" and add BOTH ends of the chain to the jump ring (this will form the ring for your finger). Add to the jump ring the 0.75" chain you added in the previous step. Close the jump ring.
- Add the clasp to the end of on of the 1.5" pieces. Attach a few large jump rings together to for an extender and attach it to the end of the other 1.5" piece.
- Try on your hand bracelet. Cut any excess chain off of the sides if necessary to fit.
I sized this bracelet to be 7.5" to fit the average size of a woman's wrist. I have small wrists I needed to take about an inch off of the sides to fit me. If your hands are bigger and longer and want to increase the length of the bracelet from finger to wrist, reduce the length of the 3" chain that is at the base of the bracelet, and add length to the side pieces. If you're making this for someone else, I recommend adding at least 1" of extender chain. Maybe even bring along this handy travel sized color coded mini tool set & case
 to ensure it's the perfect fit when you gift it!
And that's it. It was pretty easy, right? Now you have a new accessory to wear to your holiday parties or to give as a gift.
If you are give this as a gift, know that jewelry referred as dainty is usually code for tangle easily. I have a solution for that if your giving this as gift to display it nicely.
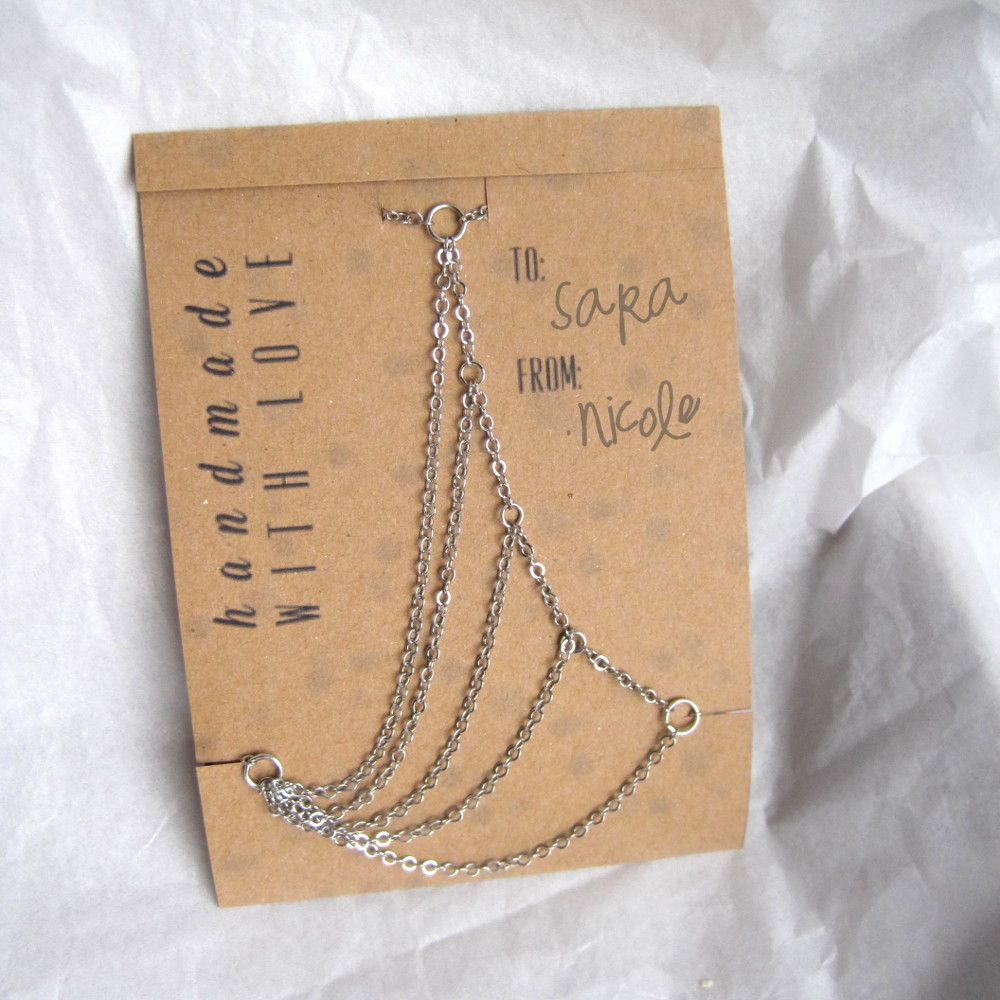
I made this printable free to download. Simply print onto cardstock paper (I used kraft cardstock) and assemble using the instructions included with the pdf. If you shortened the bracelet, you may need to snip the wrist lines a bit more to be able to close the bracelet. I think using decorative scissors would be cute to cut the folded edge, but I unfortunately don't have any aside from my fabric pinking shears.
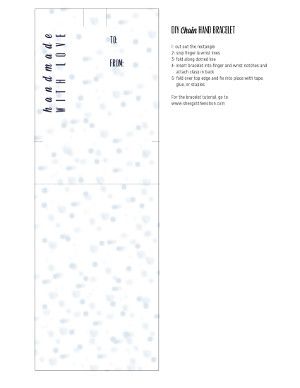
PRINT THE BRACELET HOLDER
Make sure to print at 100%


If you make this bracelet, I'd love to see what yours looks like! You can share photos of it with me on Instagram, Twitter, or my Facebook page. Be sure to know about the latest posts to my blog by following my blog on Bloglovin' or adding me on Google+.

This is so beautiful!! ♥
ReplyDeleteThank you! :)
ReplyDeleteLove the diagonal take!
ReplyDelete