
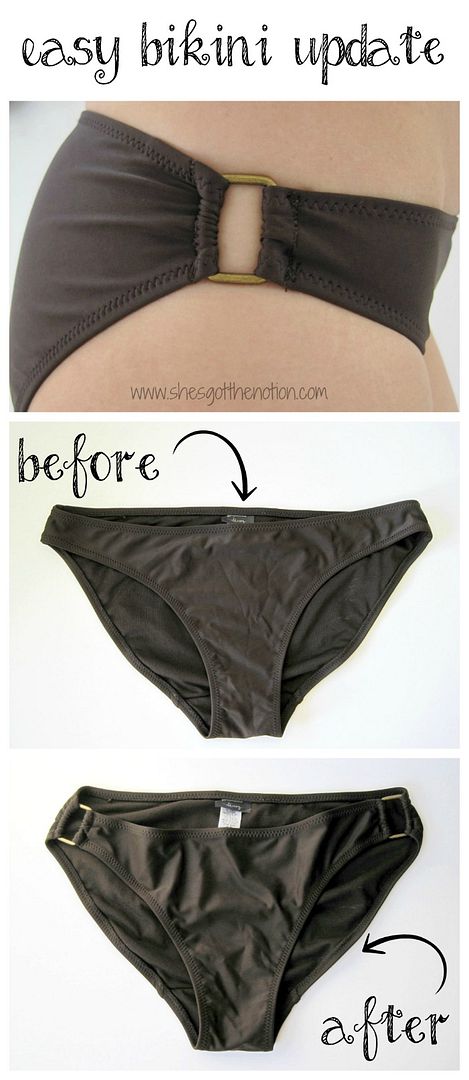
I'm going to share with you today this quick, DIY bikini update. This is great for adjusting the fit of bikini bottoms, and the rings help keep the bikini in place (i.e. less awkward ride up in the back). Since the rings add space, you could also add these to bikinis that already fit to change the look or help stop ride up. If you want to adjust a bikini that's too small, I'd recommend purchasing larger rings to help add width to the bikini.
I've had these brown bikini bottoms for several years, but haven't worn them in awhile because they are about a size too big. I also have a mismatched white and gold striped bikini top that I never wear because I don't have bottoms that match. I really like the bikini top because it has metal rings on the straps, so I got the idea of adding metal rings to the bottoms to help make them "match".
Now let's get to this easy refashion. A word of warning first, I have't been properly trained in how to sew swimsuit fabric, so I don't know what is the "wrong way" or "right way" to do it. However, the way I did it seems to work just fine for me.
First you will need the metal rings. I found my metal rectangles (1" x 1.5") in the purse notions section at JoAnn Fabrics. I couldn't find them on their website, but here are some options if you prefer to purchase them online:
Now let's gather our supplies:
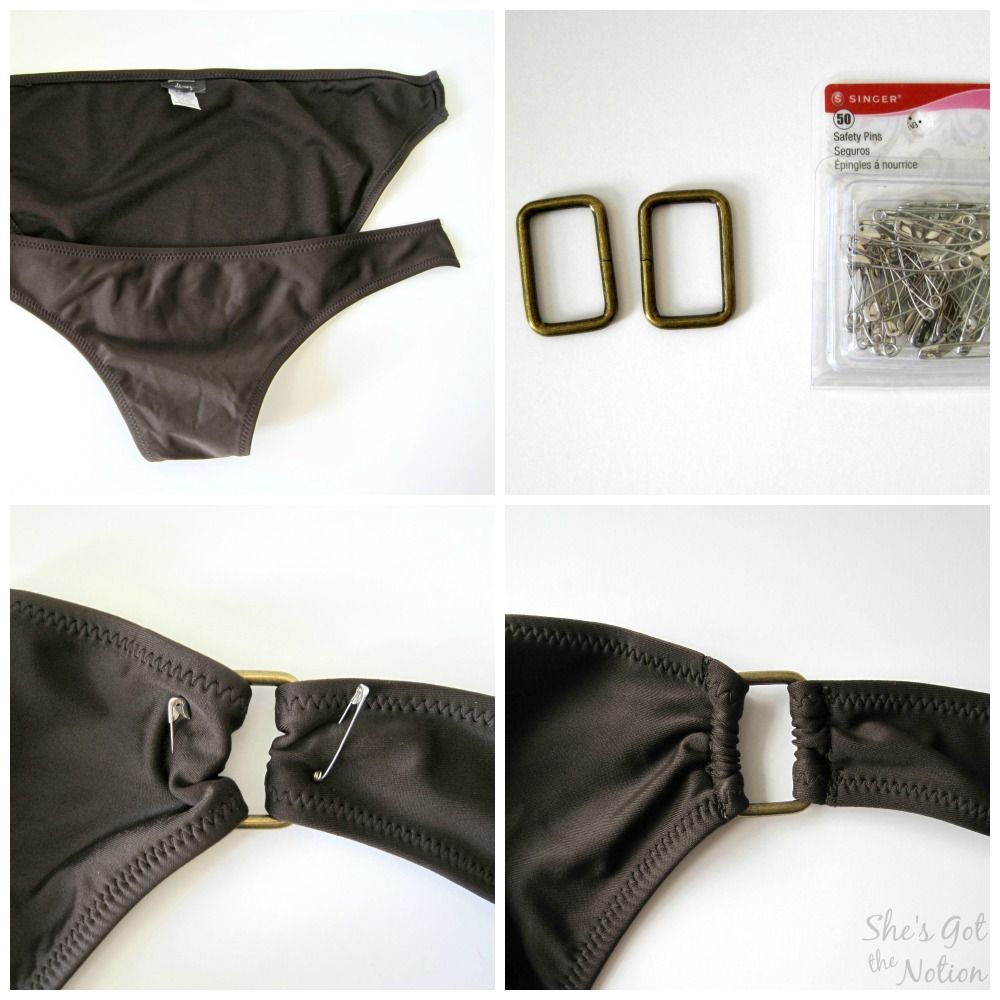
- Take your bikini bottoms and cut along the side seam. (I felt this would do less damage to the fabric rather then trying to unpick the stitches.
- Gather your metal rings and safety pins. The safety pins are so you can try it on and test the fit without pricking yourself.
- Using the safety pins, pin your metal rings in place. I pinned the minimum amount for the back of the bikini, and took in the bikini in the front. I wanted my metal rings to sit towards the front of the bikini, not the back.
Try on the bikini. Adjust the pins if needed. Once you like the fit, use sewing pins to hold the fabric in place for easier sewing.
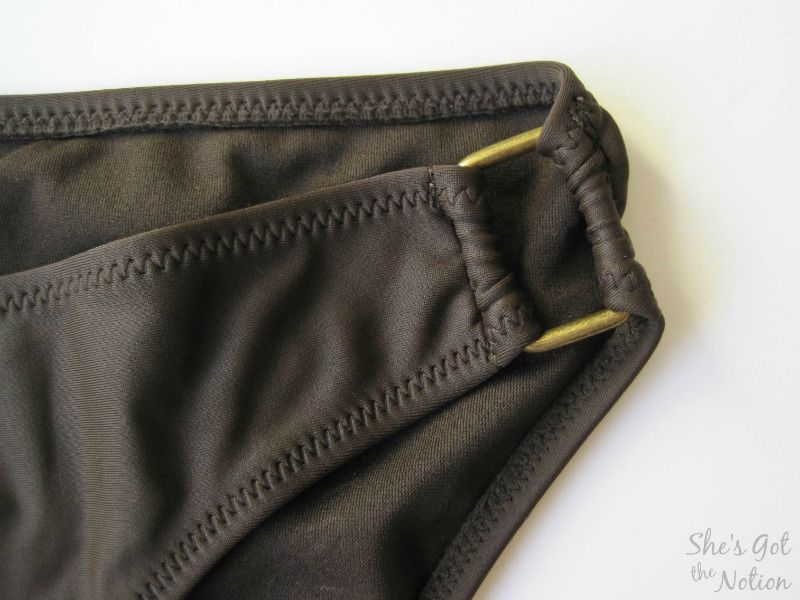
- Using a sewing machine: With a stretch or ball point needle and your zipper presser foot, sew a straight stitch close to the metal rings. You may need to stop and adjust the ring and fabric if it is bunching up. Backstitch in the beginning and end (you want these stitches to hold!). I make two lines of stitches on each side just to be safe. Trim off any extra fabric.
Sewing by hand: Thread your needle and knot the end of the thread. I recommend using a backstitch to create a secure stitch. (Click here for a quick tutorial on the backstitch.) Sew close to the metal ring, and finish off with a couple securing stitches. For extra security, you can do another line of stitching on each side. Trim off any extra fabric.
And your done!
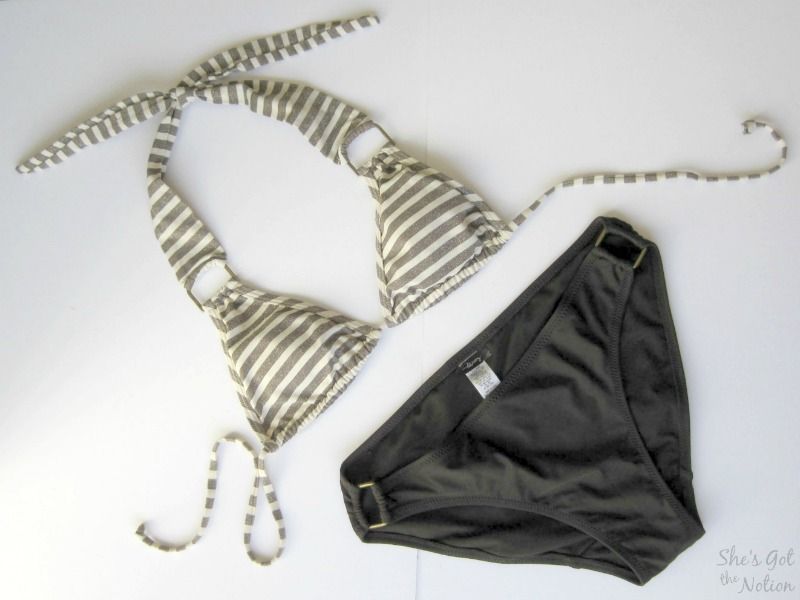
Now I have a new bikini set to wear! The metal rings help it look more put together and not like I pulled swim separates from the clearance rack (which may or may not be what actually happened).
Now put on your new bikini, grab your beach towel, sunglasses, and sunscreen, and head out to the pool or to the beach and show it off. Or wear it in your front yard to tan by a kiddie pool, I won't judge.

* This post contains Amazon Associate links. Please see my disclosure policy *
Check out these other refashions:

No comments:
Post a Comment