
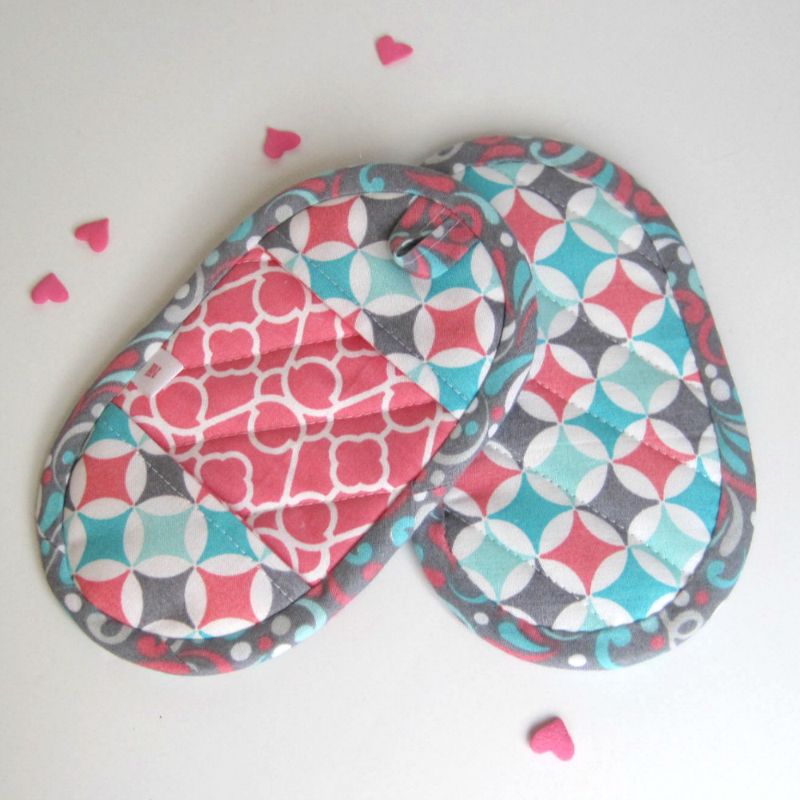
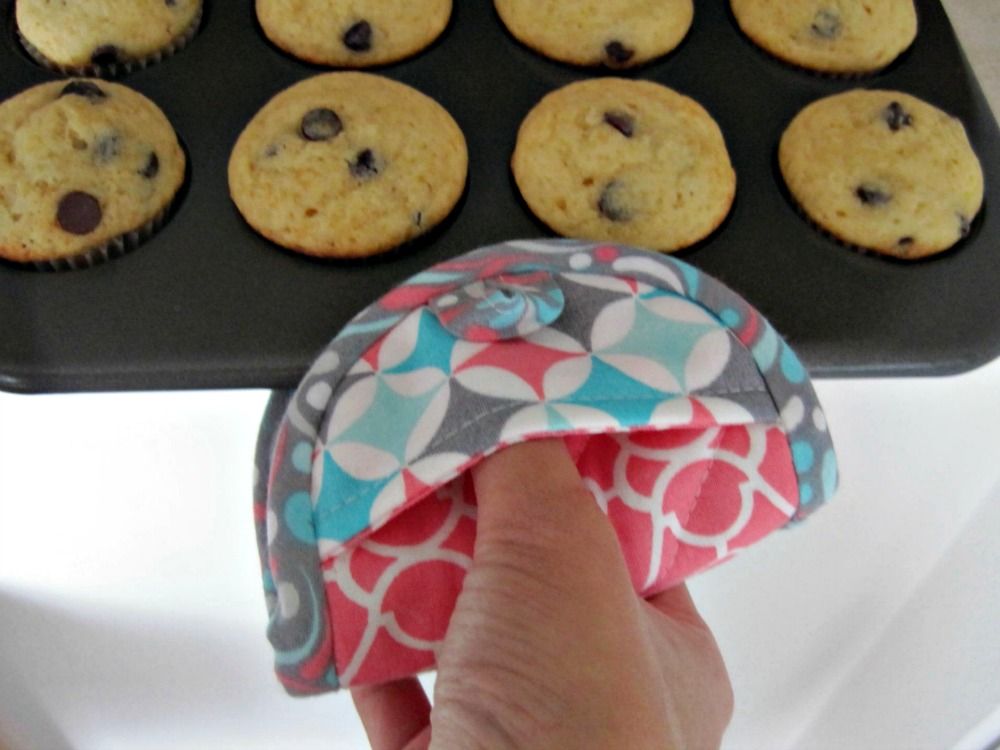
I have a tutorial here for you today for my 6 Weeks of Gifting series. The theme this week is DIY gifts for people who love to cook and bake (you can find more gift ideas here. Today, I'm going to show you how to make these little potholders with pockets for your fingers. They're perfect for gripping edges of muffin tins and cookie sheets, as well as pot and casserole dish handles. I also love to use them to take hot dishes and trays out of the microwave and toaster oven. Don't sew? I have some for sale in my Etsy store.

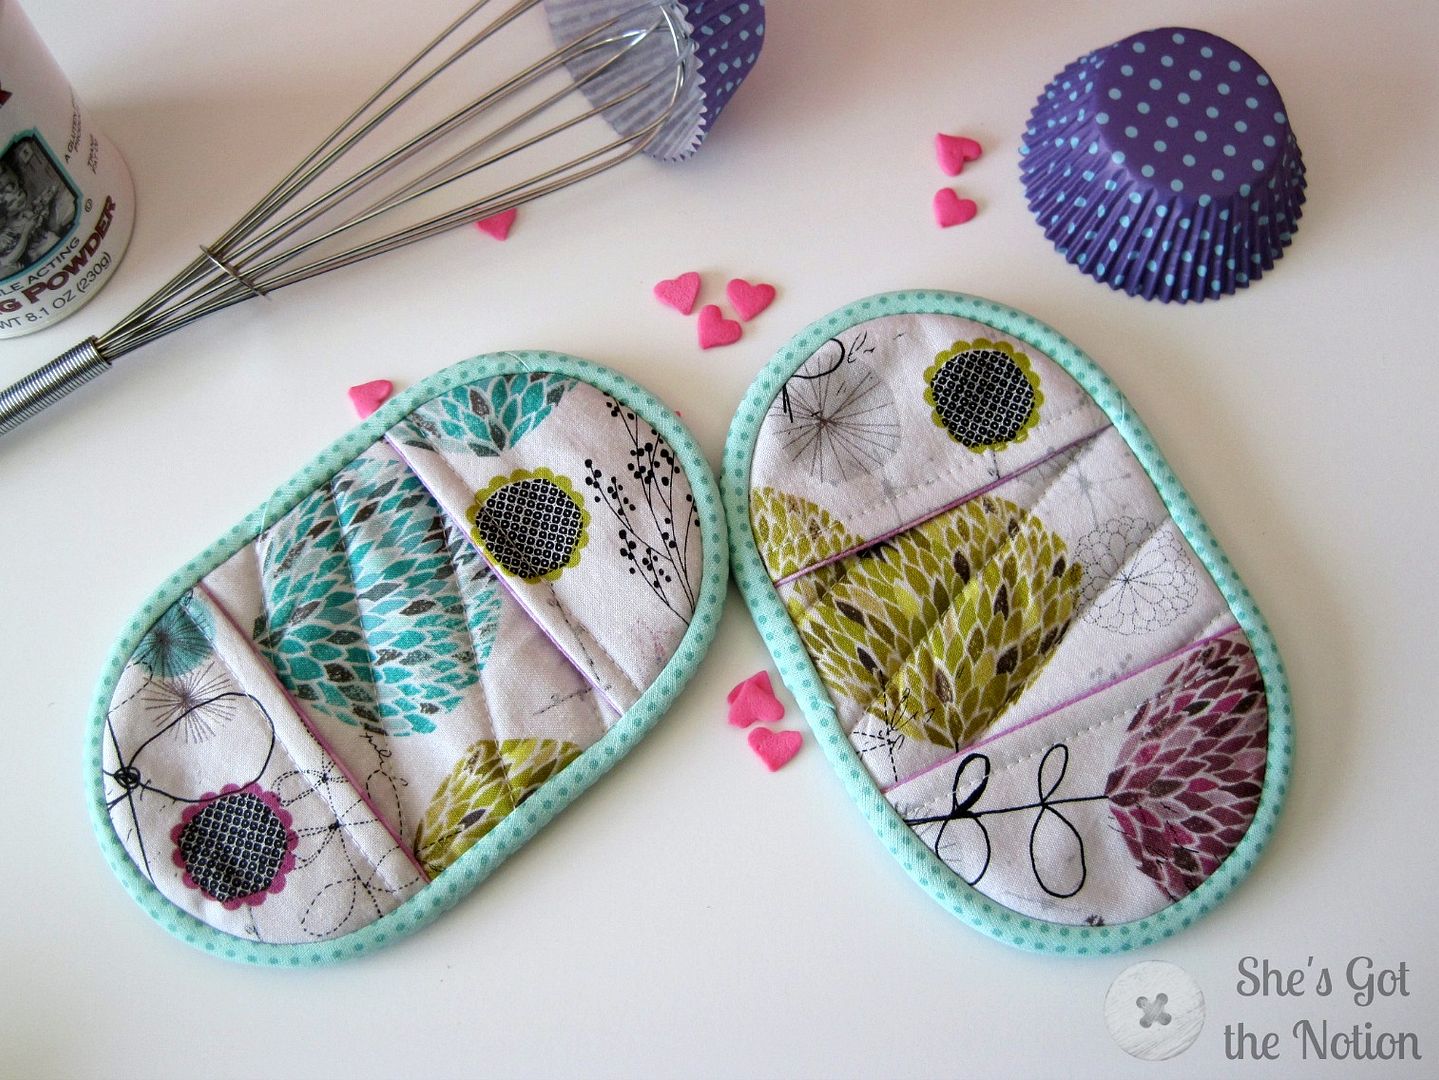
The original potholders without the hanging loop.
When I began this blog back in April, I actually promised you this tutorial. I had every intention of making it too. However, when I looked back at the photos I took, they were pretty terrible. I had forgotten a lot of steps and the lighting was bad. I've gotten a *bit* better in that past seven months, so here you go! This tutorial is for the advanced beginner or intermediate seamstress. It's not exactly a quick project, but I think they make a great gift. I made several pairs of these as gifts last year for Christmas and they went over pretty well. I love how you can just use scrap fabric or fat quarters and make each pair unique. I've upgraded them this year too. Version 2.0 has loops so they can be hung up on hooks in the kitchen for easy access.
.............
Before you begin, you need to take a fat quarter or rectangle of 100% cotton fabric and turn it into bias tape. It's easy and I have the fat quarter to bias tape tutorial to show you how. You can leave your bias tape single-folded for this project.
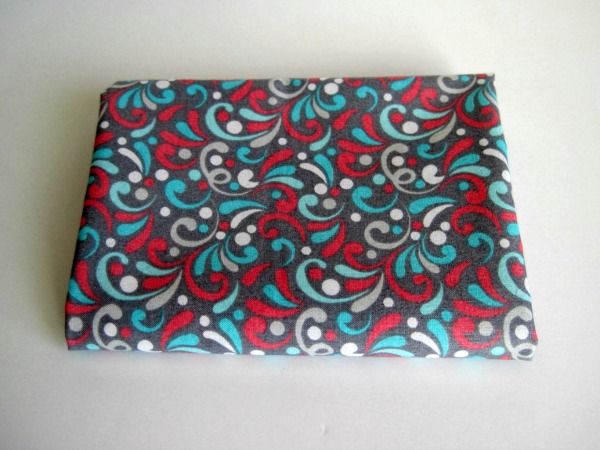

That is nearly 6 beautiful yards of bias tape from just one fat quarter.
The reason it's important to make your own bias tape is that the store bought kind is usually a cotton/poly blend. 100% cotton can withstand higher heat (think of your iron settings) so it's safer to use on potholders. I bought a fat quarter bundle and choose 3 of the fat quarters to make these pot holders. One I used to make bias tape and the other two I used to cut pieces for the potholders. The two fat quarters will cut enough pieces to make 3-4 potholders, depending on whether you need to fussy cut a graphic pattern.
Next, you need to print the potholder template.
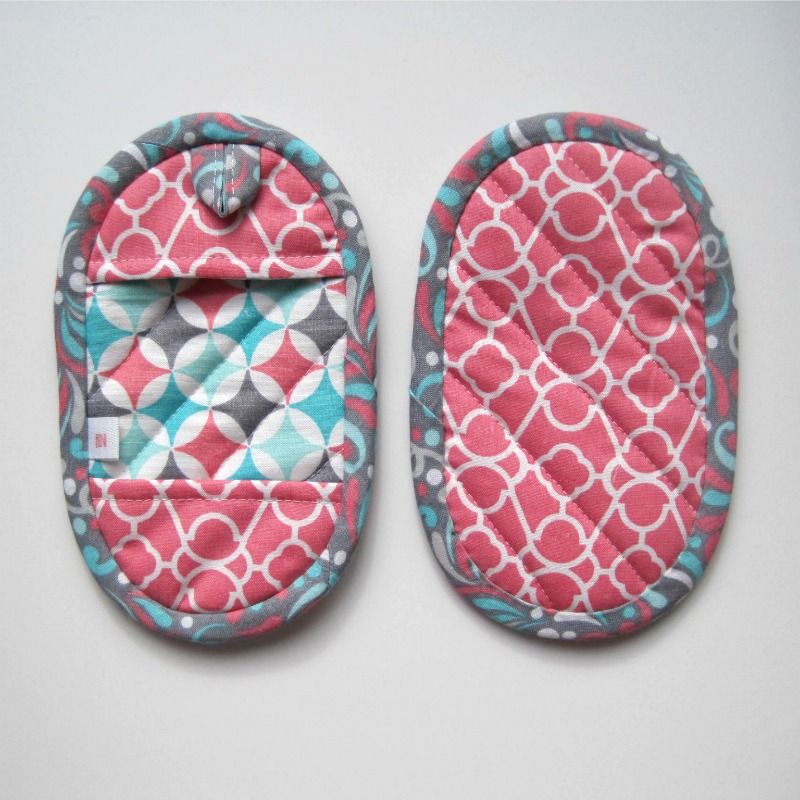
The finished potholders measure 4" x 7".
MATERIALS NEEDED:
* Insul-bright lining reflects heat back to the source so it's great for potholders and keeps your hands from getting burnt. You can buy it from my link below (associate link).
CUT THE PIECES
I have to warn you that this project involves a lot of cutting. I like to make several pairs of these at once and just dedicate a day to cutting. Doing it in front of the tv also helps pass the time since it can be a bit tedious.
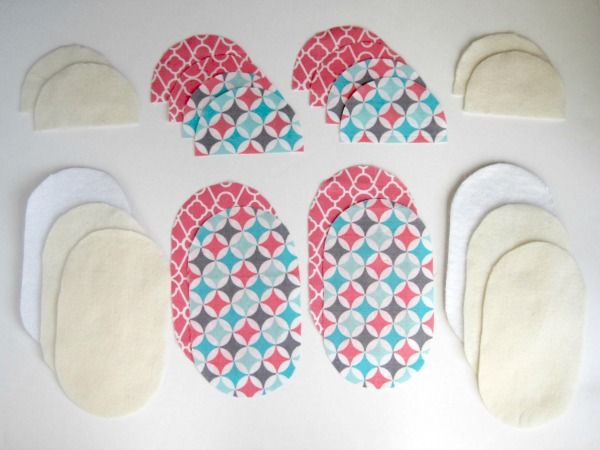
For ONE PAIR of potholders, cut:
From fabric:
From cotton batting:
From Insul-bright:
Whew..yes that's all for just one pair. This is way I dedicate a day just to cutting because I usually don't feel like doing much afterwards.
ASSEMBLE THE POCKETS
Now it's time to sew!
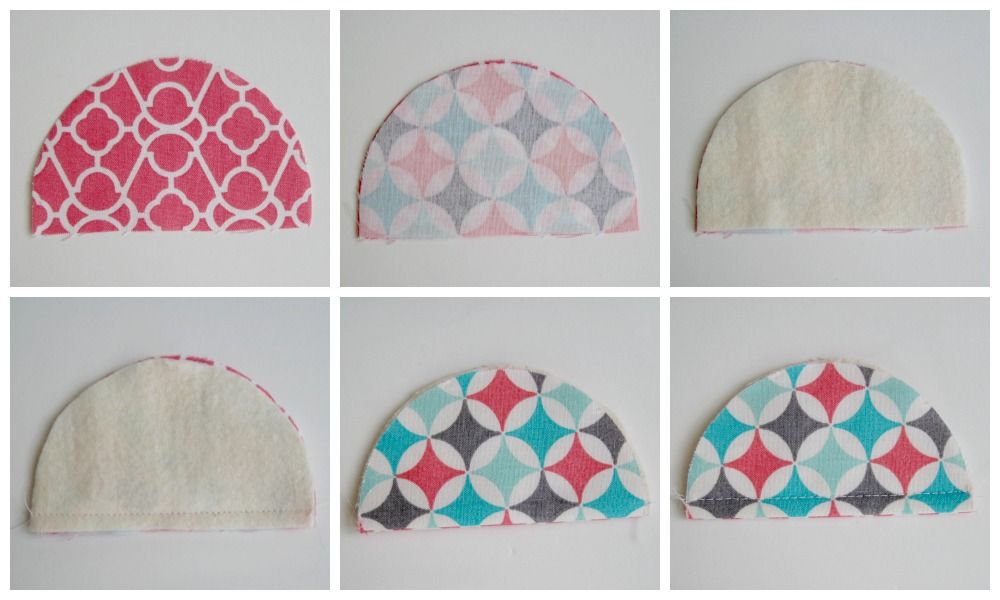
Lay 2 potholder pocket pieces right sides together, and lay a cotton batting potholder pocket piece on top. Sew with a 1/4" seam allowance along the flat edge. I pin and sew with the fabric up to help prevent the batting from shifting. Open the pocket piece right sides out and press. Topstitch 1/4" away from the edge.
Repeat for the other pocket pieces.
ASSEMBLE THE BODY
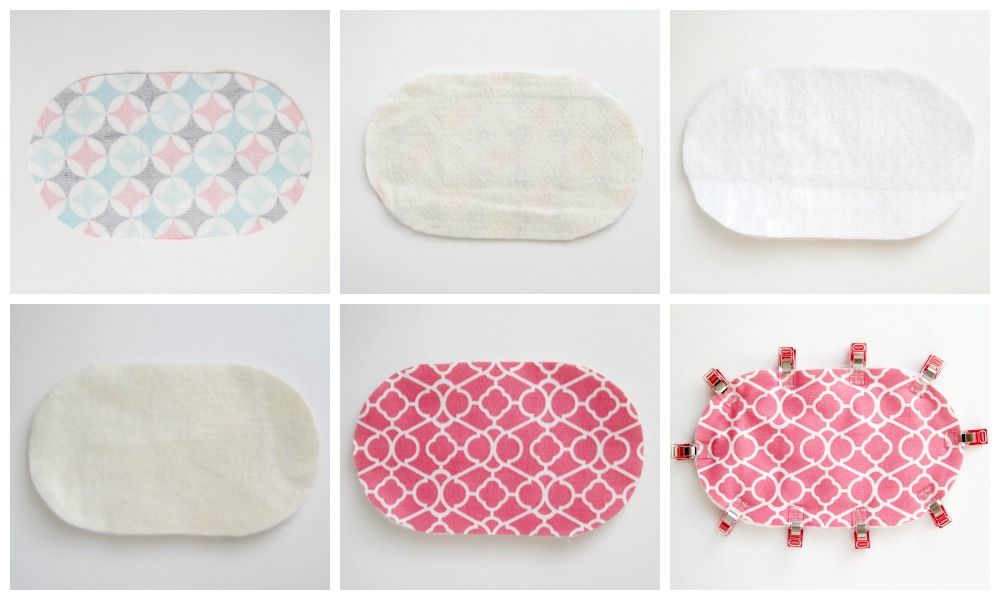
Layer the following potholder body pieces: fabric wrong side up, cotton batting, Insul-bright, cotton batting, fabric right side up.
QUILT THE BODY
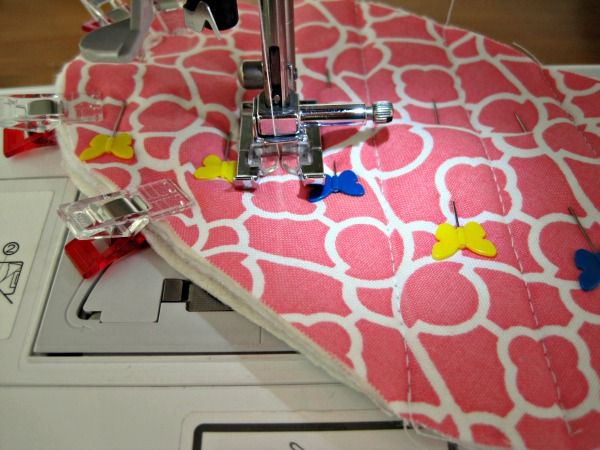
Now it's time to quilt your potholder sandwich. Clip, pin, or baste the pieces together to minimize shifting. I clipped the edges and used pins in the middle. Mark lines at a 45 degree angle about 1" apart. If you have a quilting guide you can use that instead. Sew along the lines.
Repeat for the other body pieces.
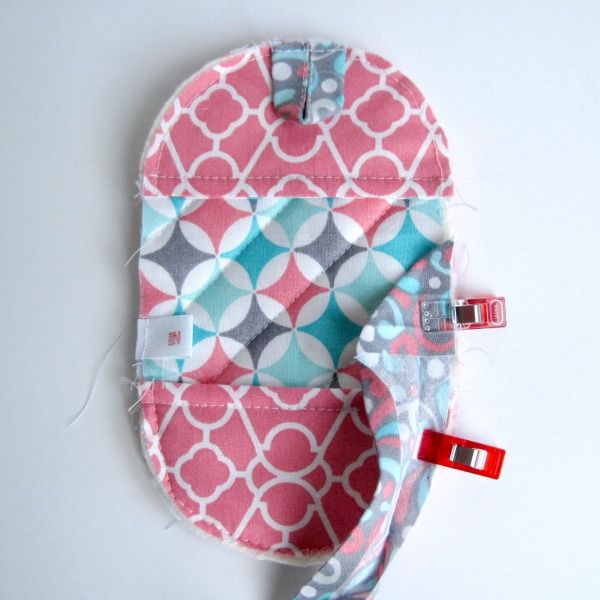
ASSEMBLE THE POTHOLDER
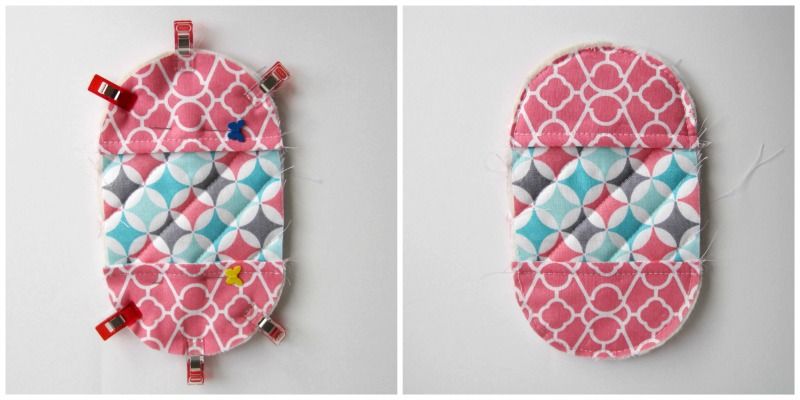
Lay a pocket piece on each end of the potholder. Use a clear ruler to help line them up straight. Pin or clip into place and baste close to the edge.
Repeat for the other pocket and body pieces.
ADDING THE LOOP AND TAG
These steps are completely optional, but they add a nice touch. This is when you can add a loop to hang your potholders and a tag to personalize it.
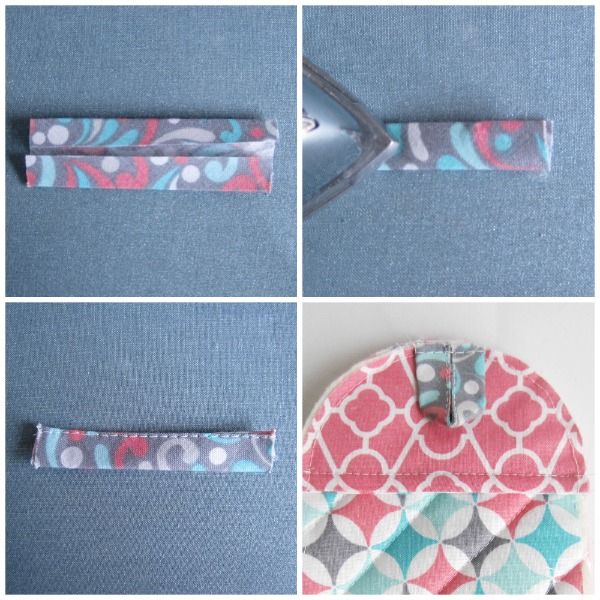
Cut a 3 inch piece of bias tape. Fold in half lengthwise and edgestitch closed. Create a loop and align the raw edges to the top of the potholder. Sew into place close to the edge.
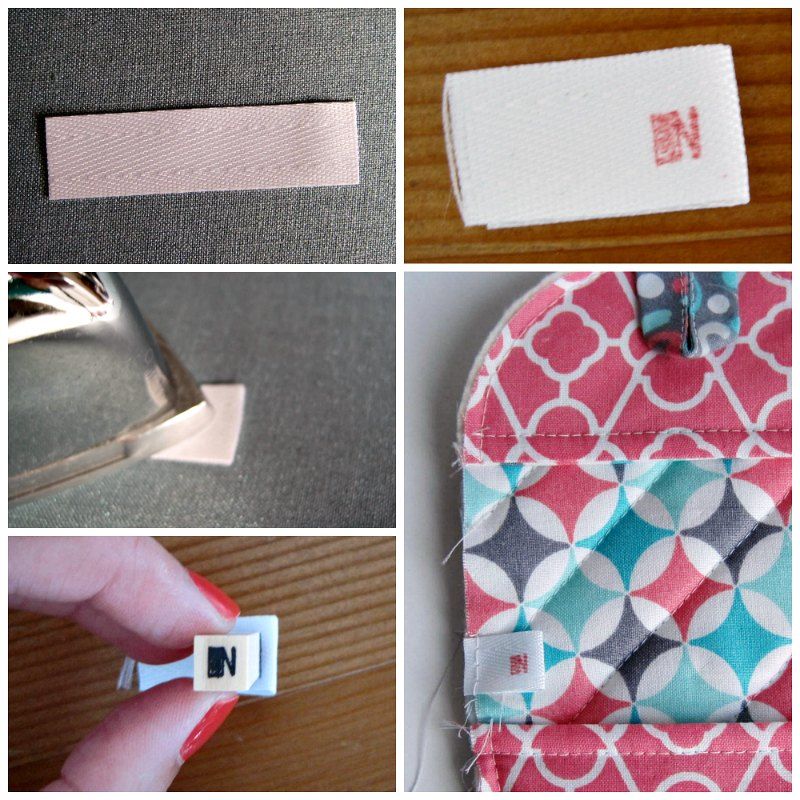
To make a tag, I cut about a 2" inch piece of 1/2" twill tape. Fold and iron the twill tape in half. I have an alphabet set of letter stamps (you can find these in the scrapbook sections of craft stores). I use the letter 'N' for Nicole and Notion. I use regular stamp ink since the potholders won't be washed much. If you have fabric ink, then you can use that too. Stamp the letter of your choice close to the folded edge and let dry completely. Lay a piece of scrap fabric on top of the tag, and iron the tags. This will set the ink. Sew the tag into place close to the edge.
SEW ON THE BIAS TAPE
Open your bias tape and align the edge of bias tape wrong side up along the edge of the potholder. Fold the end down at a 45 degree angle as shown. This helps create clean finish. Sew into place along fold line. Shorten your stitch length to help sew around the curves. Overlap the bias tape by about 1/2" to finish and cut off excess.
Repeat for the other potholders.
FINISH THE BINDING
Fold your bias tape over to the other side and clip or pin into place. Here's where I might lose you. I don't finish the bias tape by machine. Yup, I hand sew the bias tape into place. I think this is the neatest way to do it and I like the clean look of not seeing the stitches. Hand sewing is relaxing to me so I like to do it.

Now, if you loathe hand sewing and are confident in your ability to machine sew bias tape along a curve, than go ahead and machine topstitch the bias tape into place. More power to you! My machine sewn bias tape usually only looks good on one side and a total mess on the other.
Repeat your method of choice for the other potholders.
Give your potholders a final press and you're done!
Let me know if you have any questions. If you make a potholder using this tutorial, I'd love to see your finished work! Leave a comment, find me on Instagram or Twitter, or like my Facebook page.

No comments:
Post a Comment