
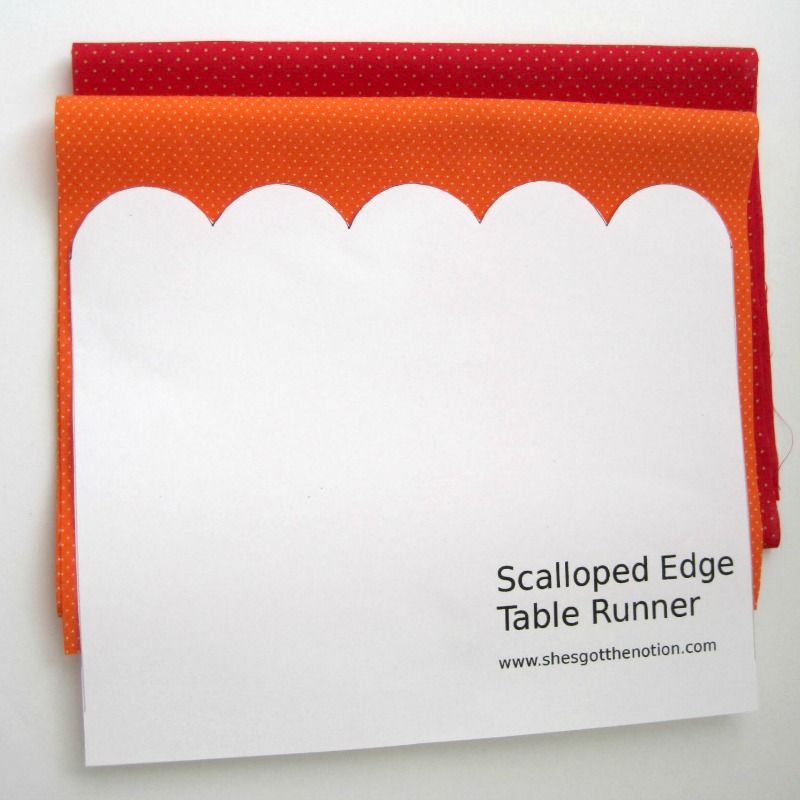
- Cut out the scallop template. Make sure you don't use your sewing scissors for this!
- Cut out your fabrics to the measurements you determined above.
- Pin your fabric rectangles right sides together. Sew together the long sides with a 1/4" seam allowance. Leave an opening on one side for turning (mine was 6"; you want it big enough to stick your arm in to help turn out the scallops).
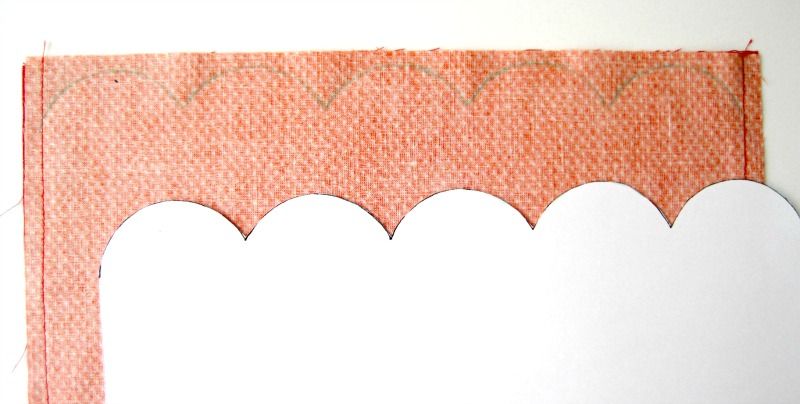
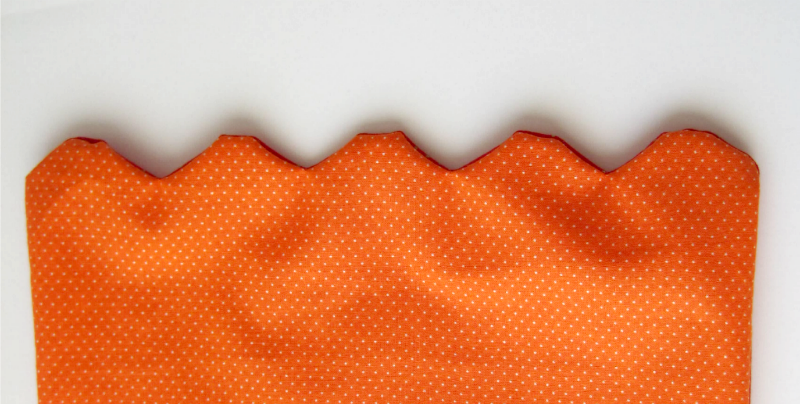
- Line up your scallop template inside the sewn seams about 1/4" down from the unsewn edge. Using a tailor's pen or chalk, trace the scallop pattern onto your fabric.
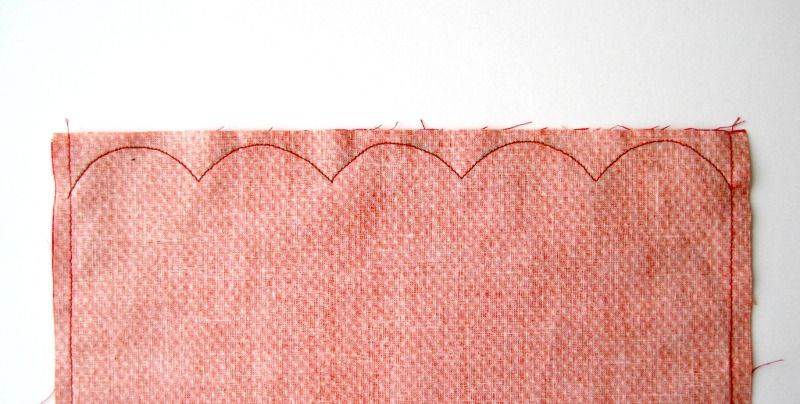
- Set your sewing machine to a short stitch length (I used 1.8mm). This will make it much easier to sew the curves. Slowly sew along the scallop lines.
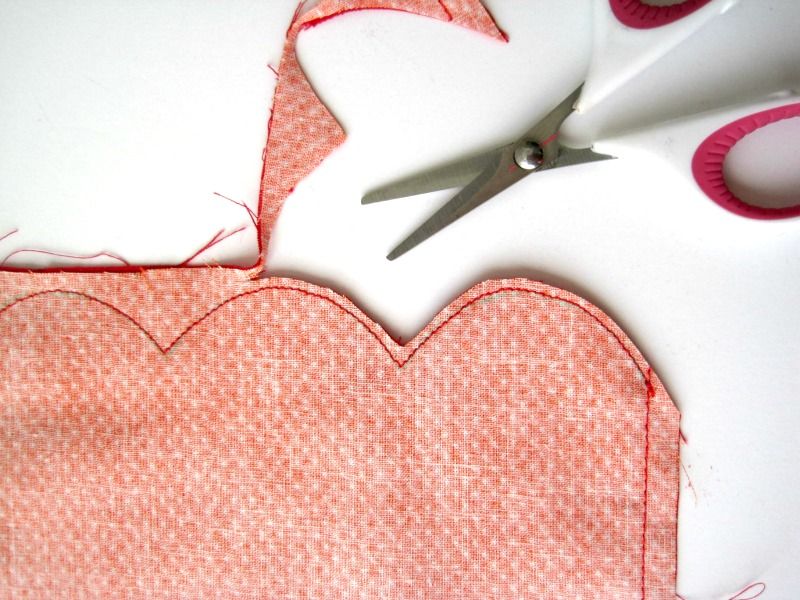
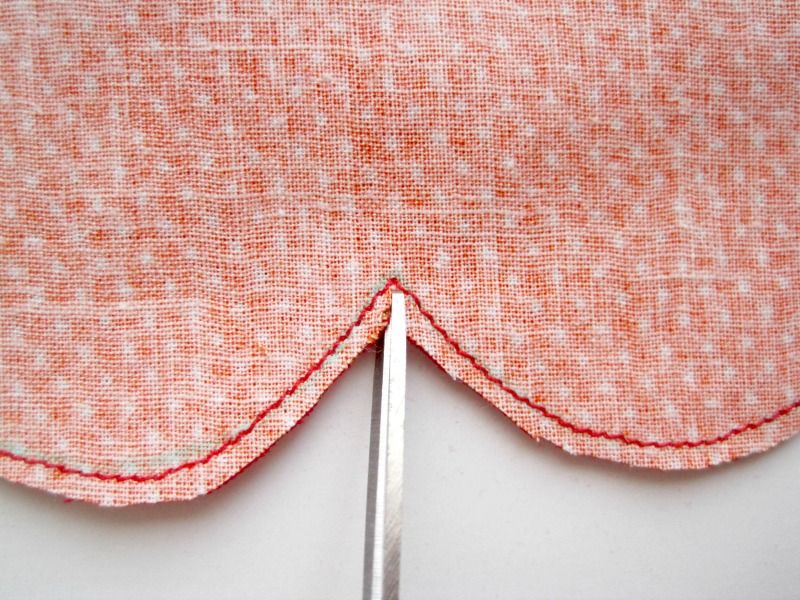
- Cut off excess fabric 1/8" away from sewn lines (it helps if you have little scissors to use). Carefully clip in between scallops, as close as you can without cutting the stitches. This will make it easier to turn the scallops.
- Turn your table runner right side out. It won't look too pretty yet, this is where ironing is important!
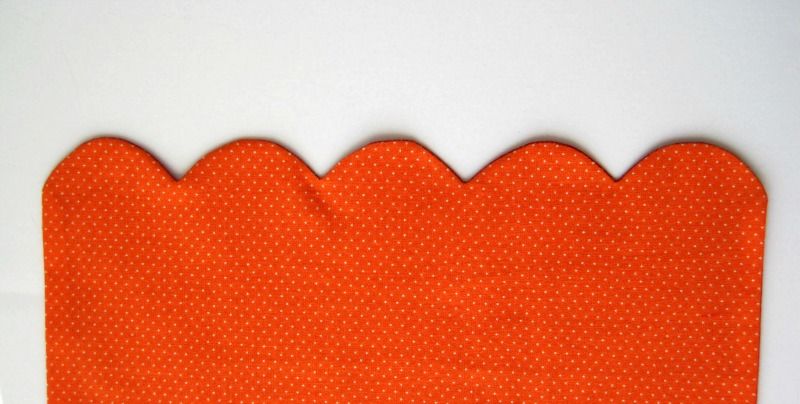
- Use a point turner if you have one (in a pinch, you can use a bone folder or knitting needle or anything with a blunt edge), and run it back and forth along the scallops. Carefully iron the scallops. Go slow, it will look much better if you take your time.
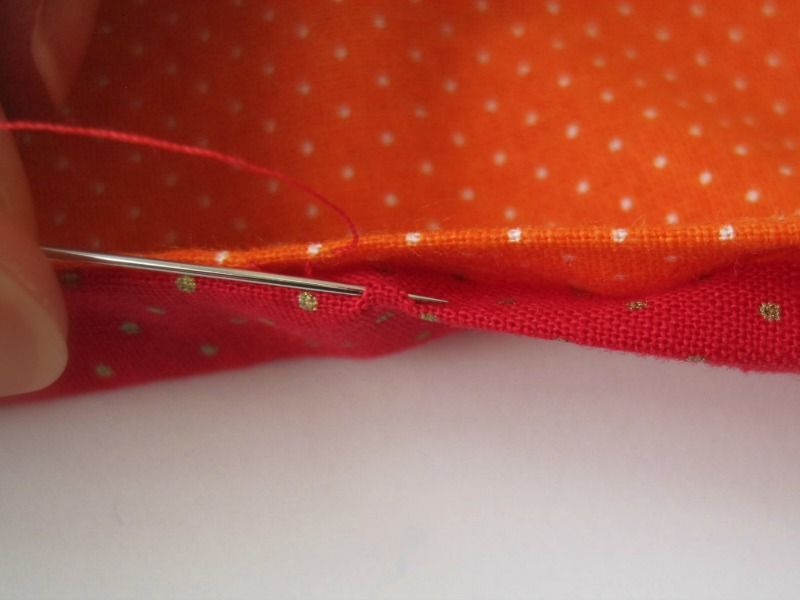
- Slip stitch the opening closed by hand.
- Give your table runner a final press, and you're done!
If you make your own table runner, I'd love to see pictures of the fabric you used! Happy sewing :)
A pin-able image for you
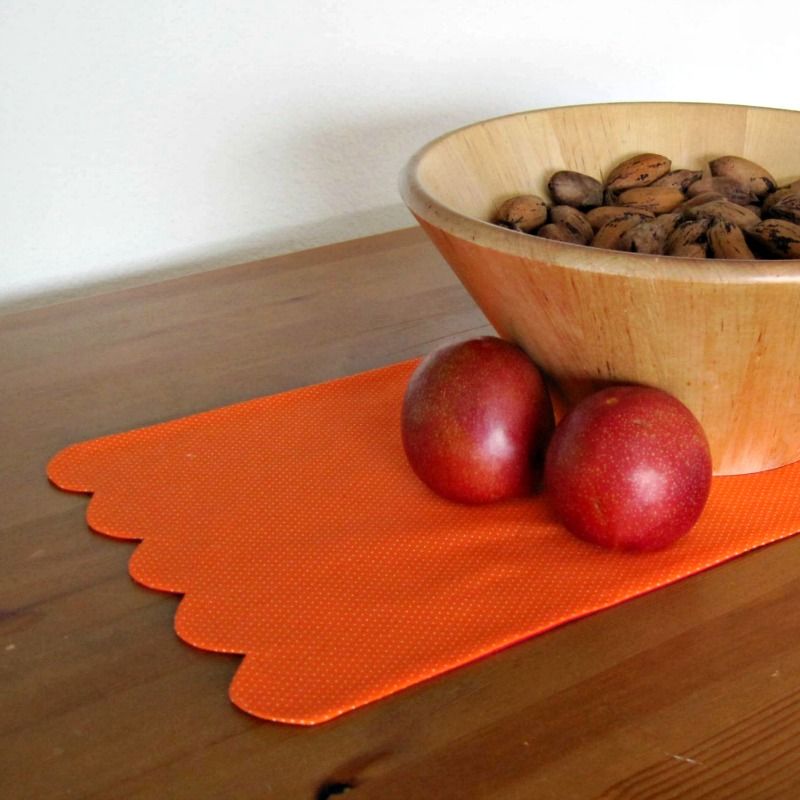
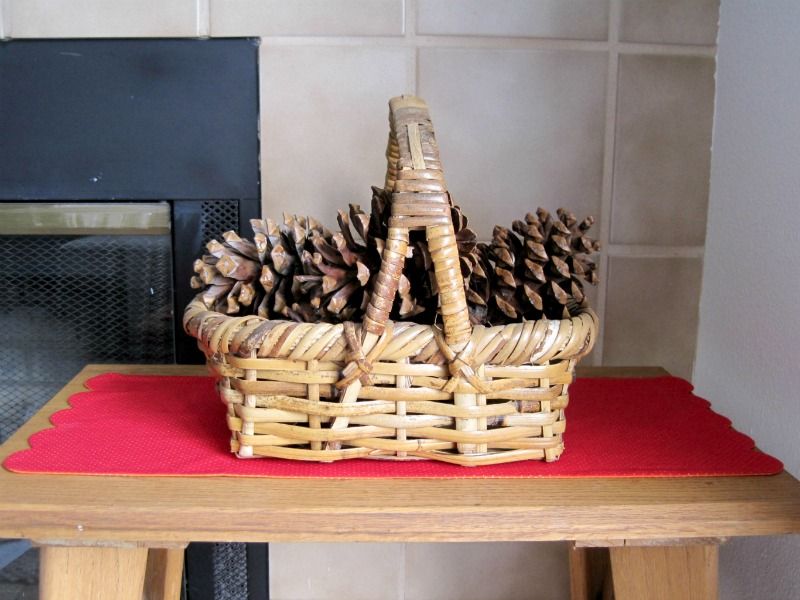
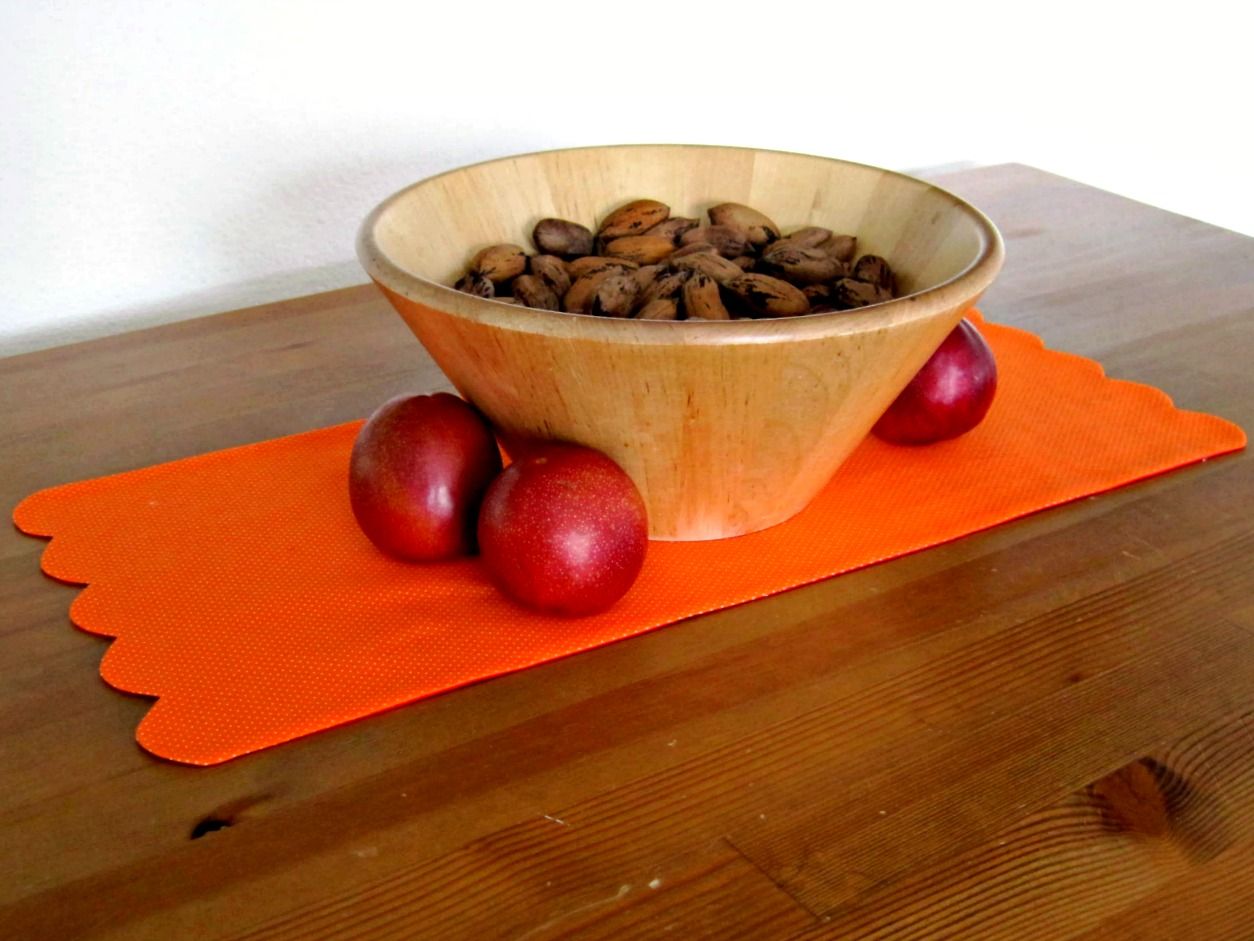
I have to confess that I am not that great at decorating for the seasons. Part of that has to do with the very limited amount of storage space I have. I don't want to devote much space to storing off-season decor when I'd rather use that space for other things...like fabric and yarn! I did want to get into a more festive fall mood though, so I decided to make a table runner. It takes up very little space, and can easily be folded up and stored.
It gets even better, though, because I decided to make it reversible. I had some cute orange polka dotted fabric that I thought would be great for Halloween and Thanksgiving. And while looking through my fabric stash, I found a red fabric with little gold polka dots. I thought be would be perfect for Christmas. And Valentine's Day. And heck, maybe even Memorial Day and 4th or July. That means I could get a lot of year around use out of just one table runner (and it would spend less time taking up storage space).
Instead of a standard rectangle, I wanted to give the table runner a scalloped edge detail. This is an easy project to sew. It is suitable for the beginners, as long has you're comfortable already with sewing curves. And another great part about this table runner being reversible is that there is no hemming involved and makes sewing up these pretty scallops a cinch. I also turned my scallop template into a pdf that you can use and save time. Yay!
PRINT TEMPLATE
Make sure you print at 100%! The width should be 10" with a 2" scallop repeat pattern.
The next step is to decide how big you want your table runner to be. The rule of thumb for an accent table runner is 1/3 the width and 1/3 the length of the table. I, however, have a tiny Ikea table and that would have made my runner smaller than my placemats. Instead, I decided on 1/3 the width, and 1/2 the length of the table. So my table runner is 10" x 23". This worked great for me because it also fits a small side table I have.
Next, you need to add your seam allowances to determine what size to cut your fabric. My seam allowances were 1/4", so I add 1/2" to each side.
So I need to cut my fabric into 10 1/2" by 23 1/2" rectangles.
NOTE: If you want the width of your table runner to be more than 10" (which you probably will if you have a normal sized table), print out 2 copies of the scallop template. Cut out both templates and tape them together at the desired width. Since the scallops are in increments of 2", your width can be 12", 14", 16", 18" or 20".
Now on to the tutorial...

No comments:
Post a Comment