
I've been trying to get into the habit of exercising more often. Sometimes I have hard time motivating myself to workout, but listening to music definitely helps. Of course, then there is the awkwardness of trying to figure out what to do with your phone. Carry it? Yeah right, I'd end up dropping it. Stick it in your sports bra? Ew, that's no places for a phone! I considered buying a cheap armband one online, but I have such tiny upper arms I didn't want to take a chance it'd be too big.
Then I decided to try making something myself. First, I tried making an alternative to the armband because, to be honest, they're not the most comfortable to wear. The Sewing Rabbit has a tutorial for making a Running Belt. Unfortunately, it involves sewing with fold over elastic, and my attempt was a bit of a disaster. [Does anyone have any good advice for sewing with fold over elastic??] So I decided to forgo the FOE, but without it my phone just bounces too much in the belt. It still makes a great walking or biking belt though. However, I really want one to be able to run with.
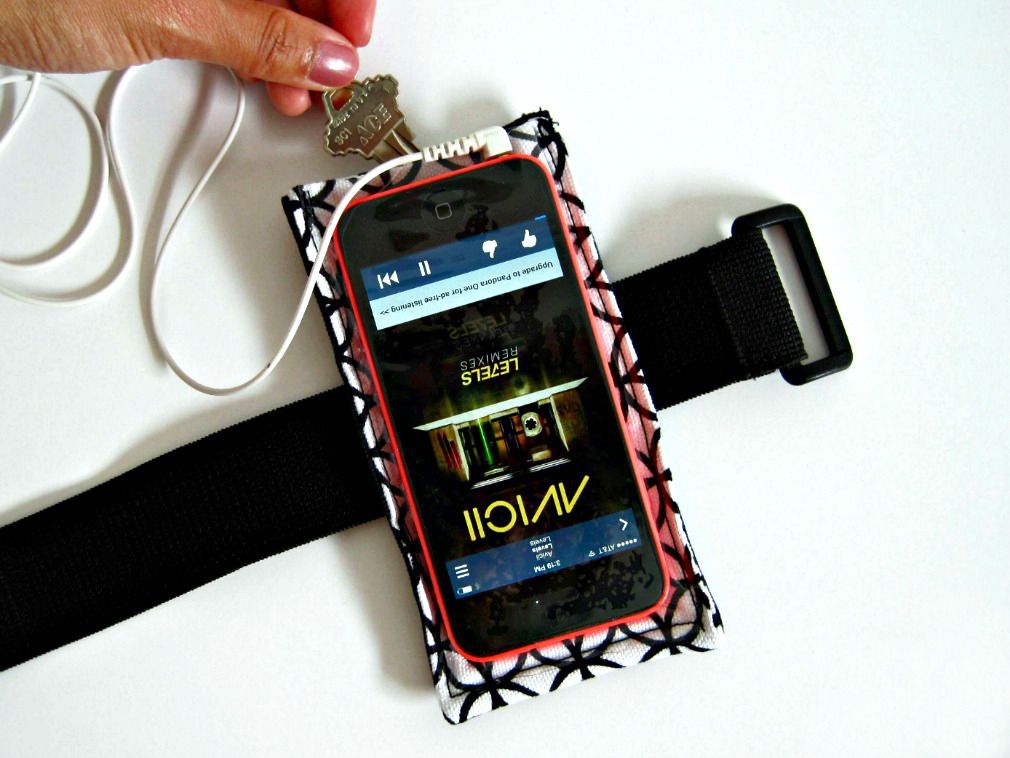
Then I saw a tutorial for sewing touchscreen phone armband using clear vinyl from Melly Sews. I love that you can still access your phone's screen through the vinyl. I have used that tutorial as starting point for mine. I modified it because wanted it to include a pocket to hold a key and an ID or some money. I also decided to forgo the elastic because I salvaged an elastic Velcro strap from an old armband I used to use that I know would fit my arm. You can still use this tutorial with elastic, it is just not sewn into the armband. I think this would actually make it easier to adjust or change the elastic when it wears out.
Ready for the tutorial? It's pretty simple and quick project. I have given measurements to fit an iPhone 5, so you may need to adjust it to fit your phone. I used two different fabrics, a print for the front and a black canvas for the back.
Materials Needed
If you're interested in your own elastic hook and loop strap, you can buy your own in the link below. It comes in 3 sizes (approx. 9.66", 11.8", 15.7"). The middle size would be suitable if you have tiny arms, and the larger size would fit most arms. The one I have is about 16", and it's almost too big on my arms.
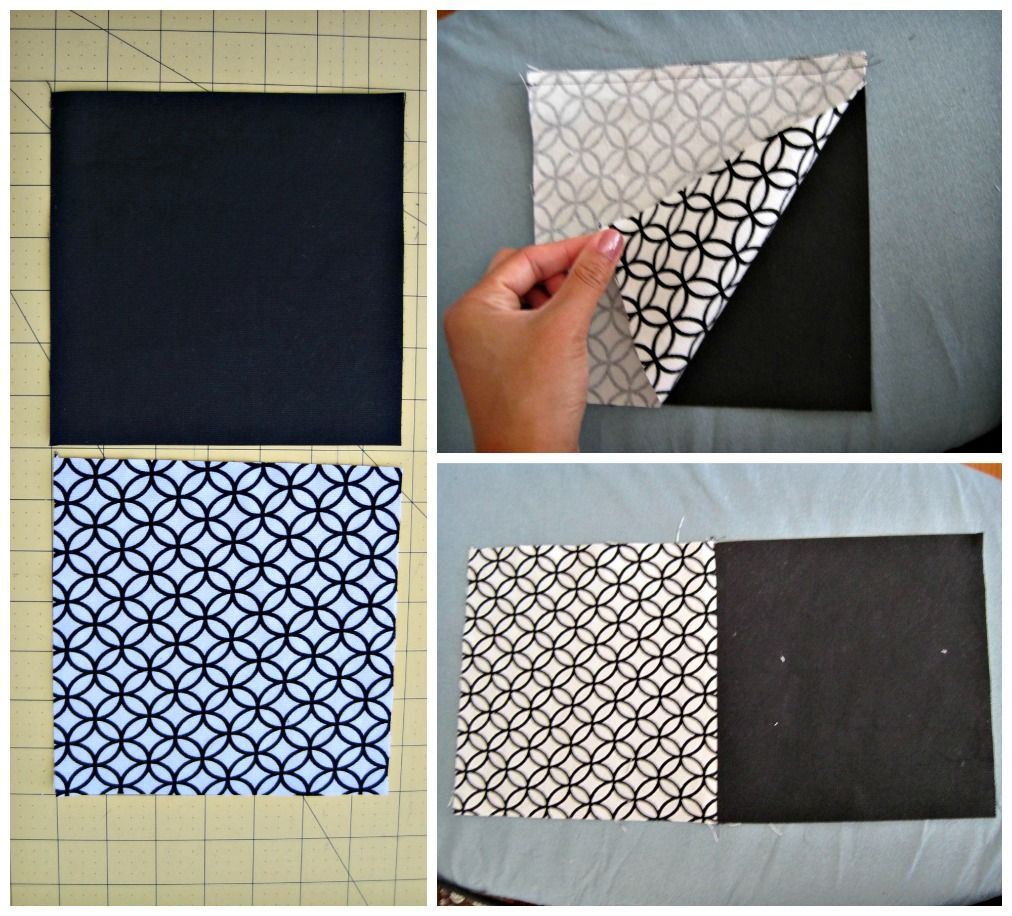
- Cut a 7" wide x 6.5" high rectangle from both fabrics.
- Sew the pieces right sides together along the 6.5" side with a 1/4" seam allowance.
- Press seam open.
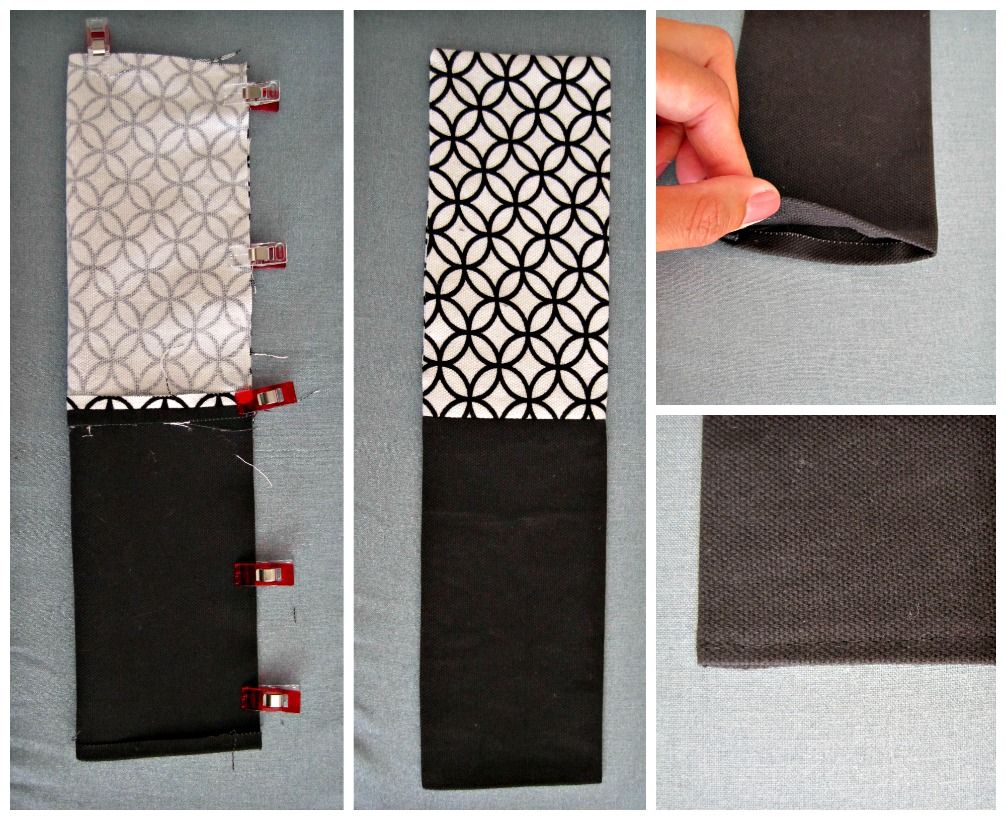
- On the end with the heavier weight fabric (black in the sample), press edge up on wrong side of the fabric by 1/4". Fold fabric in half right sides together as shown, and sew up the side and top with a 1/4" seam allowance (leave edge you pressed up un-sewn for turning).
- Clip the corners and turn fabric right side out. Use a chopstick or knitting needles to poke out corners. Press.
- Sew along the edge of the open end.
Attaching the loops for the elastic

- To make the loops to hold the strap or elastic, I used the selvage from my duck cloth. I won't fray and it reduces the layers of fabric I need to sew. My strap is 1.5" wide, so I cut two 2" selvage pieces and pressed the ends under.
Note: If you selvage isn't the same color or you fabric isn't as thick as mine, you can make fabric tubes to sew on instead. - Mark your fabric for the loops. I centered mine, and placed them close to the edges.
- Sew into place.
Sewing on vinyl and making the pocket
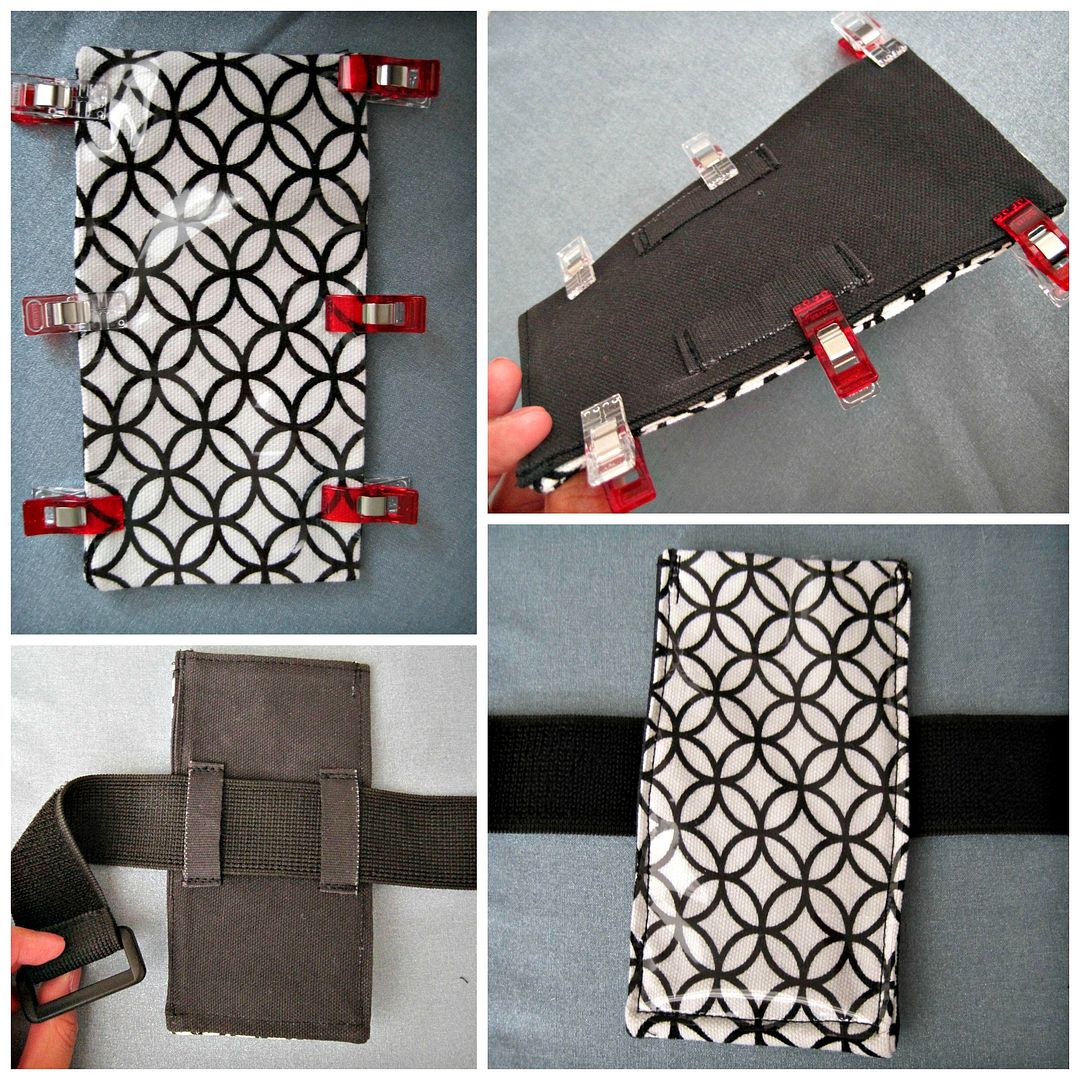
- Fold your fabric in half wrong sides together (the loops should be on the outside) and press flat. Cut a piece of clear vinyl to be the same size as the front of the armband, and place it on top.
- Clip all layers together. (I used Clover Wonder Clips,
but binder clips would work fine too.)
- Switch to a heavy duty needle on your sewing machine. Using a 3-3.5mm stitch length, sew close to the edges along the sides and bottom of the armband. Go slowly, your machine may have some trouble at the beginning depending on your fabric thickness. Leave the top un-sewn to create the back pocket and the vinyl pocket for your phone.
- If using a strap, slip your strap through the loops.
If using elastic, measure a piece of elastic the width of your arm. Insert it into the loops. Overlap the elastic to make a circle and pin or baste. Try it on to check the fit. Adjust as necessary. Sew your elastic together (I like sew together elastic by sewing a rectangle with an "x" in it where the elastic overlaps.
Cutting and assembling the fabric
And you're done! Slip your phone into your new armband and you're ready to go! Well, maybe. You still need to provide your own motivation to go run. But you can do it! Enjoy :).

* This post contains Amazon Associate links. Please see my disclosure policy *
Awesome!! I've got a Craft Gossip post scheduled for later this morning that links to your tutorial:
ReplyDeletehttp://sewing.craftgossip.com/tutorial-exercise-phone-armband-with-a-pocket-for-your-key/2015/01/26/
--Anne