
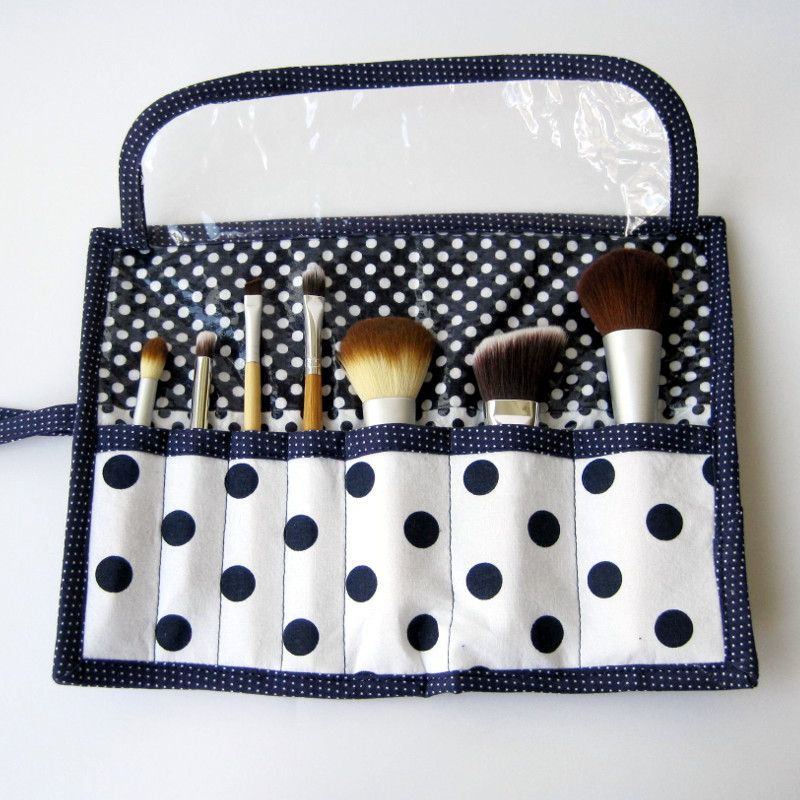
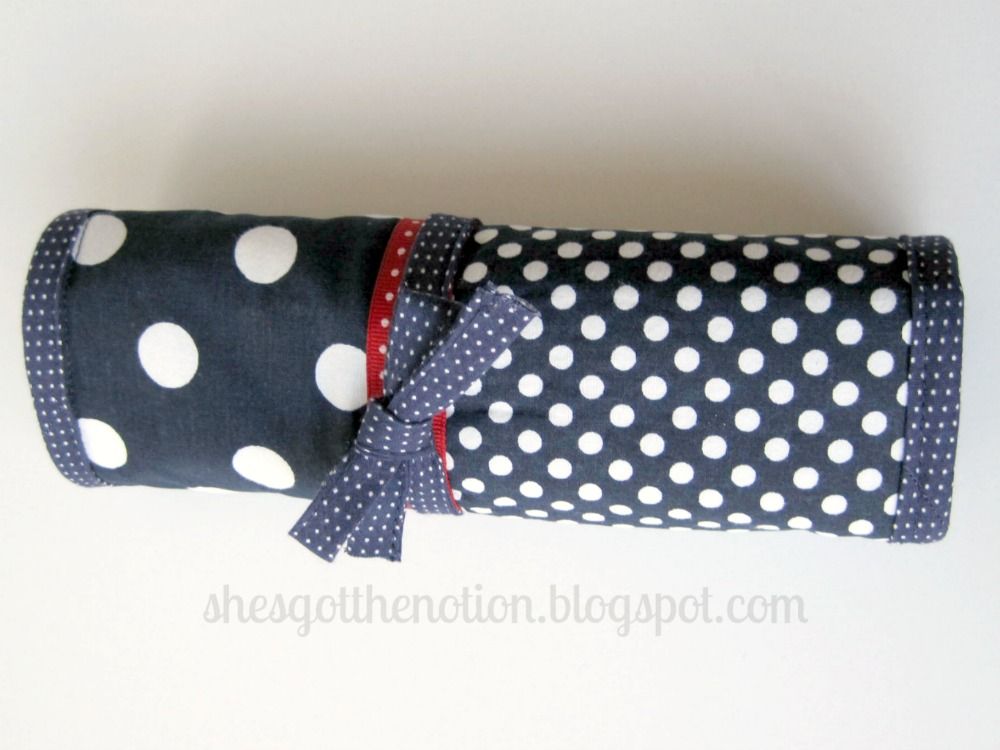
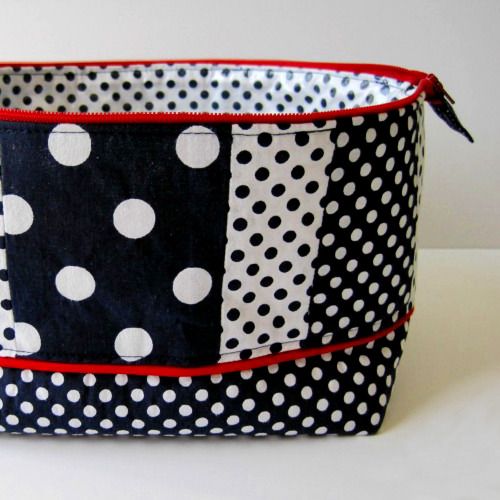
Ready for project two in the fat quarter series? The next item in my travel set is a makeup brush roll.
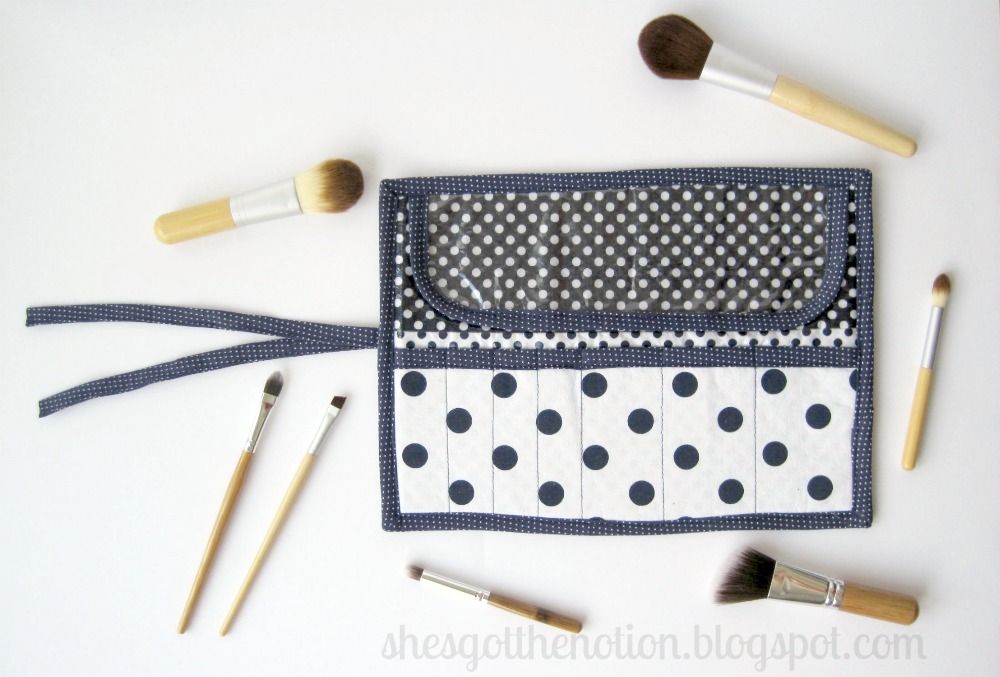
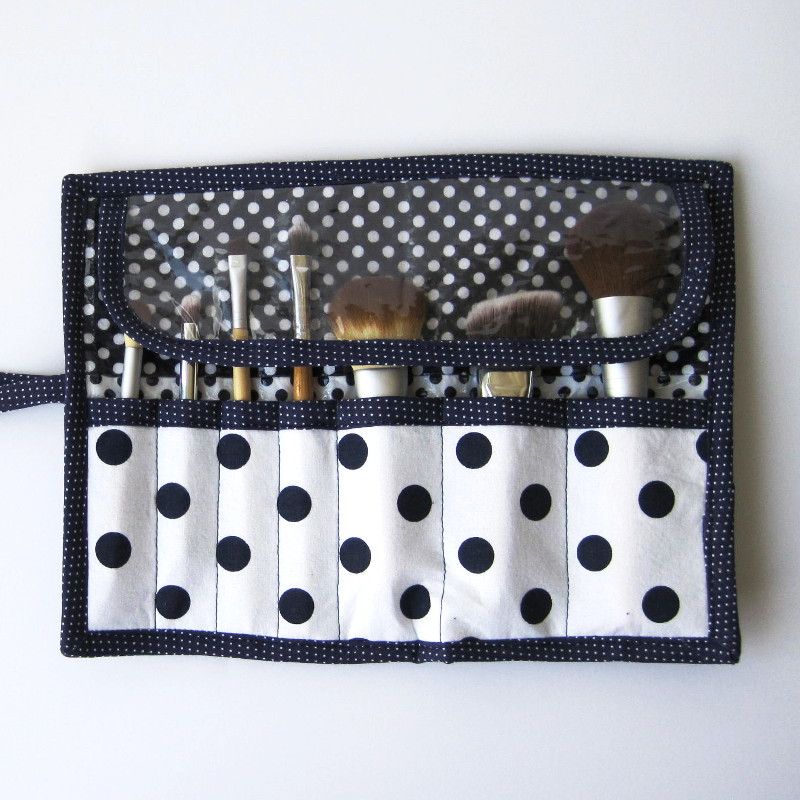
I was inspired by a makeup brush roll tutorial I found that has a flap to keep the brushes from falling out. I was also inspired by an old make-up bag I have that uses a clear vinyl flap to protect the brushes. So I decided to incorporate the clear flap into a brush roll.
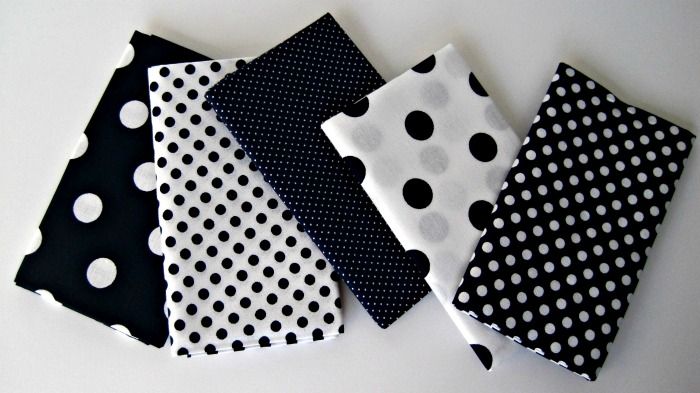
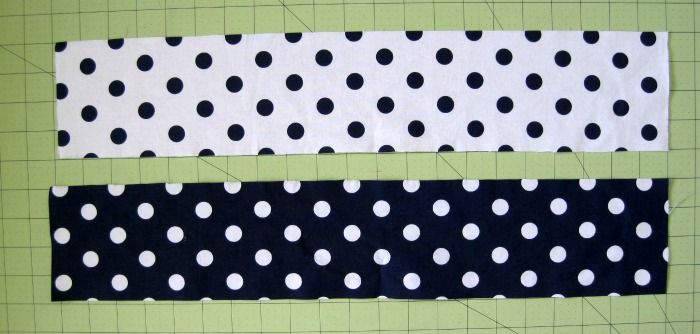
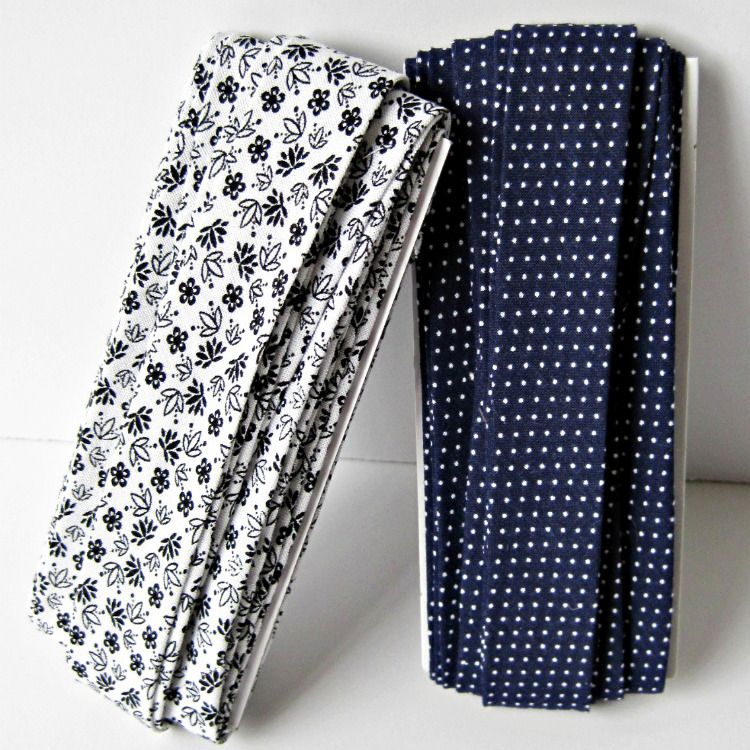
This project uses fabrics from the same fabric quarter bundle I've already used for the bias tape tutorial and the toiletry bag. I used fusible vinyl on the interior for easy cleaning. The bias tape I made from one of the fat quarters is used to line the top of the brush pocket, finish the edges of the brush roll, and as the ties.
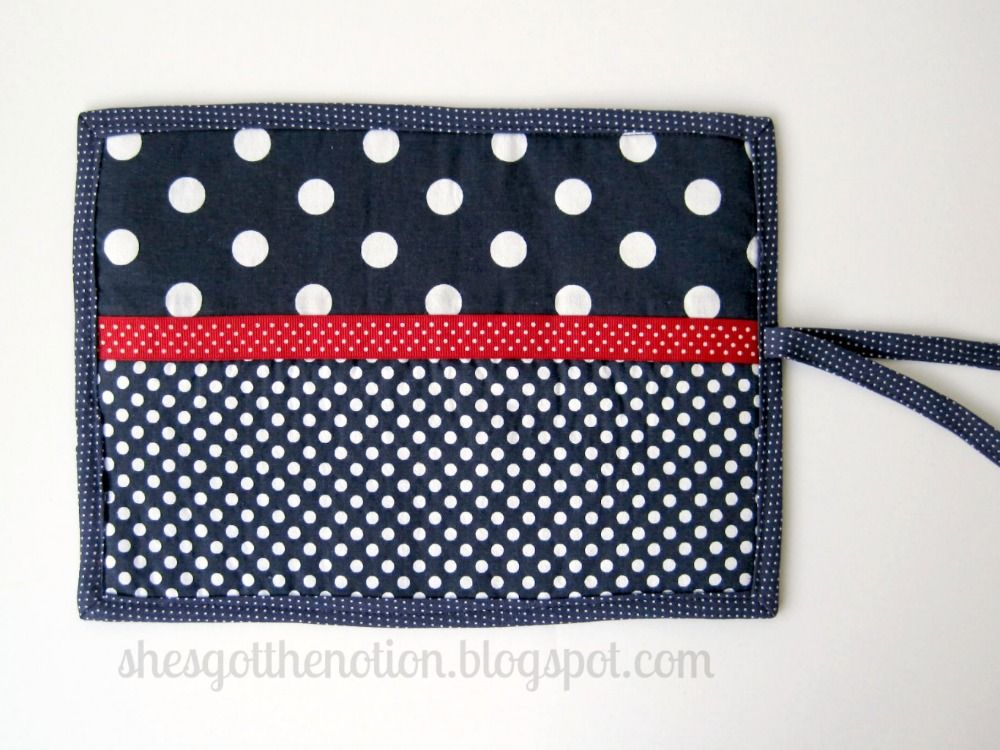
Final dimensions are 11" x 8" unrolled
UPDATE: You can see the cutting layout for all 3 fat quarter series projects HERE.
Materials Needed:
Cutting your fabric:
From your fusible fleece: Cut an 11" x 8" piece
From your fusible interfacing: Cut an 11" x 4" piece
From your fusible vinyl: Cut an 11" x 8" piece
From your clear vinyl: Cut an 10" x 3 1/2" piece
Note: If you are making all the projects from the fat quarter series, make sure you cut from the fat quarters as shown in the pictures. This way you'll have enough fabric to make all 3 projects.
Find the 21" x 4" strips leftover from making the toiletry bag. Cut off an 11" long strip from both.
You should now have two 11" x 4" pieces.
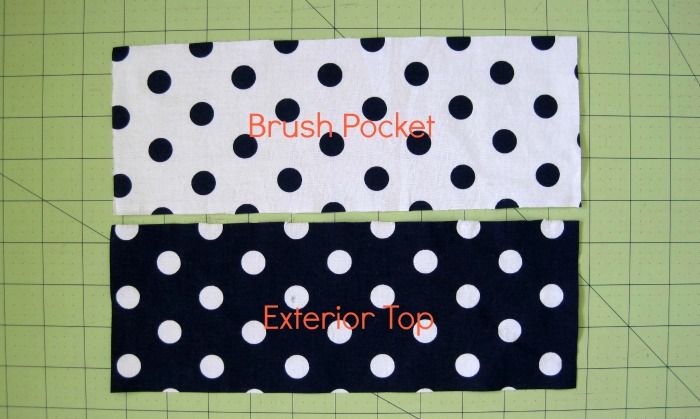
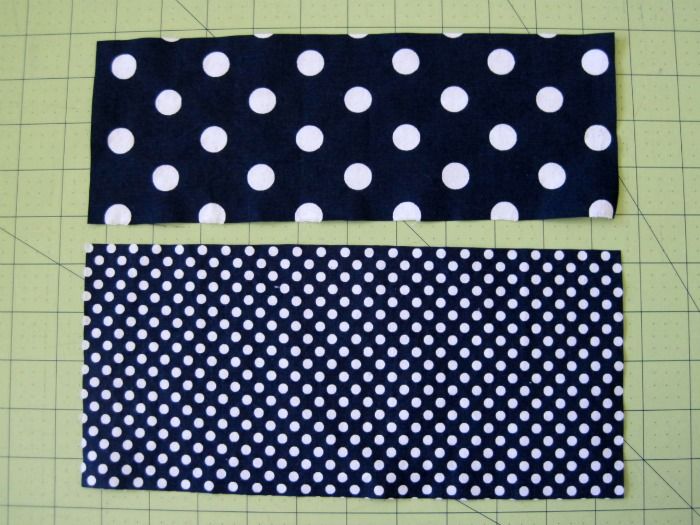
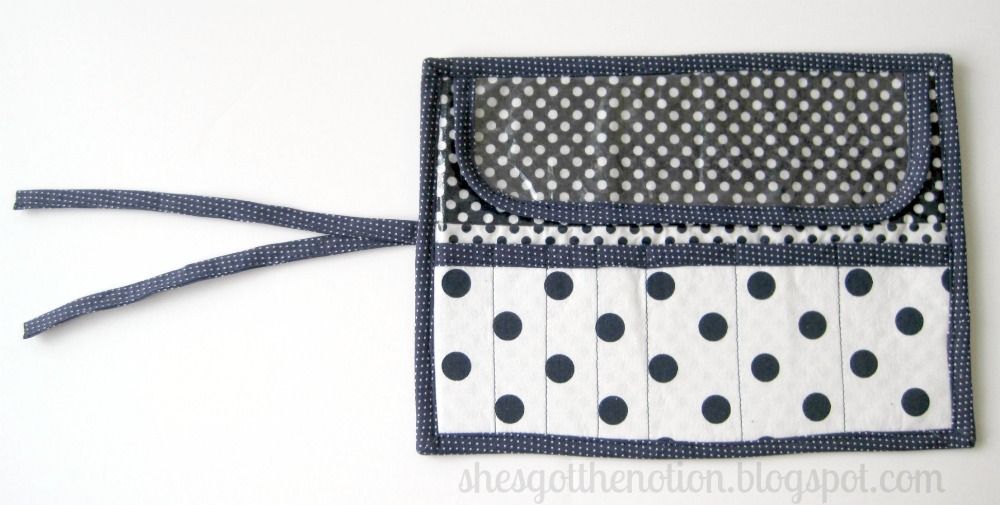
The white with large navy dots will become the brush pocket.
The navy with large white dots will be the exterior top.
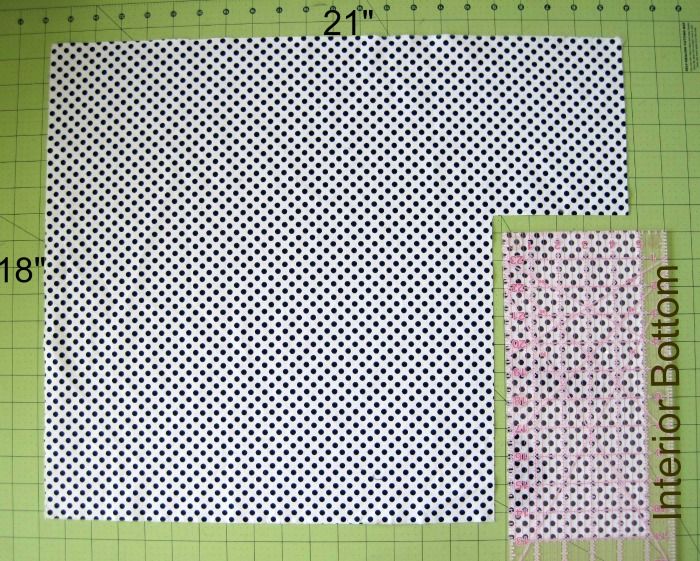
Take your fabric for the interior bottom.
Cut an 11" x 5" piece as shown.
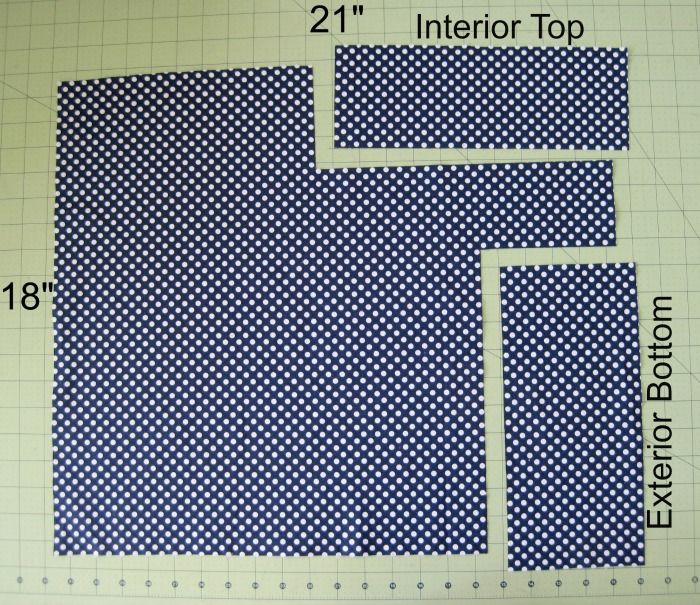
Take your fabric for the exterior bottom and interior top.
Cut a 11" x 5" piece as shown. This is the exterior bottom.
Cut an 11" x 4" piece as shown. This is the interior top.
Sewing the exterior
Find your 11" x 4" and 11" x 5" pieces for the exterior top and exterior bottom.
If you are using ric rac or piping as trim on the outside, mark the seam allowance line, 1/2", down from the top of you exterior bottom piece.
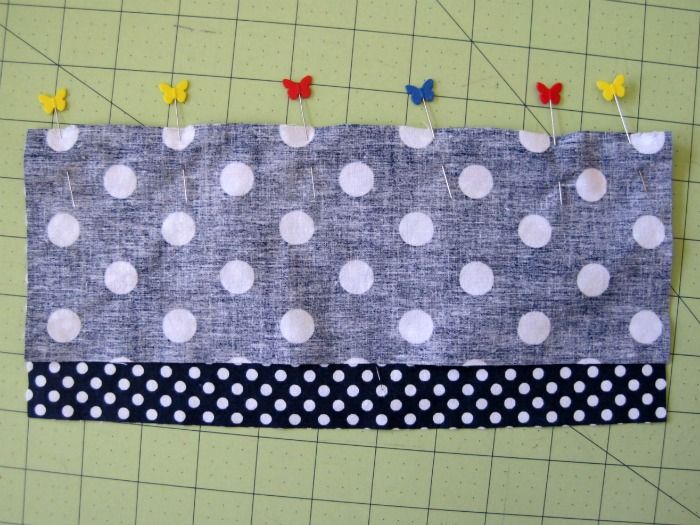
Place your exterior pieces right side together, aligning the edge of the bottom of the exterior top with the top of the exterior bottom (sorry that was a mouthful).
Sew with a 1/2" seam allowance.
If using piping or ric rac, press seam up. If using neither, press seam open.
Topstitch if desired.
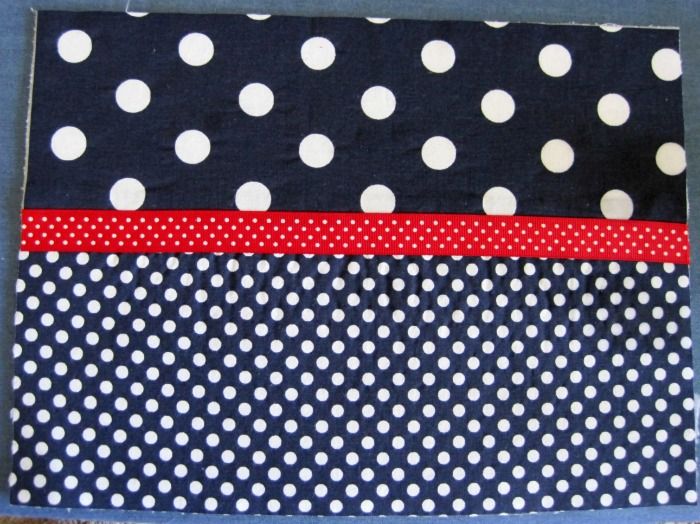
If using a ribbon as trim, you have two options:
Note: If your ribbon is polyester/synthetic, make sure to lower your iron setting.
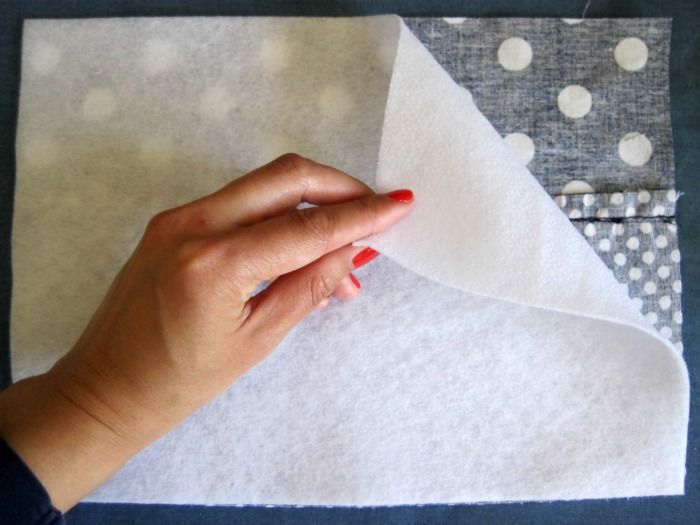
Apply fusible batting to the wrong side of the exterior piece following manufacturer's directions.
Cut an 18-20" piece of bias tape for your ties. Double fold, and stitch in place close to the edge.
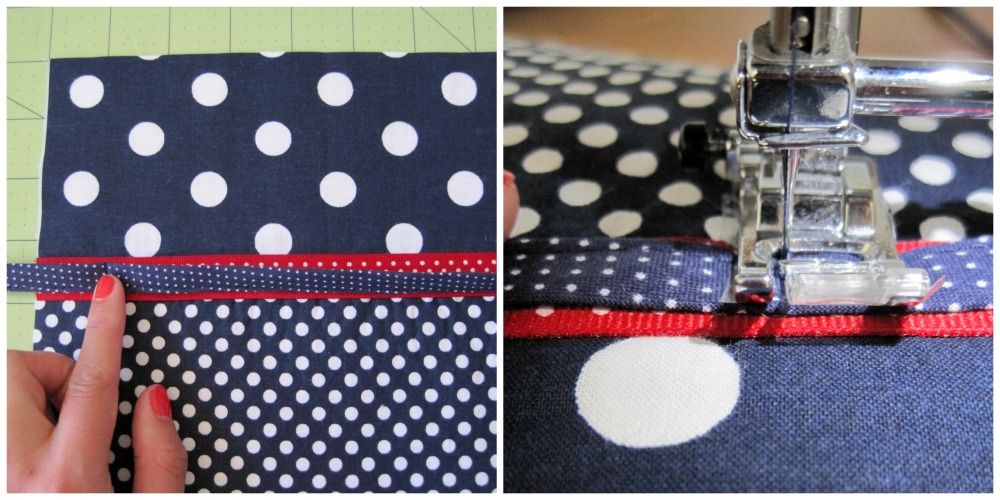
Fold bias tape in half and finger press to mark the center.
Align the bias tape on the right side of the exterior where you want it, about an inch away from the side. I centered mine over my ribbon. Sew into place along crease.
Note: Think carefully where you want your ribbon. I wanted it on the left side of the interior, but accidently put in on the left side of the exterior (which will be the ride side of the interior) and had to go back and move it later.

Pin your ties so they stay out of the way for the rest of the project. Set aside.
Sewing the interior
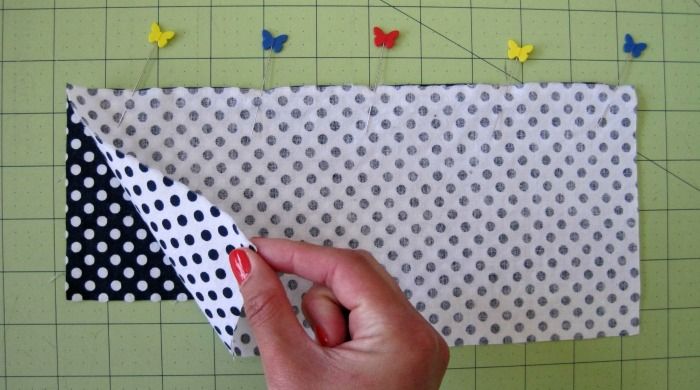
Take your interior top and interior bottom pieces and pin right sides together.
Sew with together with a 1/2" seam allowance.
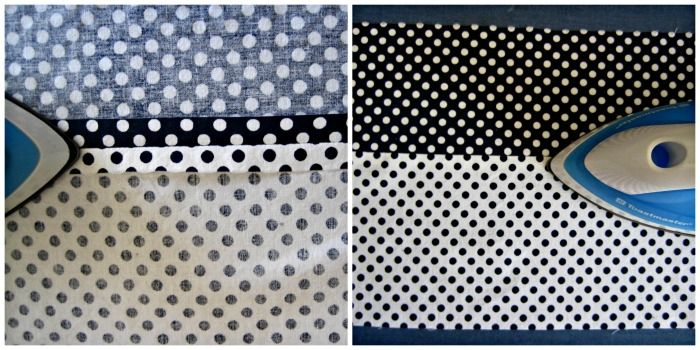
Press seam open.
Flip over and iron flat.
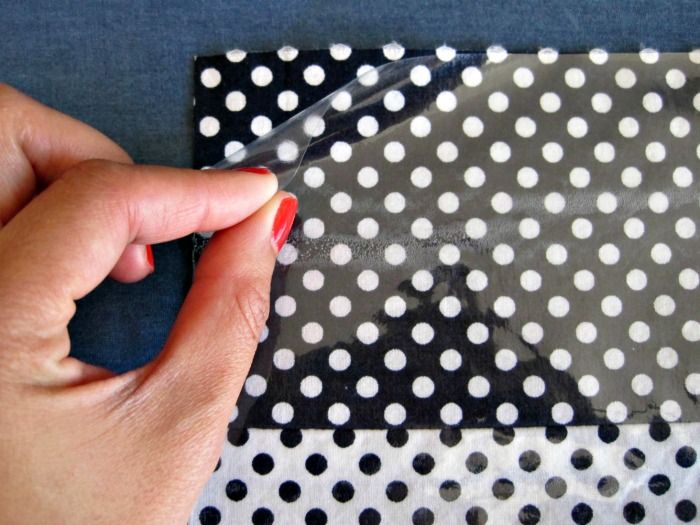
Apply fusible vinyl to the right side of the interior piece following manufacturer's directions.
Making the brush pocket
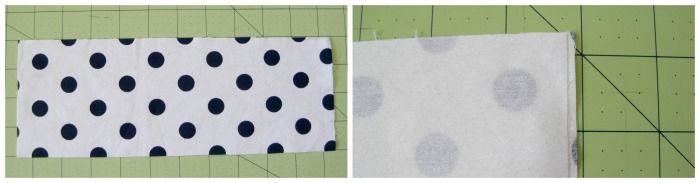
Find the 11" x 4" brush pocket piece.
Fuse the fusible interfacing to the wrong side according to manufacturer's directions.
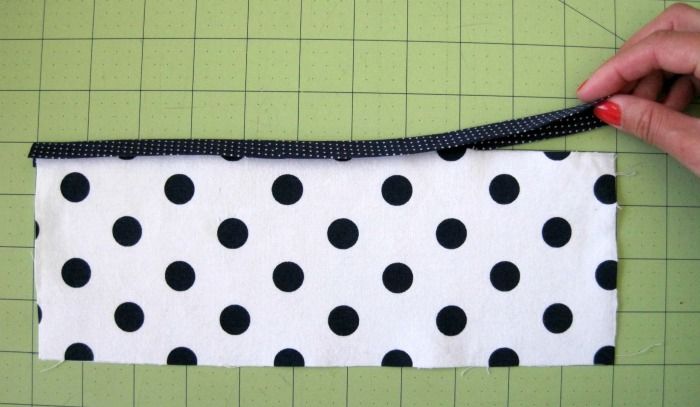
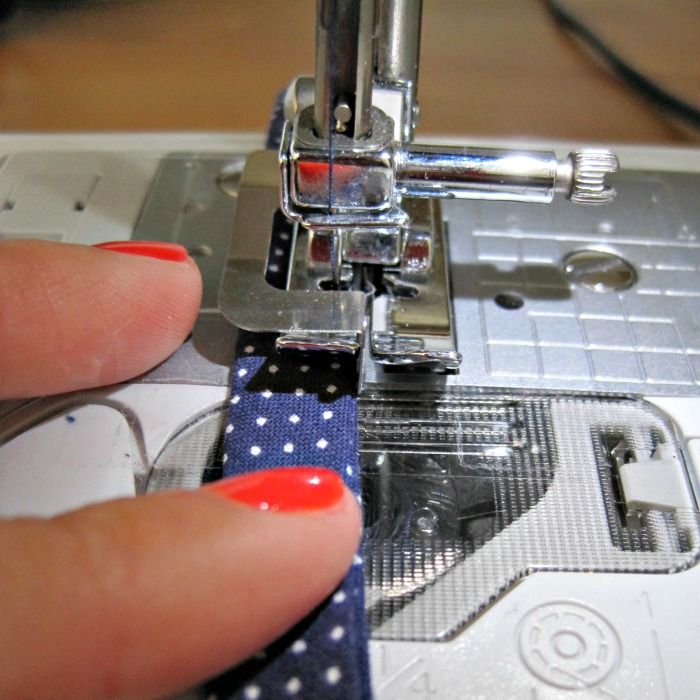
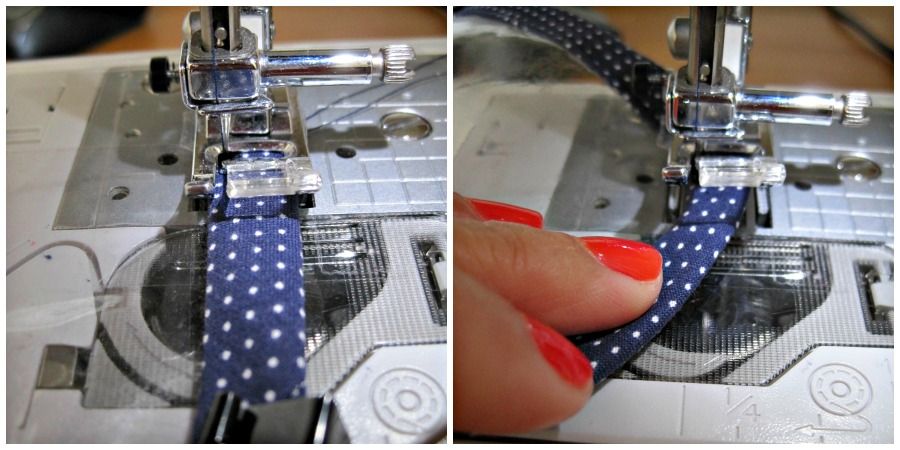
Put an 11" strip of double folded bias tape over the top edge of the brush pocket.
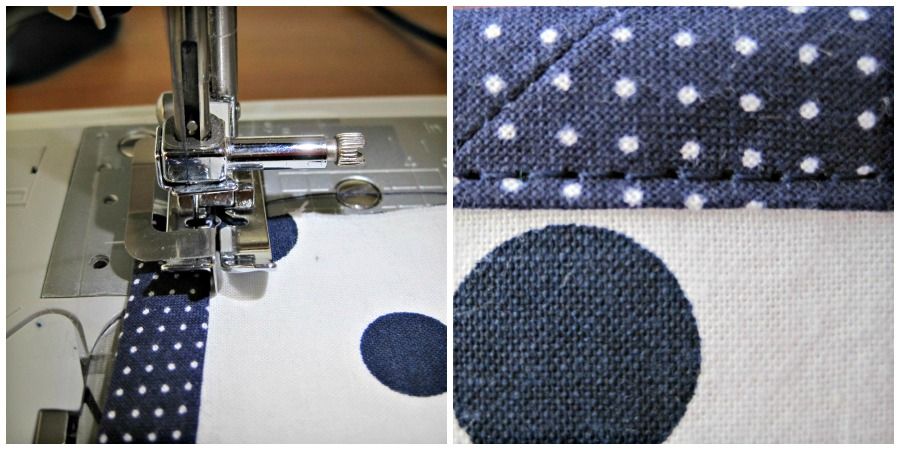
Sew in place close to the edge of the bias tape.
Tip: For sewing on bias tape, use a blind hem or edge stitching presser foot. The guide on the foot allows you to stitch perfectly straight stitches close to the edge.
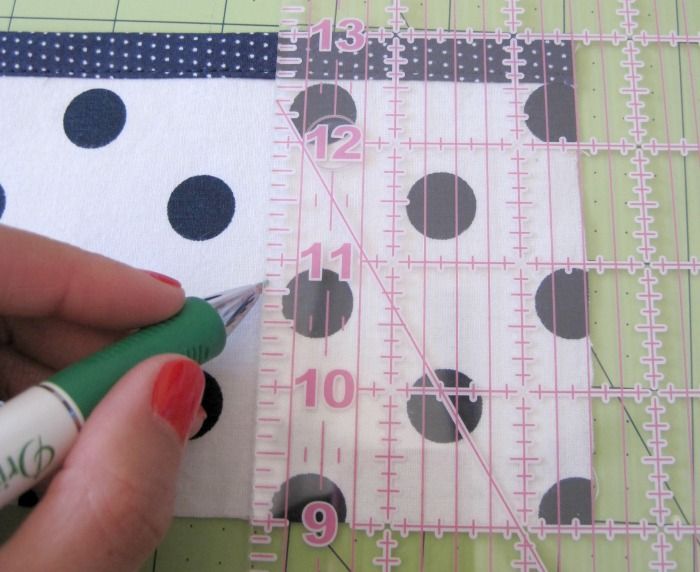
Using a clear ruler and disappearing fabric chalk or marker, draw out the pockets for the brushes.
My brush pocket hold 3 big brushes and 4 small brushes. You can adjust yours to fit your needs.

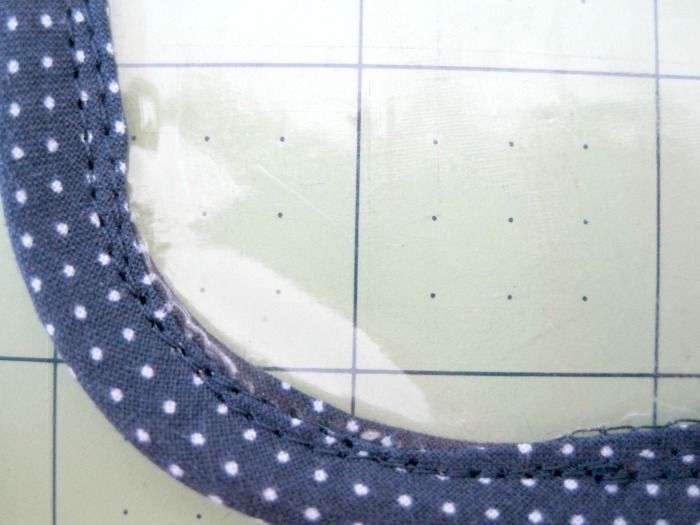
Align the bottom and sides of your brush pocket with the bottom of your interior piece. Pin or clip and baste into place close to the edge, along the bottom and sides.

Using your lines as a guide, sew up the brush pockets.
When you reach the top of the pocket, stitch back and forth a couple times to secure the pocket.
Sewing the brush flap
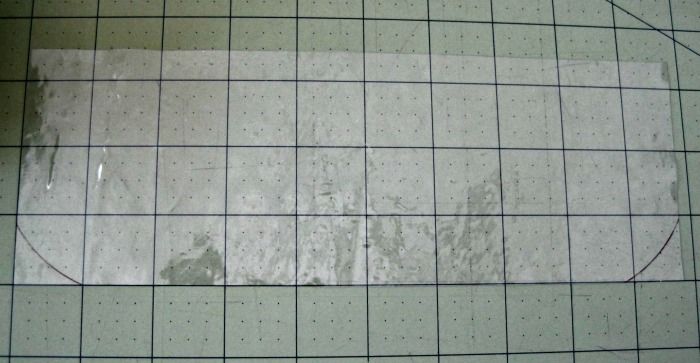
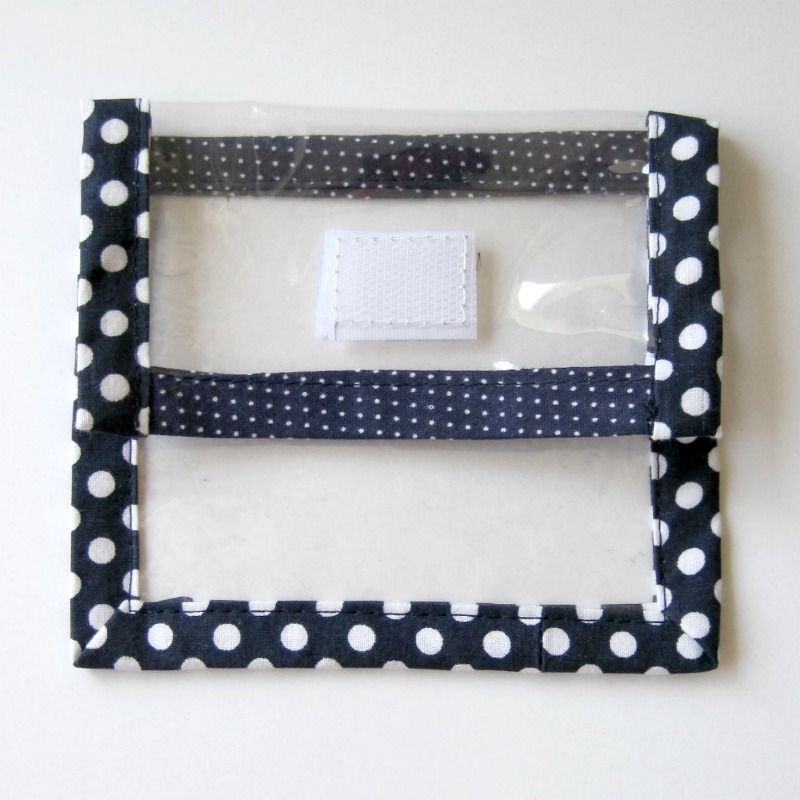
Take your 10" x 3 1/2" piece of clear vinyl and gently round the bottom corners. Use a can (or glass, plate, CD, etc.) to trace, then cut.
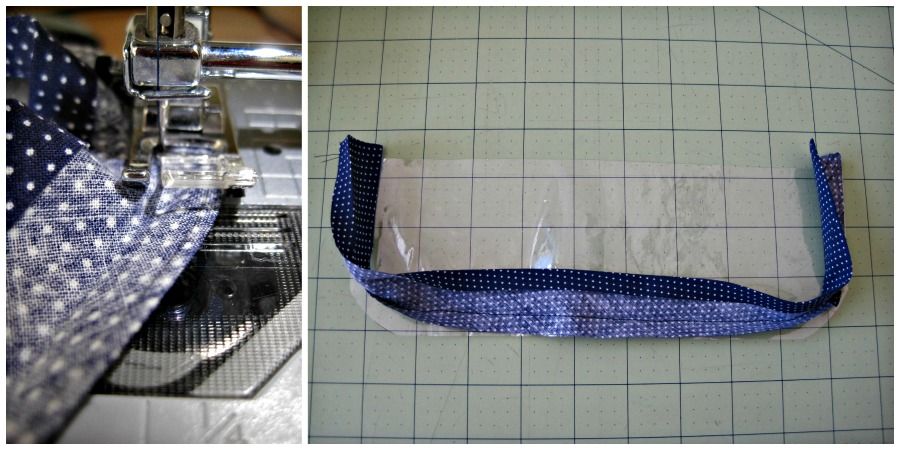
Open up a strip of bias tape and align the raw edge to the edge of the clear vinyl. I do no recommend using pins on the clear vinyl, so use clips if you have them.
I do recommend using clear tape over the metal to the left of the feed dogs to prevent sticking, like in my toiletry bag tutorial.
Sew in place on the fold crease of the bias tape, about 1/4" away from the edge. Take your time and go slow around the corners. Since we are sewing vinyl, use a longer stitch length (3mm-3.5mm).
Fold your bias tape to the wrong side, and clip in place (use fabric clips, hair clips, binder clips, paper clips...whatever you have on hand)
Turn your to vinyl to the right side to get ready to sew.
Sew in place on the right side using a longer stitch length (3-3.5mm).
When you get to a corner, go slow! Because the vinyl still sticks a bit (even with the tape), stitch 1 or 2 stitches, then with the needle down, lift the presser foot and manually move the vinyl slightly. Lower the presser foot, stitch 1-2 stitches, stop and repeat moving your vinyl again. Do this around both corners.
Oops.
Now, if your stitching went anything like mine, you might have not caught the bias tape on 1 or both of your corners on the back side. If it did, congratulations and move on to the next step! If it didn't, don't fret! Do not unpick your stitches. It will leave holes in your vinyl. Simply turn your vinyl to the wrong side, clip your corners again, and re-sew any part of the bias tape that didn't get sewn. Go slow, you don't want to have to put another line of stitches in.
Now it might not be the prettiest corners, but it's hardly noticeable on the finished project.
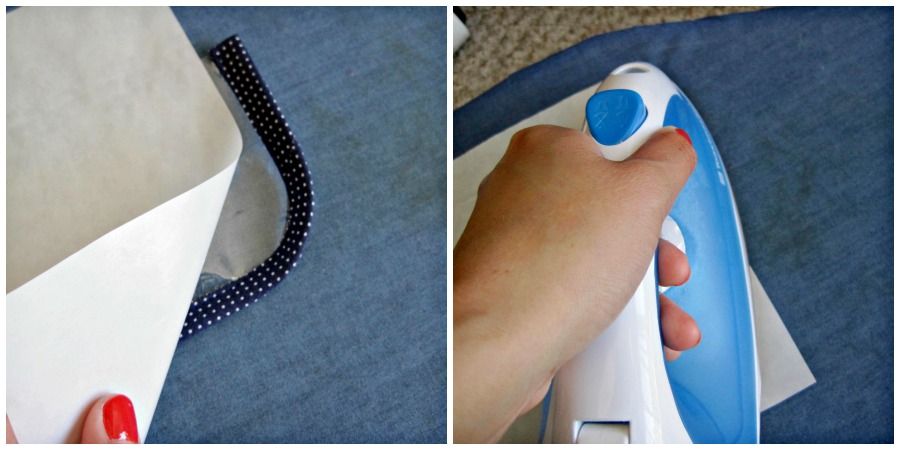
Time to press your corners flat. Use a low iron setting and a piece of paper, quickly press the corners of the vinyl (don't leave the iron on the vinyl for more than 1 or 2 seconds).
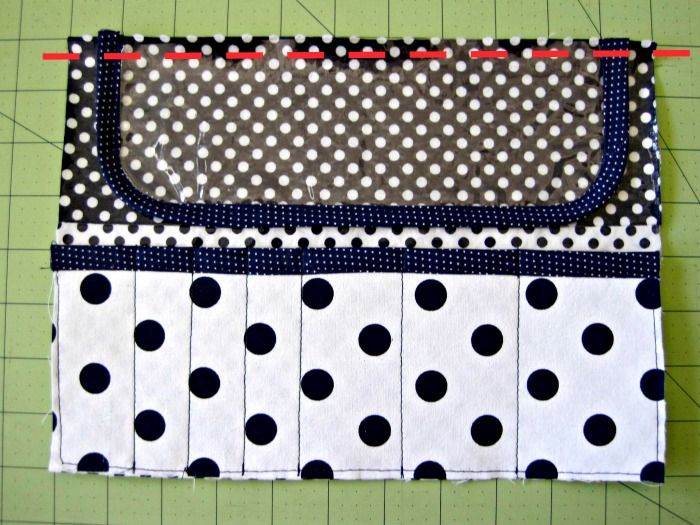
Take your clear vinyl piece and center it on the top edge of the interior piece. (There should be about 1/2" space on each side).
Clip and baste into place close to the edge.
Find your exterior piece and place it wrong side up. Place your interior piece right side up on top.
Clip or pin and baste close to the edge.
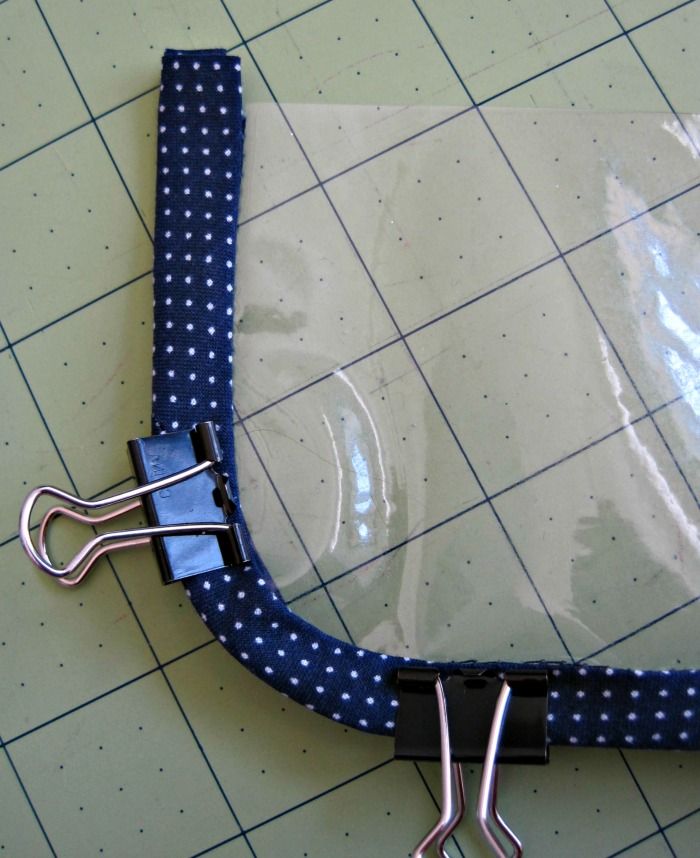
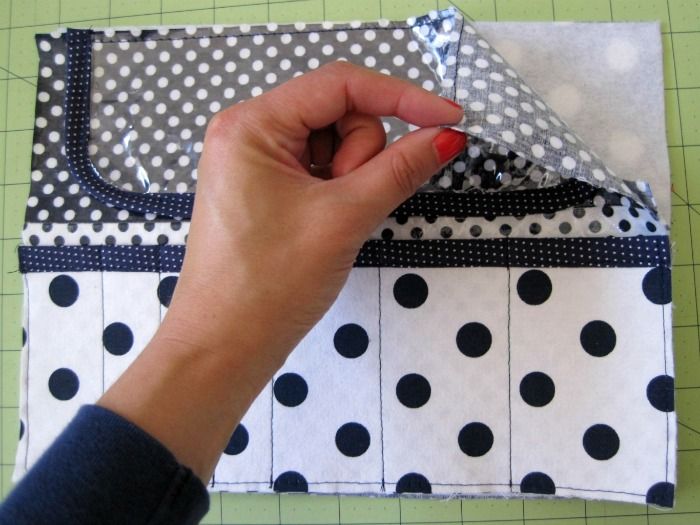
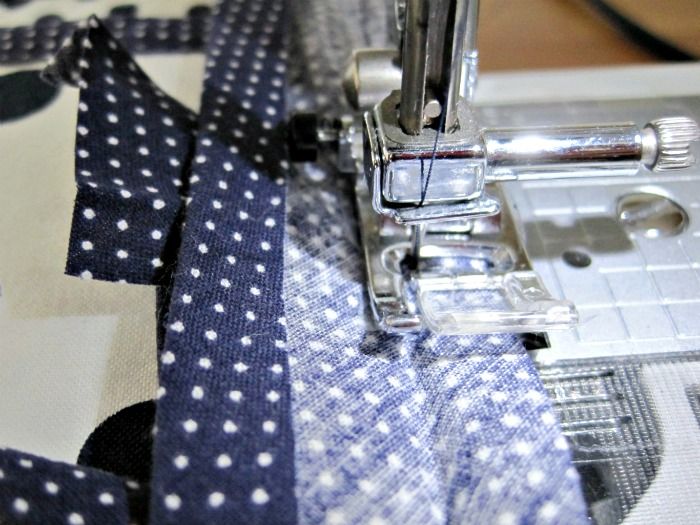
Finishing the edges with bias tape
Unfold your bias tape. Fold down the edge at a right angle as shown.
Align the edge of you bias tape with the edge of your makeup brush roll, about 2" down from the top of the brush pocket.
Starting sewing along the fold crease, about 1/4" from the edge. Remember to back stitch to lock your stitches in the beginning.
STOP sewing a 1/4" away from the corner. Back stitch and cut your threads.
Note: I held my bias tape in place while sewing. If you'd prefer, you can use pins, but only pin one side at a time because we will be stopping at the corners.
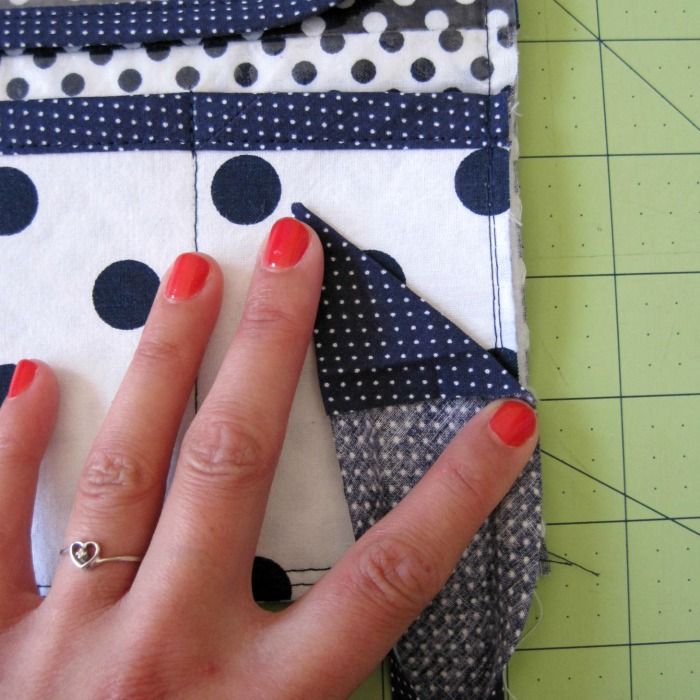
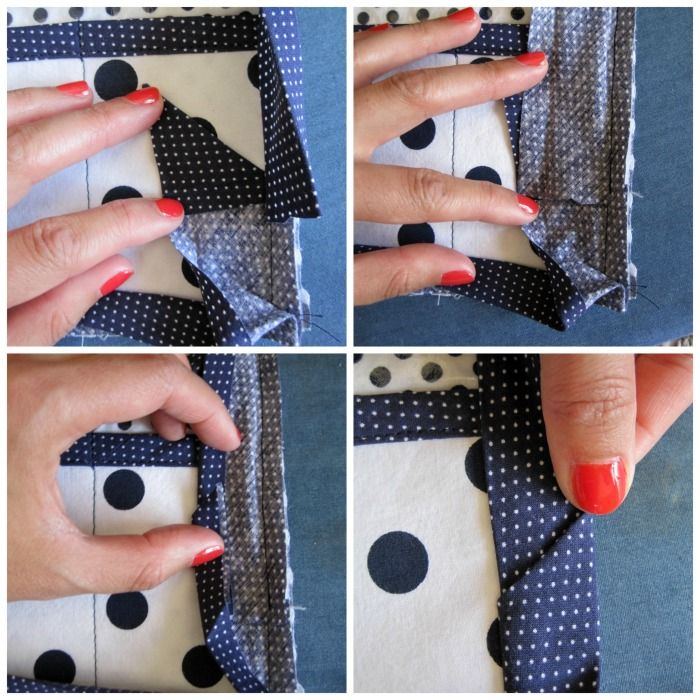
Mitering your corners
Turn your project so that the side you just sewed is along the top. At the corner, fold the bias tape up at a right angle. Finger press.
Now fold the bias tape down, using the edge of the make-up brush roll as a fold line guide. Finger press.
Start sewing again a 1/4" away from the corner (remember to back stitch), along the fold line. Stop 1/4" away from the next corner. Back stitch and cut your threads.
Repeat the folding at the corner, and start sewing again a 1/4" away from the corner.
Repeat for the last two corners.
When you get to the end, overlap your starting stitches by 1/4". Back stitch and cut your threads. Cut off any extra bias tape.
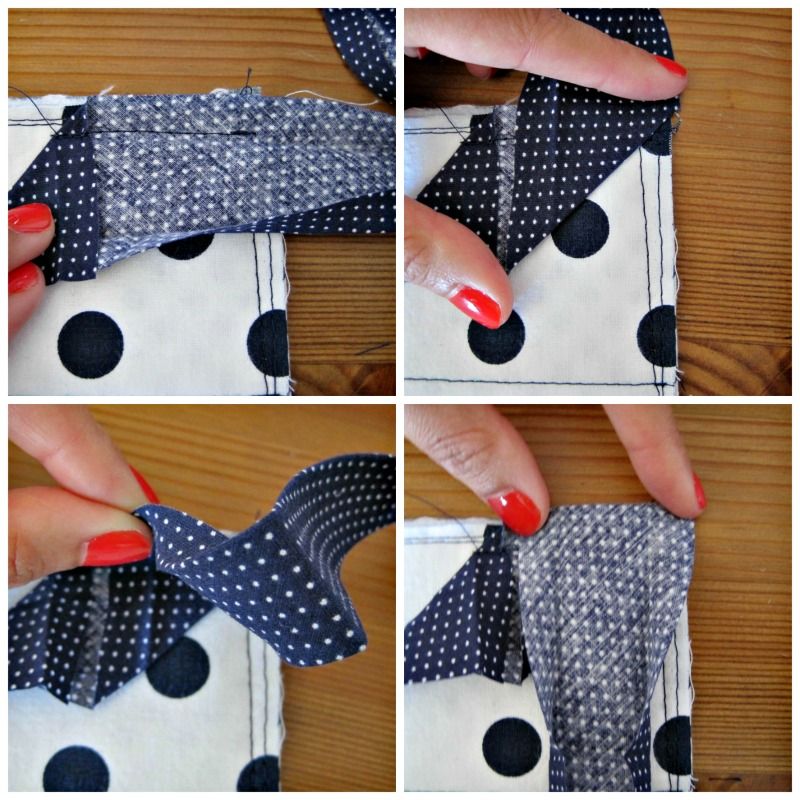
Re-fold the bias tape over to the other side of the brush roll.
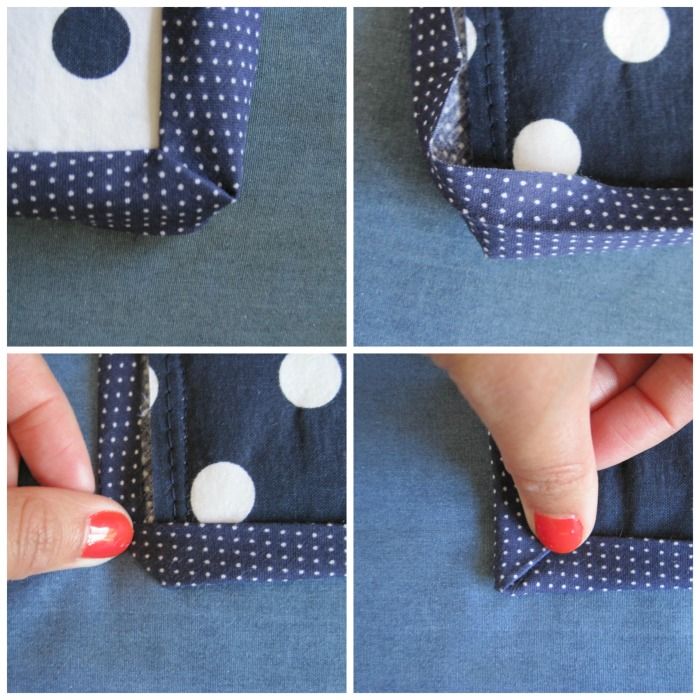
It should lay neatly on the sewn side of the corners
Turn over. Fold one side of the corner flat as shown. Then re-fold the other side. Pin or clip in place.
Now I will digress for a couple pictures...
You can either pin well:
Then have flashbacks remembering no matter how well you've pinned in the past, it still doesn't turn out too well:
So then you hand baste:
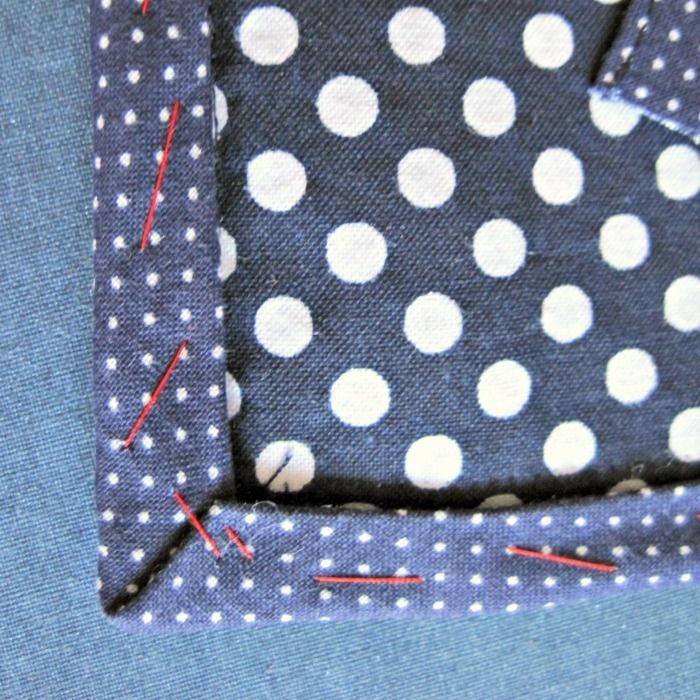
Hand basting is a tedious step, but I think it's the best way to ensure your bias tape turns out neat on the other side. Machine basting still seems to pull my bias tape and doesn't secure the corners well.
I hand baste using a long (and a bit messy, but it gets taken out later anyway) running stitch, and use a couple extra stitches to keep the corners in place. I didn't sew through all the layers because of the vinyl on the other side. I just basted the bias tape to the exterior fabric. Using a contrasting thread makes it easier to take out the stitches later.
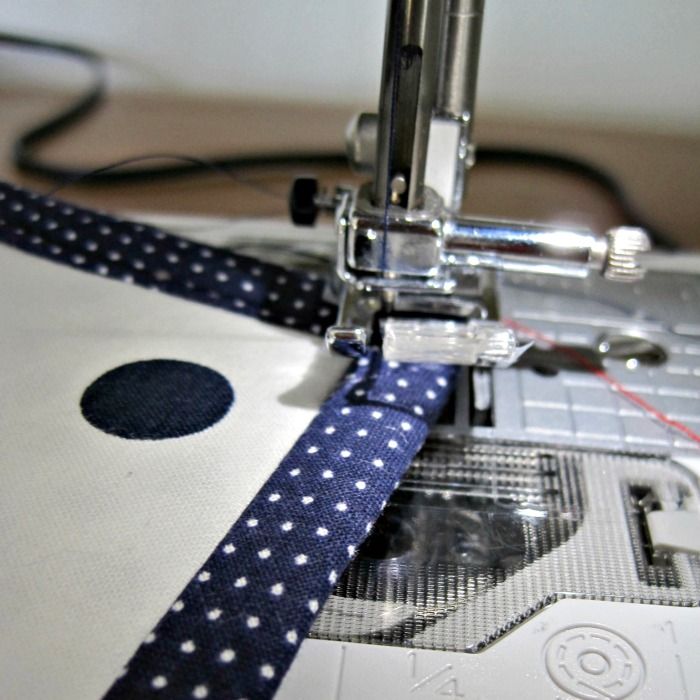
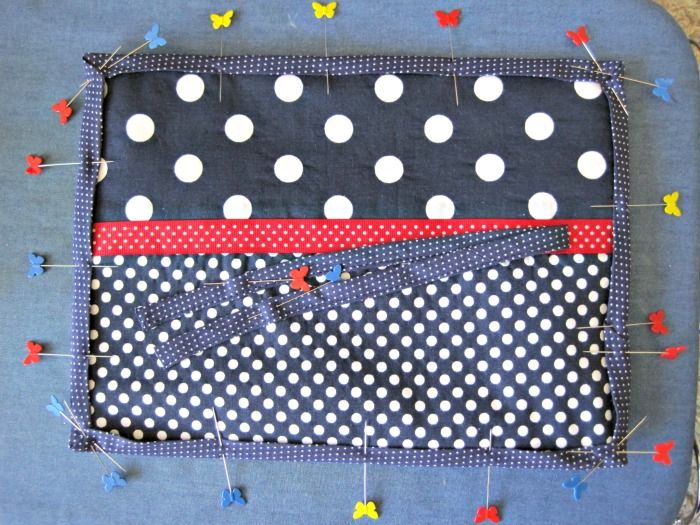
Sew in place on the interior side, close to the edge.
At the corners, with needle down, lift the presser foot and rotate fabric. Lower that presser foot and resume stitching.
Unpick all your basting stitches.
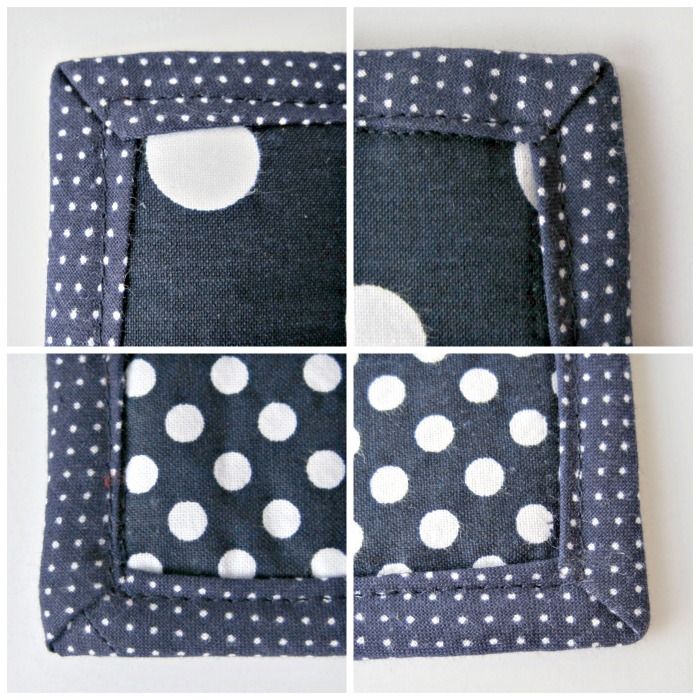
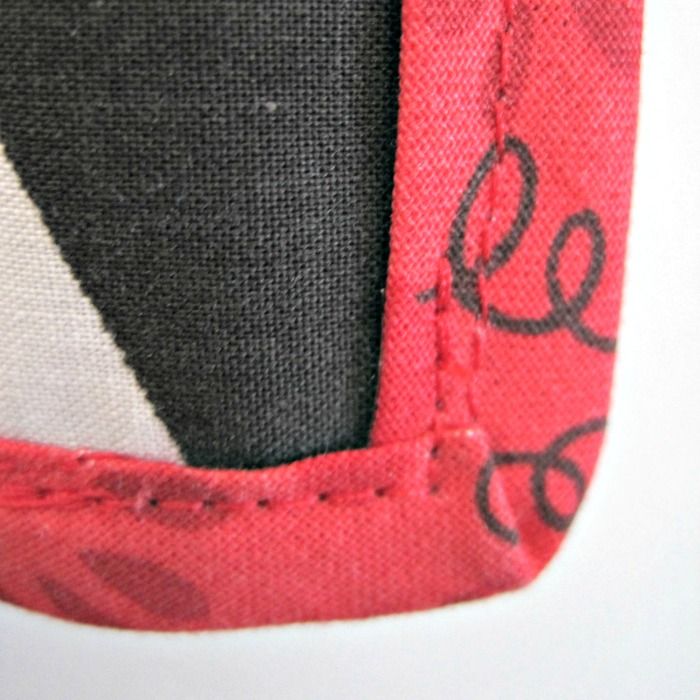
See how neat the corners look on the other side. Well, 3 of them are near perfect. One's a little wonky. But it's just a brush roll, so I can deal with it.
And you're done!
Now fill it up with your makeup brushes....
...and enjoy this sneak peak at the next tutorial.
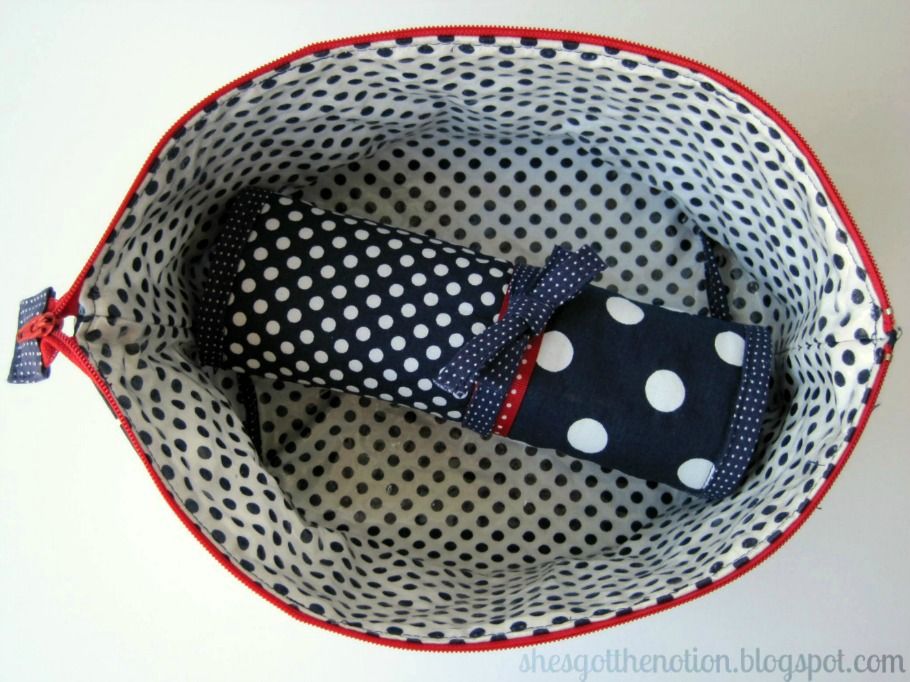
Yes, we still have enough fabric in the fat quarter bundle to make another bag :).
If you make a brush roll using this tutorial, I'd love to see it! Post a link in the comments, or post it to my facebook or twitter.

Other posts in the Fat Quarter Series:
Super cute. Great tutorial
ReplyDeleteYour tutorial is exceptionally well done. Use of contrasting materials and thread for the purpose of demonstration is excellent. Photography and written instructions are great. I love your designs. I can't wait to get the time to put your tutorials to work.
ReplyDeletePerfect tutorial! Just finished mine and I love it! Thank you so much!
ReplyDeleteYou're welcome DeeDee! I'm sure it turned out beautiful :)
Delete(I'd send you a picture but it is not possible :P )
ReplyDelete