
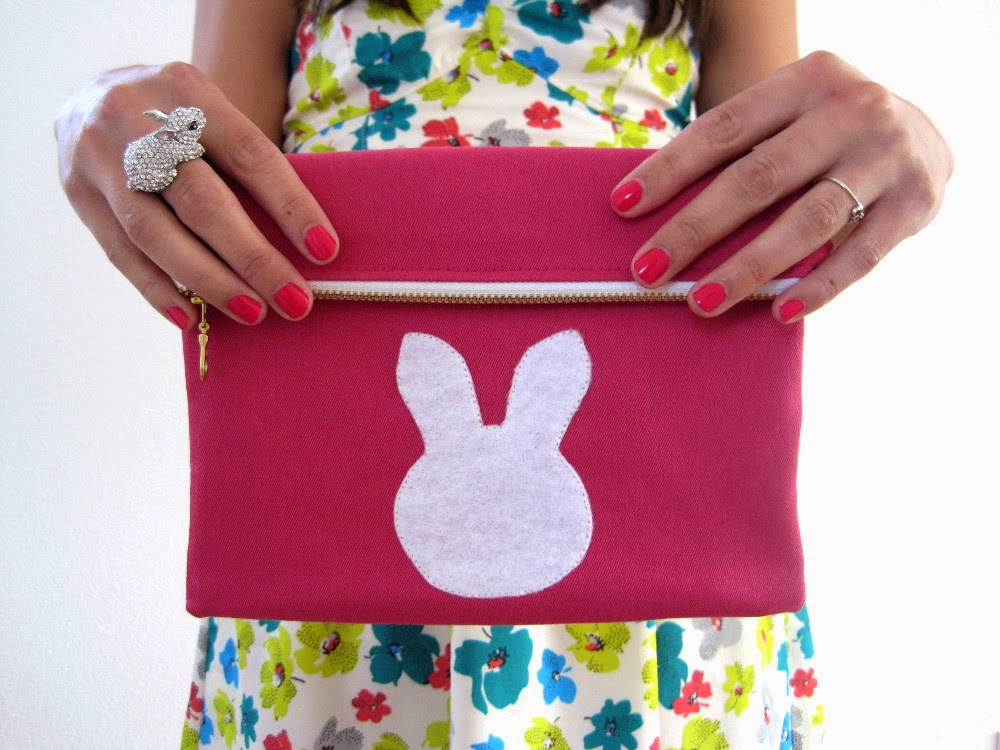
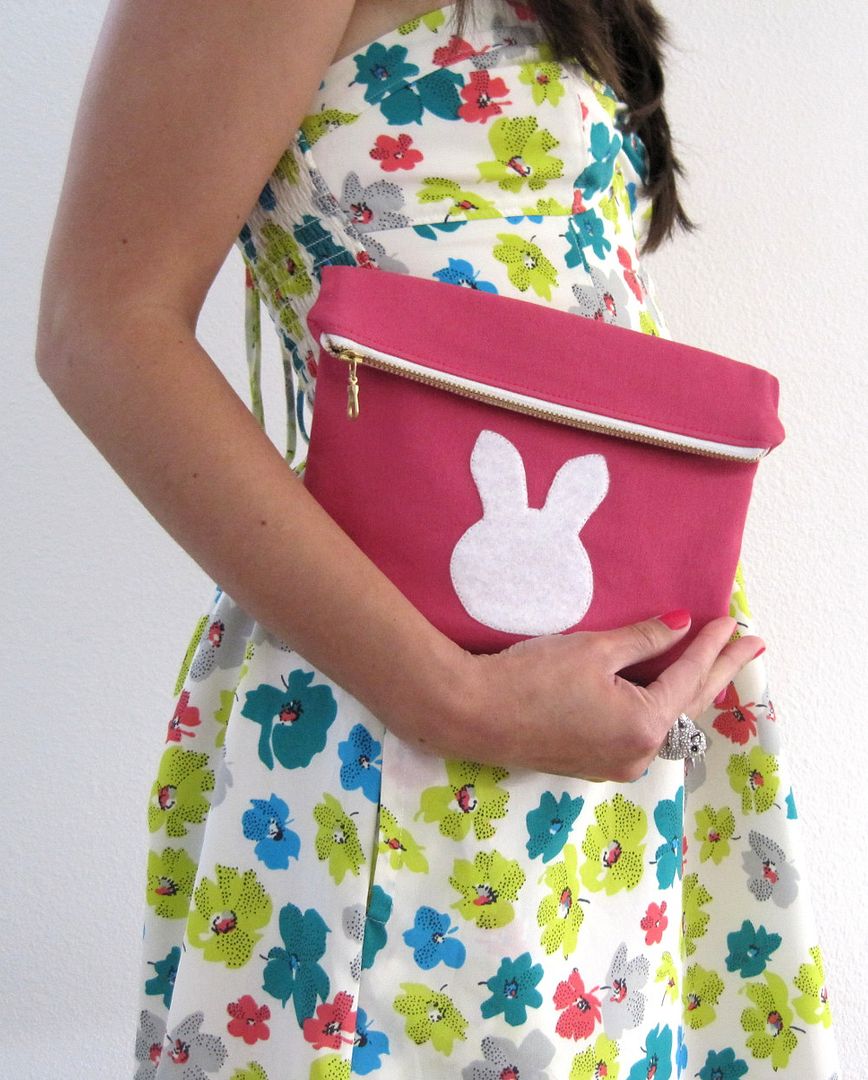
I have a sewing tutorial that's perfect for Easter. This foldover bunny clutch makes a cute little purse that will easily fit your essentials. I also think it'd make an adorable alternative to an Easter basket for girls. Just stuff it full of little goodies! This bag would be a good makeup bag or storage pouch for anything small too.
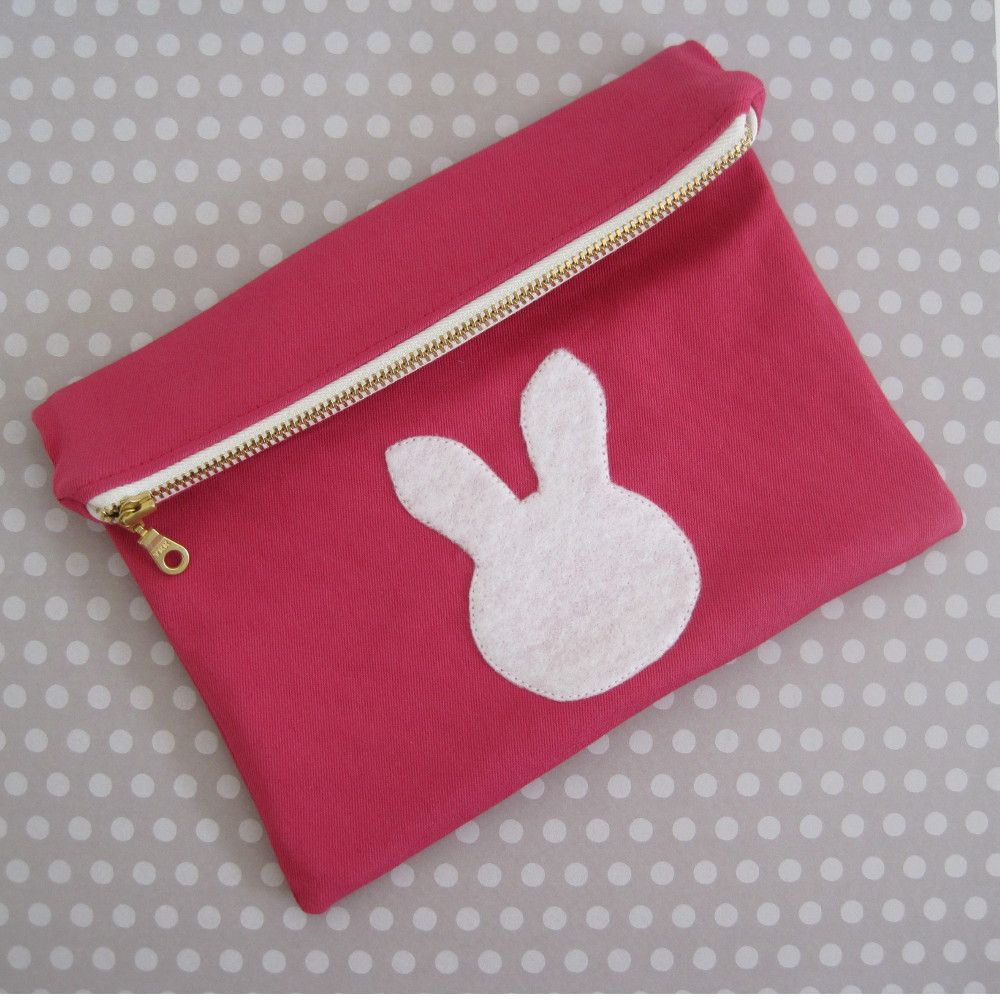
True to my word about not buying new craft supplies this month, this bag was sewn with my stash fabric. You may even recognize the pink twill fabric from my colorblock pillow tutorial.

This past week there's been a construction crew out on my balcony of my apartment, so my blinds have been shut tight for privacy reasons. Unfortunately, that meant that many of my photos are very lacking because of lighting issues. To add to it, I made several novice mistakes while sewing this clutch. Do you ever have an off day like that? I unpicked more seams than I care to admit, and a lot of my pictures show the wrong way of doing it. Doh. This means that this is more of written tutorial instead of a pictorial. However, if you've sewn a lined pouch before you should have no trouble following along. Feel free to comment with any questions or any parts that need clearing up. In the future I will try to give you a proper lined pouch tutorial!
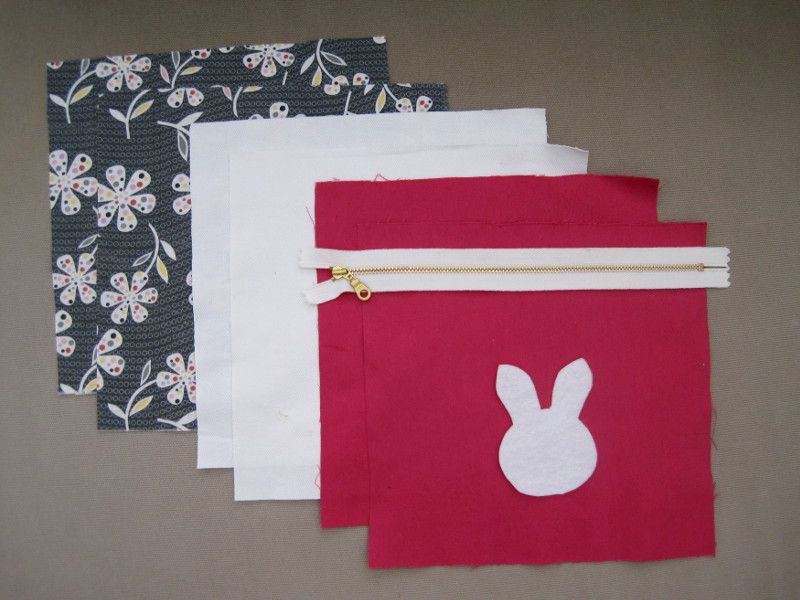
MATERIALS NEEDED
*A quick note: I quite dislike using fusible interfacing for bags because it usually alters my fabric in undesirable ways. I prefer to use sew-in interfacing or use an underlining. For this project I used denim fabric as an underlining. But this is my personal preference, so if you love fusible interfacing, then by all means go ahead and use it!
CUT YOUR FABRIC
Determine how big you want your clutch. Add in the seam allowances and add 2" to the height for the fold over.
I cut my pieces to be about 9" x 9". You will need 2 exterior fabric pieces, 2 lining fabric pieces, and 2 interfacing fabric pieces.
SEW THE ZIPPER
Layer your fabric and zipper as follows:
Pin, or since this is many layers, you can baste some of the layers together first so they stay in place while sewing.
Sew with a 1/4" seam allowance.
Press back fabric away from zipper teeth. Topstitch.
Repeat the fabric layering step for the other side of the zipper. Sew, press, and topstitch.
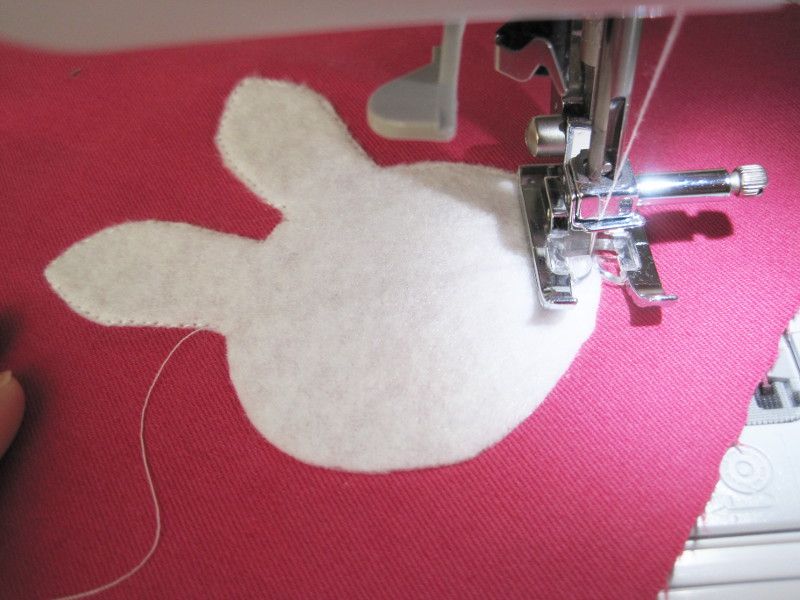
MAKE THE APPLIQUE
Draw a bunny shape onto a piece of paper. I first made a box the dimensions I wanted my bunny to be, then drew the bunny into the box. You can do a web search for bunny clipart if you need help or inspiration. Cut out the bunny template.
If using fusible web, apply the sticky side to the back of your piece of felt. Cut the bunny shape out of the felt. Position it onto the front of the clutch (fold down the top 2" first, and then center it). Fuse into place following manufacturer's directions. Edgestitch into place if desired.
If you're not using fusible web, cut your bunny shape out of the felt. Position it onto the front of the clutch (fold down the top 2" first, and then center it). Pin into place. I recommended basting into place by hand or machine. Edgestitch applique into place. Since felt doesn't fray, you can use a straight stitch for this. Shorten your stitch length to make it easier to sew around the curves.
SEW THE CLUTCH
Unzip the zipper halfway. Pin your exterior fabric (with your interfacing/interlining) right sides together. Make sure the zipper teeth are pointing towards the lining (this will prevent the zipper from being pinched when you turn it right side out). Pin the lining fabric right sides together.
Sew along all the edges, leaving a 3-4" space in the lining for turning.
Clip corners and trim off any excess zipper tape. Turn right side out. Use a point turner or chopstick, etc. to poke out the corners. Sew the opening in the lining closed by hand or machine.
Fold over the top edge 2" and press into place. Give your clutch and final press, and you're done!
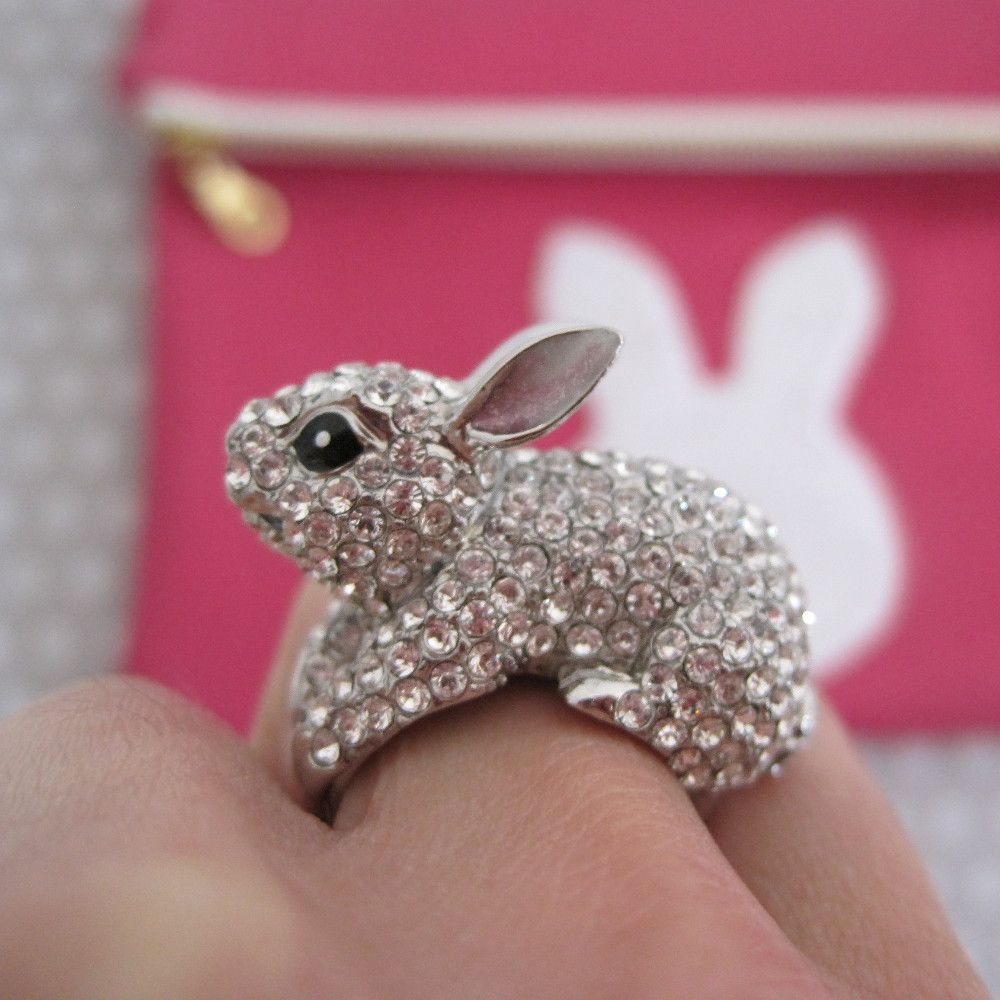
It goes perfectly with my bunny ring that I got off of eBay a couple years ago.
Now you have a cute bag that's perfect for Easter, springtime, or anytime. If you make your own bunny clutch, I'd love to see it! Tag me on social media (links in the sidebar).
Happy Sewing!

Very nice tutorial. i like it, Thanks for sharing.
ReplyDeletenon woven bags machine